In art class it is perfectly normal for students to work at different paces. Some students finish up earlier than others and some students take more time. Please allow for some flexibility on dates, as I am flexible with my students and try to meet their individual needs. Generally speaking, students have a 2-3 day rolling deadline to finish up projects. Sometimes after introducing a new project I will still have students finishing up the previous one. This is normal.
Lessons are subject to change if I feel a change is in the best interest of the class.
Click here for State of Michigan Standards and Benchmarks for Art Education
Lessons are subject to change if I feel a change is in the best interest of the class.
Click here for State of Michigan Standards and Benchmarks for Art Education
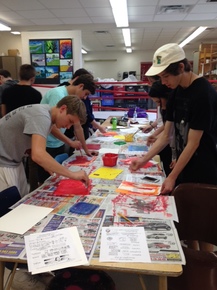
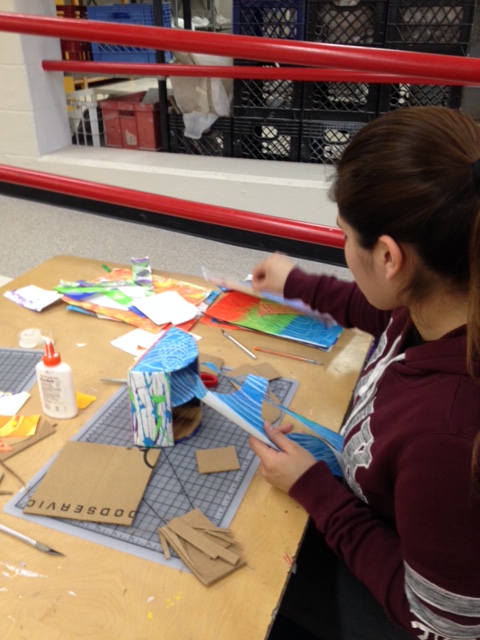
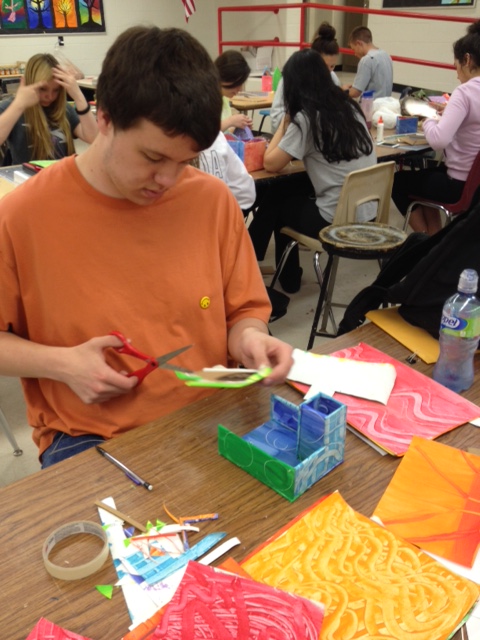
Week 15, 16, & 17 - Paste Paper Boxes
|
May 4 - 8
May 11 - 15 May 18 - 22 (Seniors last week) Standards: Standard 1: 1-4 Standard 2: 1,2,4,6 Standard 3: 1,4,5 Learning Goal: Students will be able to create a box that illustrates the Principles of Design and Elements of Art. Students will use their problem solving skills to make a creative box that draws upon prior knowledge of construction. Brainstorming: Physical example of the project is available for students to view Power Point of examples Handout explaining the Elements of Art and Principles of Design Teacher Demonstrations: On how to creatively make paste papers using Elements & Design Principles Demo on how to make template and use accurate measurements to make a solid box. Steps: - Students spend the first two days of the project making paste papers. - Stations are set up across the room for students to use tools to create papers that illustrate the EofA and the PofD. - Students must make 10 different paper designs and turn in their top 5 for a formative grade. - Once papers are made, students must make and label a template with their measurements. |

|
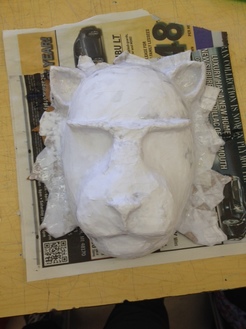
Week 10 - 14 - Cultural Masks & Paint Monsters
|
March 23 - 27
March 30 - April 2 April 13 - 17 Standards: Standard 1: 1,2 Standard 2: 1,2,3,4 Standard 3: 4 Standard 4: 1 Learning Goal: Students will learn about the mask making traditions of other cultures. Students will apply prior knowledge of paper mache to create a mask that reflects the traditions of a culture of choice. Brainstorming: Power Point of different masks from different cultures Students will use Chromebooks to look up masks Draw thumbnail sketch of mask idea Teacher Demonstrations: - How to use the mask form to paper mache - How to use cardboard, wire, poster board, paper pulp to get desired results. - How to apply paint with value to achieve a more professional look. How to adorn mask with store bought and homemade elements. |
|
Week 8, 9 & 10 - "Monster" Collaboration Project with Indian Hills 1st Graders
|
March 9-13
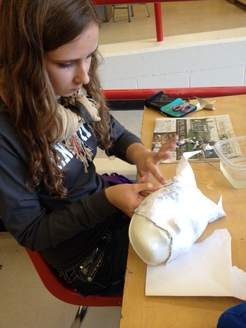
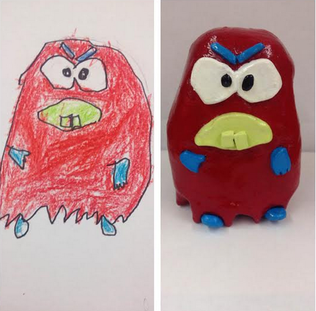
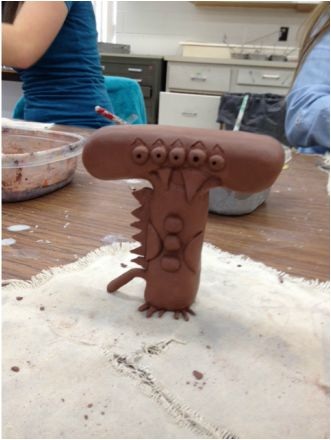
-AND- March 16-18 (MACUL Conference. Short week) Standards: Standard 1: 1,2,3,4 Standard 2: 1,2,4,5 Standard 3: 1,2,4 Standard 4: 3 Learning Goal: 1. Students in the 3D class will be introduced to the vocabulary, tools and basic sculpture techniques involved in clay. 2. Students will use problem solving skills to render a 2D drawing from a 1st grade student and turn it into a 3D sculpture. Teacher Demonstrations: Some of the students in this class have been exposed to clay methods before, but most have not. The students who have experience in clay are expected to be leaders in the class and help out other students with some of their questions while they also work on their own creatures. For the students who are totally unfamiliar with clay, I will demonstrate and teach the basics of: -Wedging -Scratch and Scoring clay - what slip is - what makes clay explode in kiln - How to store work in progress - Explain the drying and firing process Brainstorming: The drawings from the 1st grade students at Indian Hills is the primary inspiration for their work. Students are to replicate in detail the "blueprint" provided by the 1st grader. All idiosyncrasies should be included in the artwork, including the same colors. Students will have the choice of offering their sculpture to the 1st grade student. :) |
|
Currently we are skipping over this assignment but I am leaving it up in case of possible return.
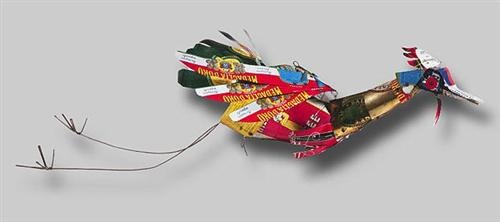
Create a sculpture of a bird of choice using found objects, wire and pop cans.
|
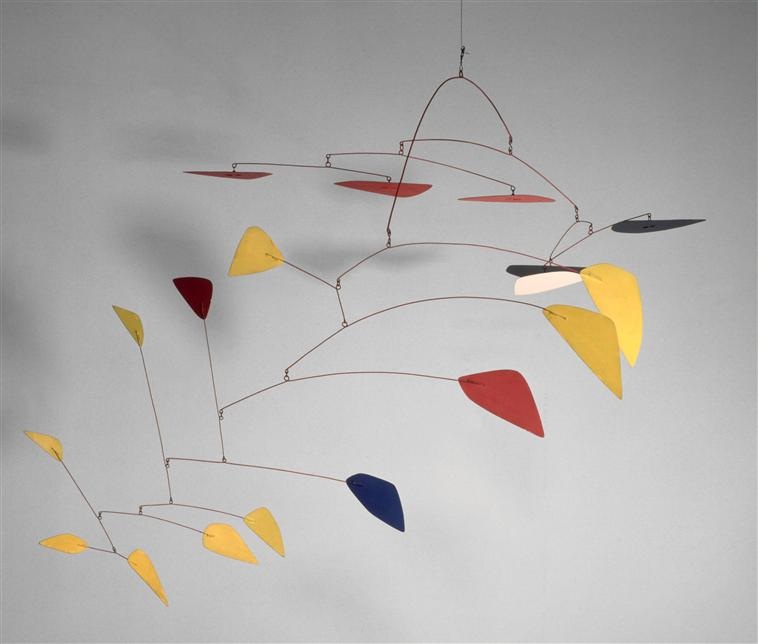
Create a BALANCED mobile/staybile using wire and found objects.
|
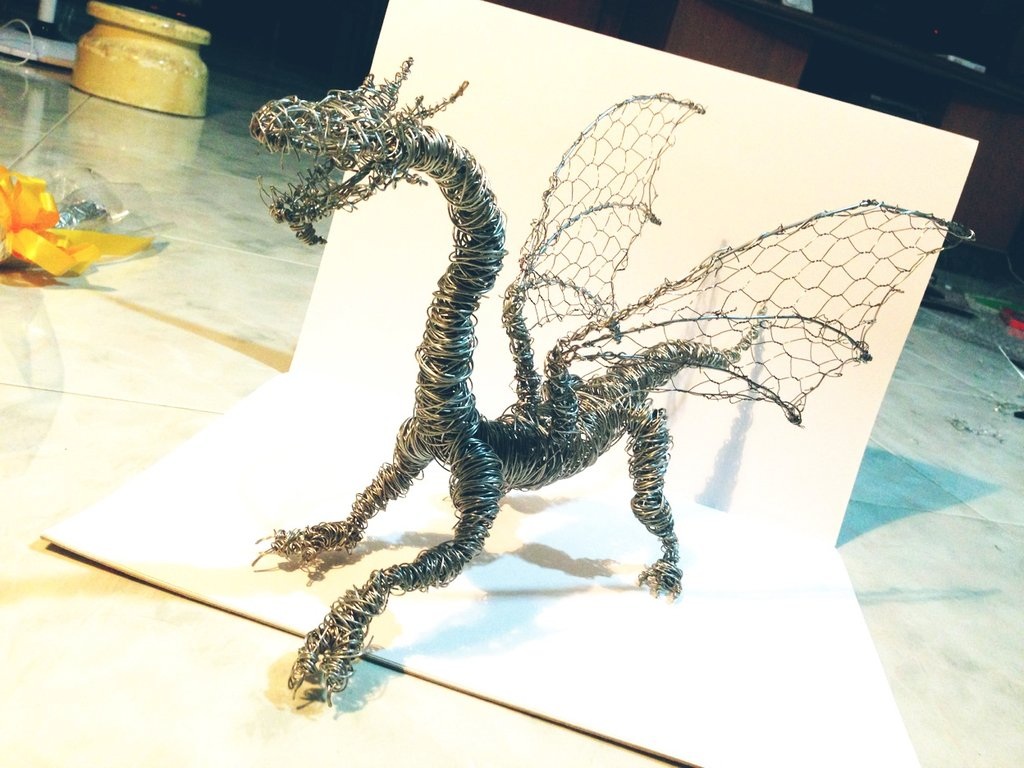
Create a sculpture using wire. This is a 3D sculpture and not flat like the silhouette we already made.
|
Week 5 & 6 - Wire Silhouettes
February 17 - 20 (Mid Winter Break Monday & Snow Days Thurs/Fri)
-AND- February 23 - 27 (Snow Day Monday) -AND- March 2-6 (ACT Testing Tues/Wed NO CLASS) Standards: Standard 1: 1,2,3,4 Standard 2: 1,2,3,4,5,6 Standard 4: 2 Standard 5: 4 Learning Goal: Students will learn about the contemporary artist Gavin Worth Students will learn the basics of wire construction Students will create their own wire silhouette Brainstorming: Power Point of examples Use Chromebooks for images Teacher Demonstrations Demo on how to form basic silhouette from a photocopied image Demo on how to join wires together Demo on how to add to base. |
LESSON POWER POINT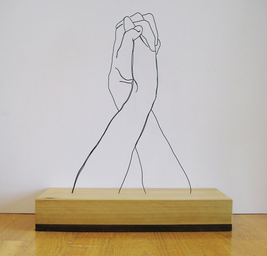
Artwork by Gavin Worth. Click on image to go to his website.
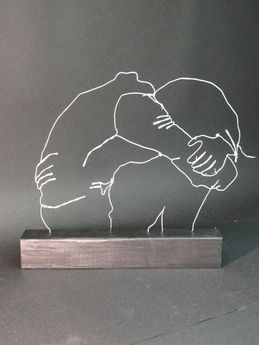
Image from "Thisartadventure.com" Click on image to go to site.
|
Week 4 - Cut Paper Silhouette
|
February 9-12 (Mid Winter Break Friday)
Standards: Standard 1: 1,2, Standard 2: 1,2,4,5 Standard 3: 1,5 Standard 5: 4 Learning Goal: Students will draw upon their prior knowledge of Folk Art to learn about the Chinese Folk Art of Paper Cutting. Students will use design skills to create a detailed paper cutting of their own. Demonstrations: How to use watercolor to enhance the background with a wash and salt. Using Tissue paper to add texture to the background with a watercolor wash. Collage-ing the background Using colored tissue paper to add color to separate shapes. Students are continuing to cut out their designs and choosing a background for their image. All of the students are at different stages in the project. |

|
Week 2 & 3 - Cut Paper Collage and SilhouetteJanuary 26 - 30
-AND- February 2-6 Standards: Standard 1: 1,2, Standard 2: 1,2,4,5 Standard 3: 1,5 Standard 5: 4 Learning Goal: Students will draw upon their prior knowledge of Folk Art to learn about the Chinese Folk Art of Paper Cutting. Students will use design skills to create a detailed paper cutting of their own. Brainstorming: YouTube videos Chromebook to look up images and develop ideas Examples of the project Choices: Students can choose to do one of the following: 1. Create a less intricate cutting but create a more detailed background for it to lay upon. (ex: student may collage a background and lay the cut design on top. Or paint a creative background.) 2. Student may cut a more detailed design which will take more time to cut and develop, but then lay that design on top of a white sheet of paper that does not have to be decorated.) Teacher Demonstrations: How to draw out image so that it is appropriate for a cut paper design. (Leave border around paper and all lines must connect to the border.) How to transfer image drawn on white paper to the black paper How to cut out paper using the exacto blades |

Click Here for Examples from other students |
Week 1 - Paper Relief
Standards:
Standard 1: 1-4 Standard 2: 1,2,4,6 Standard 3: 1,4,5, Learning Goal: To learn what a relief is To design and create a relief of your own out of paper. To strengthen design skills Brainstorming: YouTube videos showing the process Previous student work The Internet Teacher Demonstrations: Demo showing how to mark paper for cutting and for folding Demo showing how to transfer design onto final paper. Click Here for Power Point |
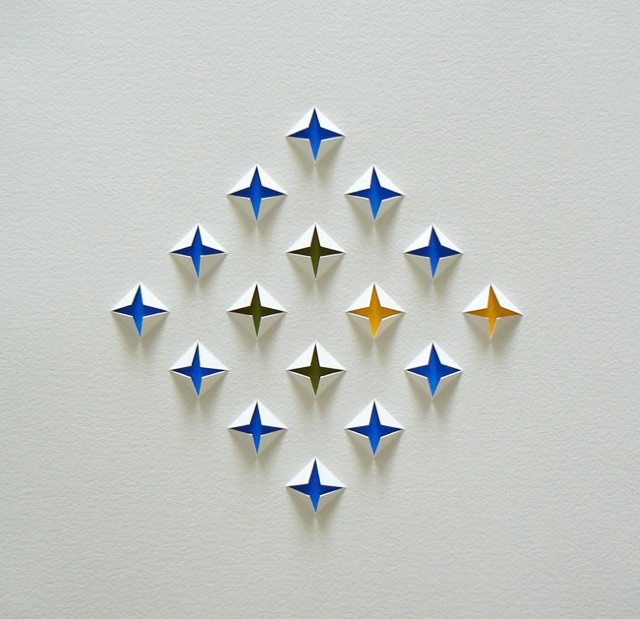
Artwork by: Lisa Roddon
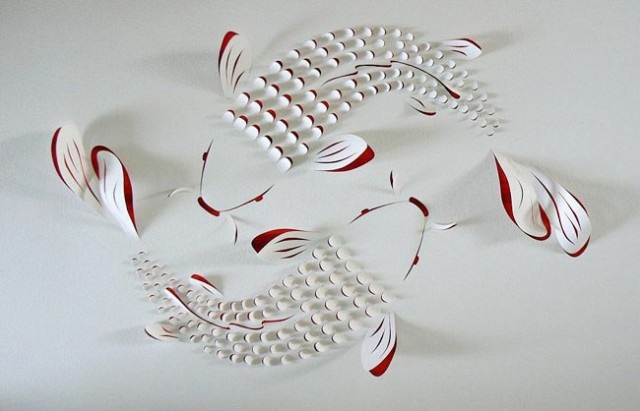
Artwork by: Lisa Roddon
|
SECOND SEMESTER
Please submit your Web Portfolios here
Week 17 & 18 - Final Exam Portfolios
Standards:
Standard 1: 4
Standard 2: 6
Standard 3: 1,2,3,4,5
Standard 4: 3
Learning Target:
Students will reflect on their own creative process and how it has evolved and compares to others by creating an online portfolio for a portion of their final exam grade.
Please click HERE for specific requirements on this project.
ADVANCED 3D CLICK HERE FOR ARTIST TRADING CARD DISCRIPTION
Week 16 - Holiday Project Fun!
Standards:
Standard 1: 1,2,3
Standard 2: 1,2,3,4,5
Standard 3: 4,5
THE ART ROOM IS GETTING MOVED THE NEXT FEW WEEKS AND WE NO LONGER WILL HAVE ACCESS TO OUR KILNS AFTER 12/12. STUDENTS WILL BE WORKING ON A WIDE VARIETY OF PROJECTS DURING THIS TIME. ALL STUDENTS WILL BE WRAPPING UP THEIR CLAY HOUSES AND MOVING ONTO SMALL AND/OR HOLIDAY THEMED ARTWORK
Learning Target:
1. Students will paint their slab houses using painting and color theory learned in class.
2. Students will explore various mediums and develop their creative thinking skills by creating 1 or 2 original projects of their choice.
Brainstorming:
Teacher Demos
Google/Pinterest
Exploration
Task:
Student will be introduced to the following options for projects:
1. HOLIDAY CARDS - Students create a small holiday card that will be judged with the other students work and up for a small gift card prize. Judging will be by the staff. Students just design their own original holiday themed card.
2. SNOW GLOBES - Students create a snow globe of choice. Use polymer clay to sculpt the inside of globe or use photographs and other props.
3. EGG ORNAMENT - Students will blow out the inside of an egg through small pin holes. Egg shell will be decorated and strung.
4. PAINTING W/ A TWIST - Students may create a painting in the style of "Painting with a Twist." Easy simple fun paintings.
5. STUDENT CHOICE - If students are not interest in the above options for work, they must propose their own ideas to the teacher for approval.
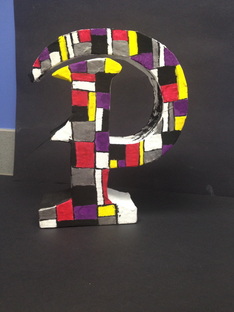
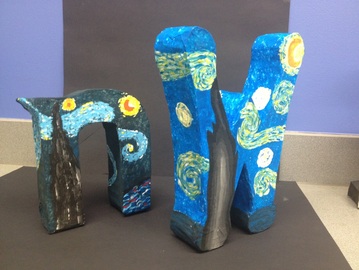
Week 11-15 - Famous Artist Block Letters
|
November 10 - December 5th
Standards: Standard 1: 1,2, Standard 2: 1,2,4,5 Standard 3: 1,5 Standard 5: 4 Learning Target: 1. Using design principles learned in class, students will design, form and paint a block letter of their choice. 2. Students will learn basic forming techniques involved in paper mache art that will be necessary for when we being more complex paper mache projects. 3. Students will learn art history by painting their letter using the style and images from a famous painting of their choice. Brainstorming: - Students will have visual examples of what the project outcome should resemble (both still images as well as a physical example of the project in progress.) - Students must draw three thumbnail sketches of letters they want to create to generate ideas for their final project. Teacher Demonstrations: Demo on how to transfer image to cardboard Demo on how to make the letter 3 Dimentional using hot glue and cardboard Demo on how to use the paper mache as well as paper pulp Demo on different ideas and techniques that can be used in painting |
|
Week 9 & 10 - Folk Art Paper Mache Cont...
|
October 27 - 31
- AND - November 10 - 14 Standards: Standard 1: 1,2, Standard 2: 1,2,4,5 Standard 3: 1,5 Standard 5: 4 Learning Target: 1. To understand and be able to explain what Folk Art is by the end of this unit. 2. To create a sculpture in the tradition of Folk Art 3. To learn the basics of creating small scale paper mache sculpture. Some students will be ready to paint early in the week, while others may not begin painting until near the end. There will be an emphasis on detail during the final phases of construction. Teacher Demonstrations: Demo on the applying the final layer of paper mache Demo on successful painting tips |
|
Week 7 & 8 - Folk Art Paper Mache
October 13 - 17
-AND- October 20 - 25 Standards: Standard 1: 1,2, Standard 2: 1,2,4,5 Standard 3: 1,5 Standard 5: 4 Learning Target: 1. To understand and be able to explain what Folk Art is by the end of this unit. 2. To create a sculpture in the tradition of Folk Art 3. To learn the basics of creating small scale paper mache sculpture. Brainstorming: Power Point on Folk Art and various examples Students search the Internet for inspiration Teacher Demonstrations: How to make an armature for various forms How to apply mache so that it is well crafted and not lumpy How to use paper pulp and foam clay for detail On Different ways to make clothing for sculpture Painting Demonstrations CLICK HERE FOR THE POWER POINT LESSON ON FOLK ART PAPER MACHE |
Metals Jewelry ReflectionEXIT TICKET FOR FOLK ART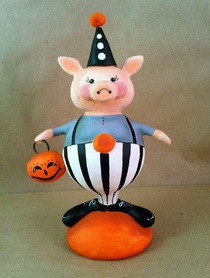
Image from Etsy: The Snippets. Carrie Murtha
Country Living Magazine. Lori Mitchell. Artist
|
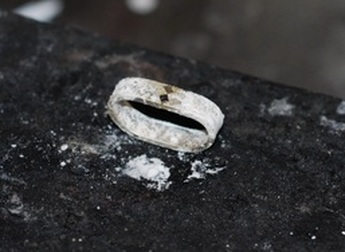
Week 6 - Ring Design
|
October 6-10
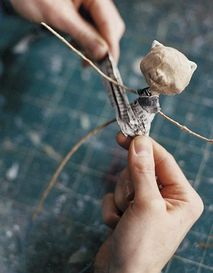
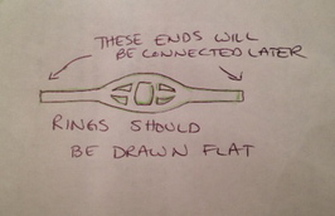
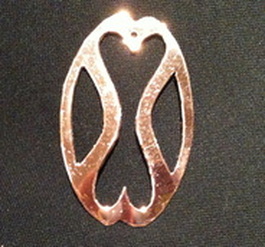
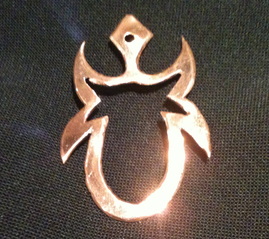
Standards: Standard 1: 1,2,3 Standard 2: 1,2,3,4 Standard 3: 1,4,5 Learning Target: Students will create a metal ring that showcases their design skills, their creativity and metalsmithing skill. Students will become comfortable with the soldering process and learn to basic to soldering skills. Brainstorming: Students will draw 6 different ring design possibilities. Ring must have a negative shape cut out of it. It may be a simpler ring but could include texture or be a shape other than straight across. Student should try to challenge themselves on the shape of the ring and not settle for a simple rectangular band. Example drawings will be provided. Teacher Demonstrations: Teacher will demonstrate the soldering process as applied to rings. Things to remember when soldering: ALWAYS REMEMBER SAFETY!!! Hair tied back Wear safety glasses No loose clothing Don't distract anyone working with the torches!!! No goofing around near the soldering station or you will be written up! Three Tips for Soldering
1 Measure your finger for ring size. 2. Double check ring size by cutting out strip of paper and trim to the widest part of your finger. 3. Trace the length of that paper on your graph paper and start designing your ring in that space. 4. Do not design your ring so that negative spaces are cut too close to the edge of your metal. This is asking for disaster. 5. Get creative and don't use easy images that first pop into your head. (Hearts, stars, peace signs, etc..) 6. Show the teacher ALL of your WELL DRAWN ideas. If it is sloppy - I won't look at it and you won't get metal to begin the project. 7. Glue on metal and saw out design. 8. File edges (sand/buff later) 9. Anneal the metal and then hammer the ring so that edges join together for soldering. 10. Solder metal 11. Sand metal using low to high |
|
Week 5 - Balanced Pendants & Intro to Rings
Sept 29 - Oct3
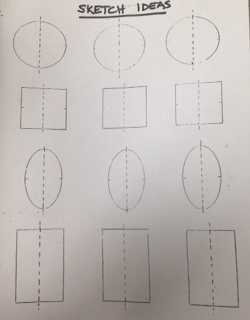
Standards: Standard 1: 1,2,3 Standard 2: 1,2,3,4 Standard 3: 1,4,5 Learning Target: 1. Students will use knowledge of Design Principles to design and create an original pendant using the principle of "Symmetry." 2. Students will learn the basics to piercing and cutting metal with a saw, cutting negative shapes, filing, sanding and buffing. 3. Students will learn the safety rules when using the buffing equipment. Brainstorming: * Students are given 12 shapes to fill with "half designs." These designs need should be creative and original and include at least 1 negative shape. Designs need to touch the outside edges of the shape. * Once 12 designs are finished, student chooses top 3 to finish and draw the other half of the design to create symmetry. Teacher Demonstrations: * How to pierce the metal to cut out negative shapes from the metal. * How to use the buffing machine effectively and safely. Steps: * After finishing final design, glue the design onto sheet metal with glue stick * Use drill press to get starting holes in negative shapes * Cut negative shapes first, as it is easier * Cut outside shape of metal * File edges of metal so that edges are smooth and rounded and EVEN. * Sand so that scratches are gone and metal is shiny * Sand the edges of metal so that saw marks are gone. * Use steel wool for further finishing * Using Buffing machine to add shine. |
|
Week 4 - Introduction to Metalsmithing
|
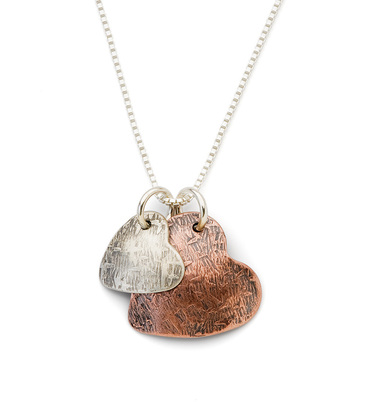
Sept 22-26
Standards: Standard 1: 1,2,3 Standard 2: 1,2,3,4 Standard 3: 1,4,5 Learning Target: 1. Students will learn the vocabulary, tools and skills involved in creating simple metal jewelry. 2. Students will create a simple heart pendant and apply texture using tools in class. Teacher Demonstrations: * What is and how to use a bench pin. * How to saw metal properly * How to insert a saw blade into saw properly * How to use the drill press * How to add texture and use Liver of Sulpher * How to use the dapper block * How to file properly * How to sand properly * How to buff properly |
Click the picture to link to her webpage.
|
|
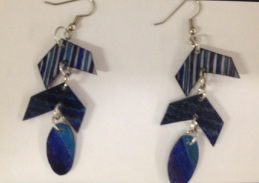
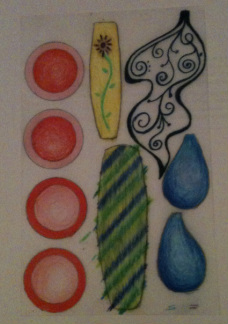
Week 2 & 3- Finish Principle of Design Collages & Create Shrinky Dink Jewelry
Sept 8 - 12 Standards: Standard 1: 1,2,3,4 Standard 2: 1,2,3,4,5,6 Standard 4: 2 Standard 5: 4 Learning Targets: 1. Students will finish up their Principles of Design collages, labeled with the principles used. 2. Students will create a pin, pendant, key chain, earrings or bracelet out of shrinky dinks using the design principle ALTERNATION. 3. Students will use up all the Shrinky Dink plastic to create jewelry of choice with any left over material. Brainstorming: * Power Point on various Shrinky Dink jewelry pieces as well as on the examples of jewelry that exhibits Alternation. * Examples of Shrinky Dink jewelry. * Use of Chromebook and iPhones to look up examples of Shrinky Dink jewelry on Etsy, Pinterest or Google. * Required sketches of drawing before beginning project. Teacher Demonstrations: * Demo on how to prepare the Shrinky Dink plastic if necessary. * Model how large to draw the image on the plastic to allow for shrinkage * Demo on how to cook the Shirnky Dink and press into the plastic after cooking to flatten or curve if desired. Steps: 1. Begin by brainstorming on the internet for possible ideas. 2. Look for patterns of interest. (You may trace patterns if desired.) 3. Sketch out the design for each piece/part of your jewelry. 4. Sketches are worth 25 points and must be good quality sketches. If you can't draw it well in a sketch I don't know if you can draw it well on final Shrinky Dink plastic. So it must be drawn well. 5. When sketches are approved, you may begin designing your jewelry on the plastic. 6. Sharpie markers, colored pencils or paint may be used to add color to the plastic. 7. Shapes must be 3x as big as the final shape desired, as the plastic shrinks. 8. Must have holes before shrinking to allow for thread, string or jump rings. 9. Attach all parts together with good craftsmanship. |
Click Below for the Shrinky Dink Hand Out
Click here for Power Point for Pop Art Shrinky Dinks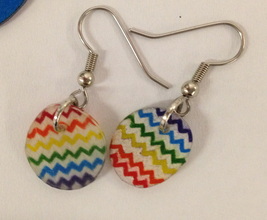
| ||
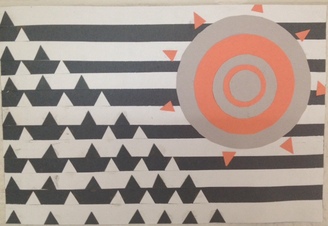
Week 1 - Design Principles
Sept. 3-5
Standards:
Standard 1: 1-4
Standard 2: 1,2,4,6
Standard 3: 1,4,5,
Learning Target:
Students will learn the fundamental design principles necessary for creating good artwork.
Students will create 3 small design collages based off of a different Principle of Design.
Click HERE for the requirements of the assignment.
