In art class it is perfectly normal for students to work at different paces. Some students finish up earlier than others and some students take more time. Please allow for some flexibility on dates, as I am flexible with my students and try to meet their individual needs. Generally speaking, students have a 2-3 day rolling deadline to finish up projects. Sometimes after introducing a new project I will still have students finishing up the previous one. This is normal.
Lessons are subject to change if I feel a change is in the best interest of the class.
Click here for State of Michigan Standards and Benchmarks for Art Education
Lessons are subject to change if I feel a change is in the best interest of the class.
Click here for State of Michigan Standards and Benchmarks for Art Education
SCROLL DOWN TO SEE THE CURRENT WEEKS LESSON
If absent or behind in class, click though the Daily Targets to see what you missed!
|
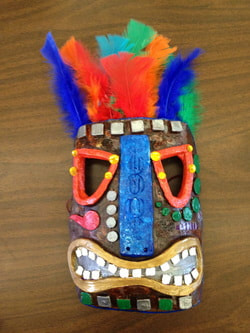
Week 15 & 16 - Masks & Figure Study
May 7-11 May 14-18 Standards: Standard 1: 1,2,3,4 Standard 2: 1,2,4,5 Standard 3: 1,4,5 Learning Goal: 1. Students will be able to create a mask that reflects the influence of a culture of choice. 2. Students will be able to sculpt a human form, either abstracted or realistic. Brainstorming: - Use of the Internet for ideas. - Power Point of examples - Past student examples Teacher Demonstrations: Each student will be creating their own individual artwork, so instruction will have to be personalized. -Demo on how to make abstracted and more detailed faces. Both projects must be completed, but student will choose only one of these projects to count as the final project for the exam portion of their grade. |

|
|
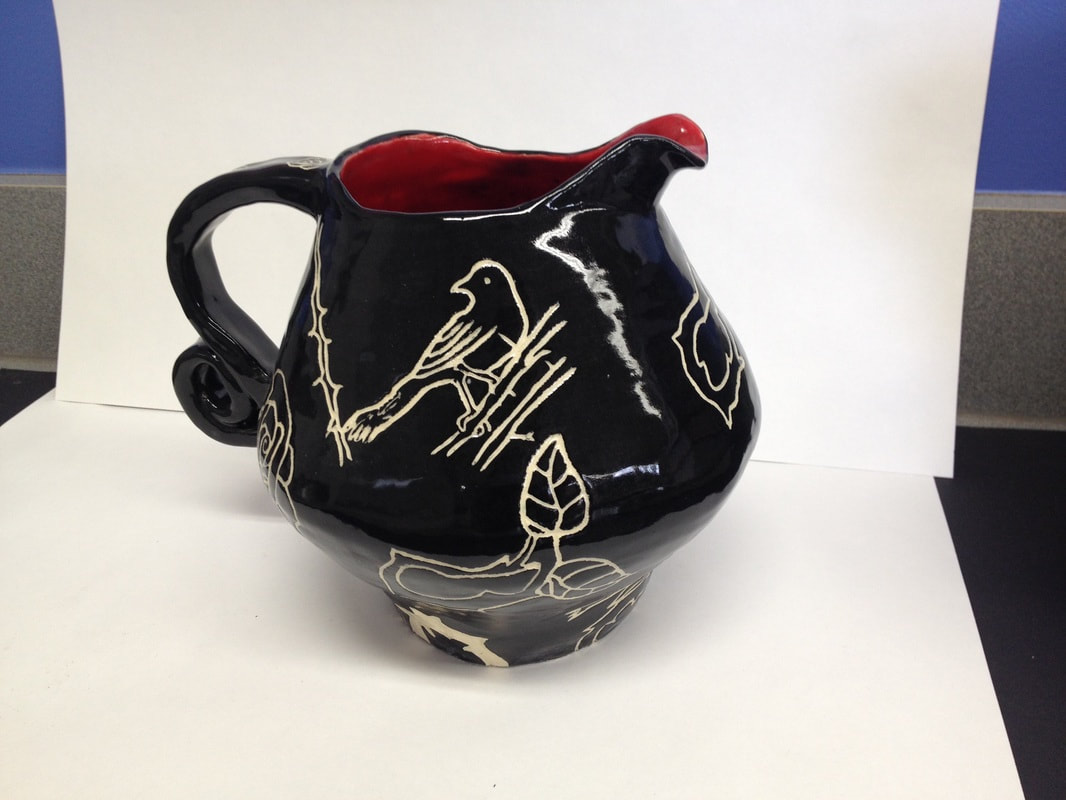
Week 13 - Finish Sgraffito/Begin Free Choice or Wall Vase
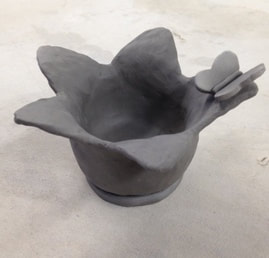
April 30 -May 4 Standards: Standard 1: 1,2 Standard 2: 1,2,3,4 Standard 3: 4 Standard 4: 1 Learning Goal: Using Mothers Day as the theme, students will be able to design and construct a wall vase that exhibits good clay techniques, shows evidence of Principles of Design/Elements of Art, such as line and texture. Brainstorming: 1. - For the wall pockets, students will find images on their Chromebooks to get inspiration for the wall pockets. These images should not be replicated as their project, but used as inspiration for their own ideas. 2. - Physical examples of the project will also be provided for inspiration. Teacher Demonstration (For Wall Vase): Many of the skills needed to make this project have been learned though out the year. However, there will be a demonstration on how to use newspaper to create the pocket for this artwork. The teacher will also demonstrate how to add on decorative elements, curl the slabs. |
|
|
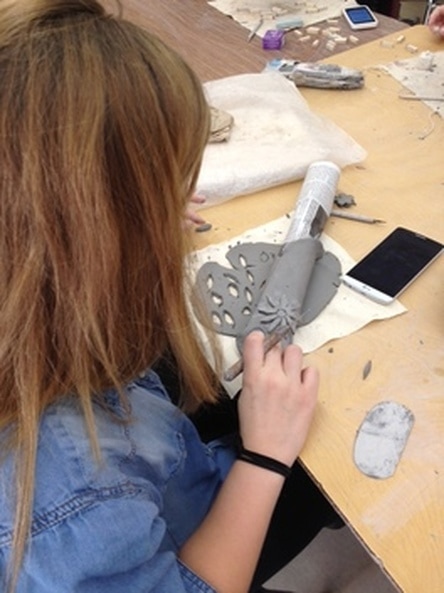
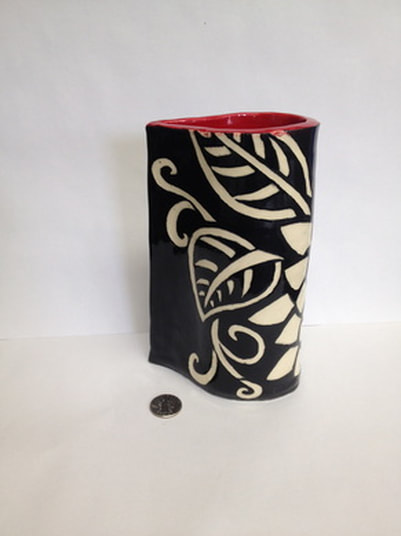
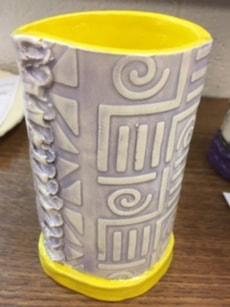
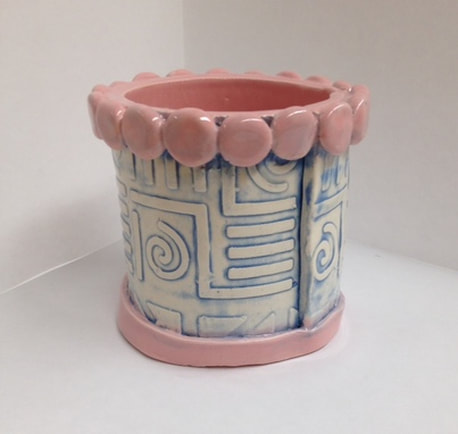
Week 11 & 12 - Sgraffito
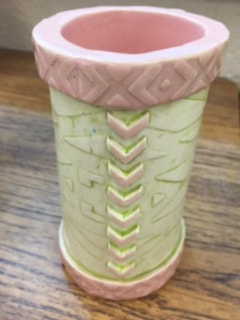
April 9-13 (Testing Tues/Weds) April 16 - 20 (Half day Tuesday due to testing) April 23-27 (Mrs. Joe was sick... so students also did Art21 Worksheet) Standards: Standard 1: 1,2,3 Standard 2: 1,2,3,4,5 Standard 3: 4,5 Learning Goal: Students will be able to use the Sgraffito technique as applied to pottery Students will be able to create a pot using prior knowledge of either the coil or slab technique. Brainstorming: Students will see a Power Point and watch a video on how to create Sgraffito pottery. Students will need to create 2 thumbnail sketches to come up with an idea prior to making the clay work. Teacher Demonstrations: - On how to begin the drawing and work with positive/negative space - How to create the slab vase - How to transfer drawing to clay Steps: 1. Start with brainstorming ideas 2. Draw out image well on the paper provided, as this final image will be traced onto the clay. 3. Create a base for your vase or mug and roll out a slab to wrap around it. 4. Create a handle for mug and shape (put on later) 5. Paint the leather hard clay with an underglaze color of choice. 6. Transfer drawing to the clay. 7. Start carving away the drawing. Leave a good balance between the positive and negative space. |
|
Week 10 - 11 - Paint and Glaze Boxes and Free Choice
March 26-29 (Week Before Break)
April 9-13 (Testing Tues/Weds)
Standards:
Standard 1: 1,2,3,4
Standard 2: 1,2,4,5
Standard 3: 1,2,4
Learning Goal:
1. Students will be able to paint/glaze their clay work using prior knowledge of color theory and paint/glaze application.
2. Students will apply materials and techniques with sufficient skill and confidence so that personal intentions are carried out in their own artwork.
|
Weeks 8 - 9 - Free Choice Project
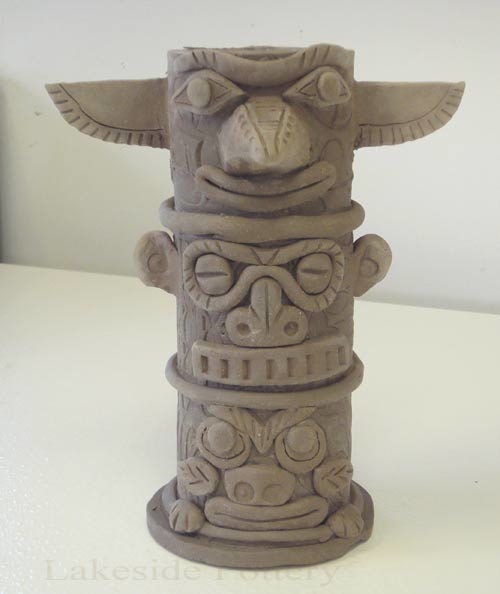
March 12-16 March 19-23 Standards: Standard 1: 1,2,34 Standard 2: 1,2,3,4,6 Standard 3: 1,4,5 Learning Goal: Students will be able to create a choice driven project based on the 4 basic hand-building techniques learned during semester 1. (Pinch Pot, Slab Construction, Coil Pottery, Press Mold) Brainstorming: Power Point on available options Google/Pinterest for ideas Options: Students may create any of the following using any of the hand-building skills we have learned all year long. -Totem Sculpture (Traditional or non traditional) - Tea Pot and Matching Mug - Place Setting (set of 3) - Matching set of anything (candle sticks, platters, mugs) - Bookends - Student Choice (Teacher approved) Requirements: Must be complex enough to warrant a full project grade. Must include the 1 of the handbuilding techniques listed above. |
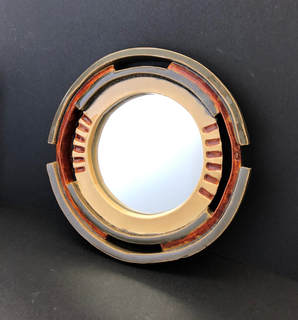
Mirror
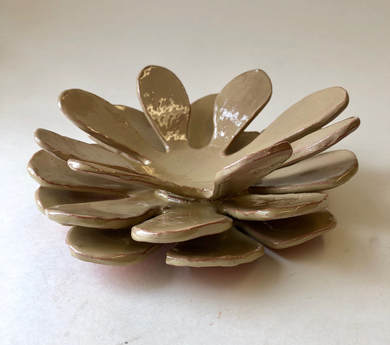
Candle Holder
|
|
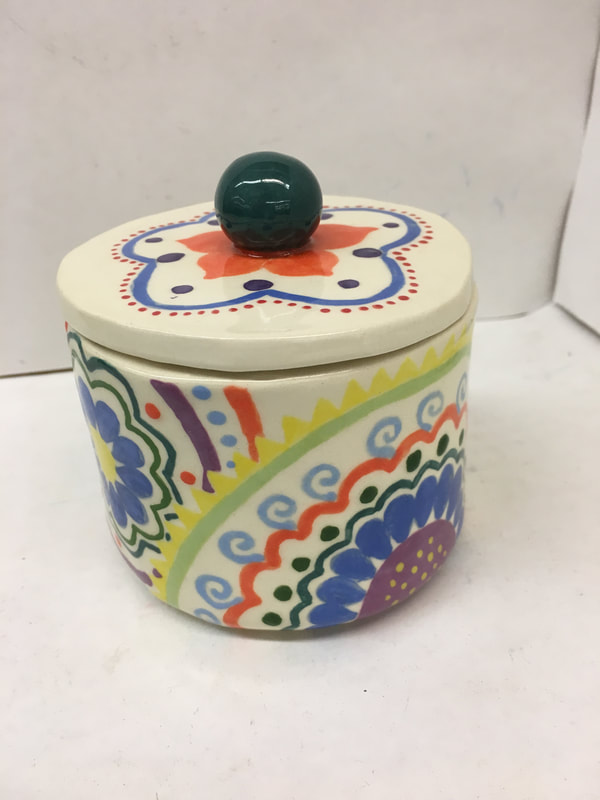
Week 6 - 7 - Culture Inspired Clay Box
March 5-9 March 12-16 Standards: Standard 1: 1,2,3,4 Standard 2: 1,2,4,5 Standard 3: 1,4,5 Learning Goal: Students will use prior knowledge of slab construction to create a slab box that is decorated with the designs of a culture of choice. Students will learn to add add footing and lids with a lip to hold in place. Requirements: Must have a foot Must have an advanced lid. Must not be bigger than 4" tall or longer than 6" Brainstorming: Power Point on different box shapes and designs, as well as cultural influences Books with cultural design Chromebooks Teacher Demonstrations: Review how to make a template for a box (as we did with our clay houses) Review need to wait until slabs are harder to attach together Demo how to make and attach different kinds of footing Demo how to cut and make different kids of lids. |

|
|
Week 5 - Paint/Glaze Tiles and Animals and Update Websites
Feb 26 - Mar 2 Standards: Standard 1: 1,2,3,4 Standard 2: 1,2,4,5 Standard 3: 1,2,4 Learning Goal: 1. Students will paint or glaze their Relief Tiles and Animals using prior knowledge of color theory and value or proper glazing techniques. 2. Students will reflect upon their learning and the process of crating by writing about their work and posting it to their websites. Brainstorming: Power point on glazing options Chromebooks or phones for visual references if necessary. Teacher Demonstrations: Review on color theory how to mix color and blend with value How to properly use polyurethane to add shiny coat to finished work. |
|
|
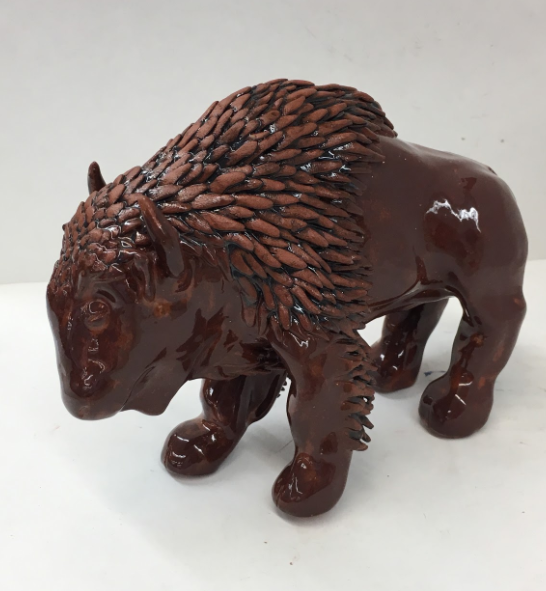
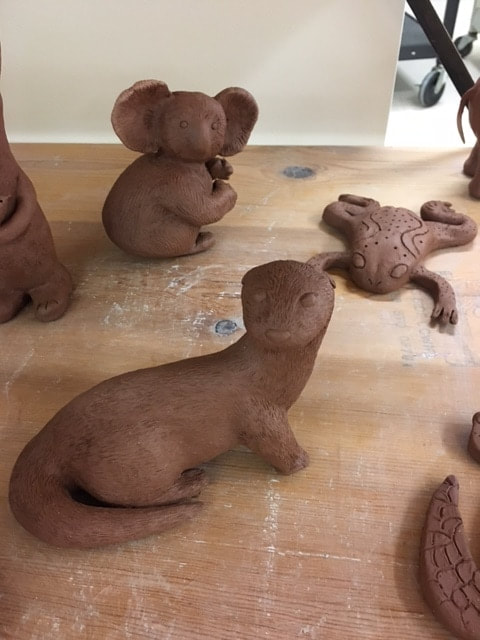
Week 3 & 4 - Animal Sculpture
Feb 12- 16 Feb 20-23 (Mid Winter Break Monday) Standards: Standard 1: 1,2,3,4 Standard 2: 1,2,4,5 Standard 3: 1,2,4 Learning Goal: Students will be able to create a non-cartoon animal sculpture focusing on forming muscle tone and using proper clay hand-building techniques. Brainstorming: Power Point on the different kinds of sculptures they should be looking for. Students will use their Chromebooks to search for images of animal sculptures. Students should find and save or "pin" a front, side and back view of the animal they wish to create. Images of "sculptures of animal" rather than "photos of actual animals" help the student more. Teacher Demonstrations: - Teacher demonstration on how to begin the basic structure - Demonstration on how to add muscle tone for a more realistic representation of their animal. Steps: 1. Find an animal and get approval from Mrs Joe 2. Wedge clay to get rid of air bubbles. 3. Start basic body shape and keep in mind MUSCLE/BONE STRUCTURE 4. Work on shape, make sure snouts are 3-D, don't draw on facial features, make them with clay. 5. Add texture where appropriate |
|
|
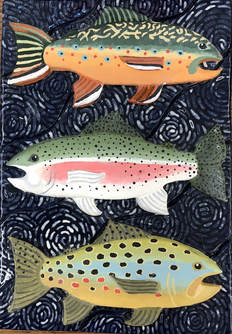
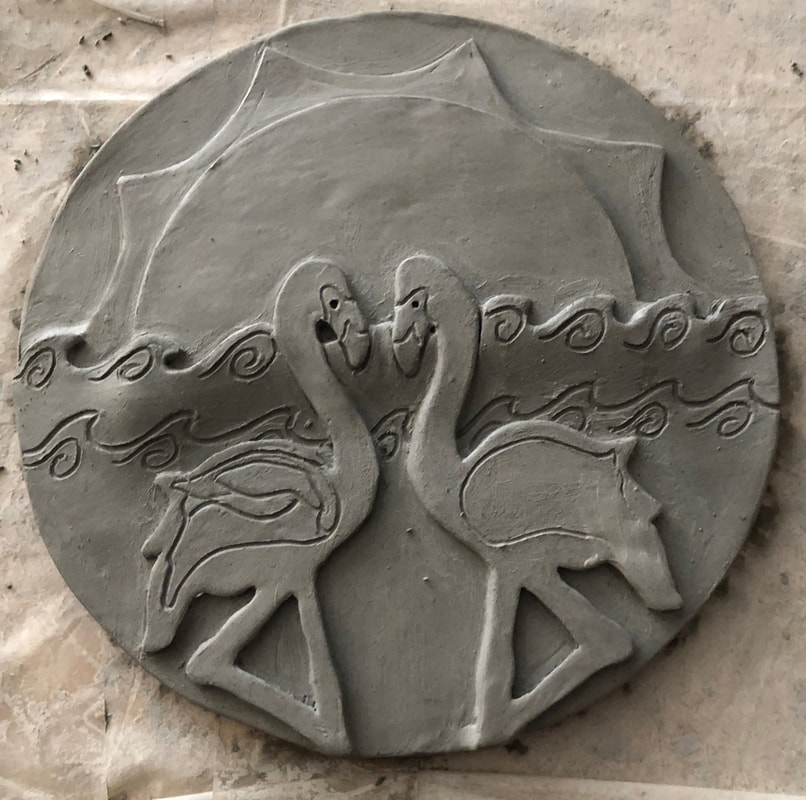
Week 1 & 2 - Relief Tiles
Jan 29 - Feb 2 (Snow Day Tuesday) Feb 5-9 (Snow Day Monday & Friday) Standards: Standard 1: 1,2,3 Standard 2: 1,2,3,4 Learning Target Students will design and create a relief tile that successfully shows an understanding of The Principles of Design Tile should have a foreground, middle-ground and background. Tile should have a min of 2 dominant design principles and 2 dominant art elements Brainstorming: Examples of past student work Power Point on various approaches to the project. Use Chromebooks for ideas. Draw a sketch of tile before beginning. Teacher Demonstrations: Basic group demonstration on how to begin by adding layers to tile as well as carving away areas. - Stress rounding off cut edges so that the tile doesn't look like it has cookie-cuter images on it, but rounded off images. - More detailed painting demonstrations will come after projects are fired. 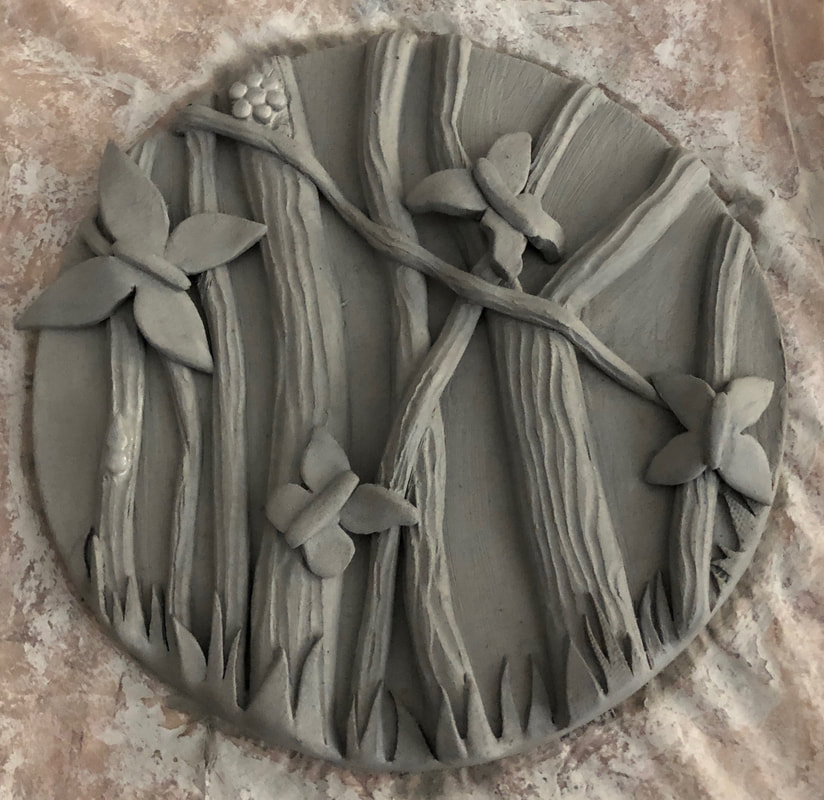
|

|
Second Semester
|
Week 17/18 - Free Choice
January 3-5 -AND- January 8-12 Standards: Standard 1: 1,2,34 Standard 2: 1,2,3,4,6 Standard 3: 1,4,5 Learning Goal: Students will be able to create a choice driven project based on the 4 basic hand-building techniques learned during semester 1. (Pinch Pot, Slab Construction, Coil Pottery, Press Mold) Brainstorming: Power Point on available options Google/Pinterest for ideas Options: Students may create any of the following using any of the hand-building skills we have learned all semester long. - Totem Sculpture (Traditional or non traditional) - Tea Pot (matching Mugs?) - Place Setting (set of 3) - Matching set of anything (candle sticks, platters, mugs) - Bookends - Teacher approved Sculpture - Functional Pottery (Toothbrush holders?) - Student Choice (Teacher approved) Requirements: Must be complex enough to warrant a summative project grade. Must include the 1 of the handbuilding techniques listed above. Must be finished with construction by Jan. 12th to allow for drying and firing. |
Lakeside Pottery
|
|
Week 15 & 16 - Continue Construction and Paint/Glaze Clay Houses
December 11-15 -AND- December 18-21 Standards: Standard 1: 1,2,3,4 Standard 2: 1,2,4,5 Standard 3: 1,4,5 Learning Goal: 1. Students will be able to paint or glaze slab houses with skills learned throughout the semester. 2. Students will be able to mix new shades of brown and other colors to provide more interesting color palate. Teacher Demo: No specific demonstrations are given, however, students are directed to the paint area to see visuals on how different shades of brown, as well as other colors, can be mixed. |
|
|
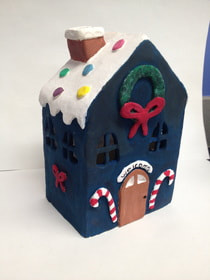
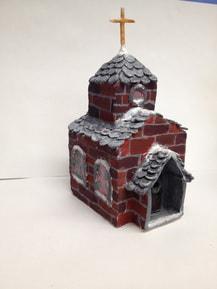
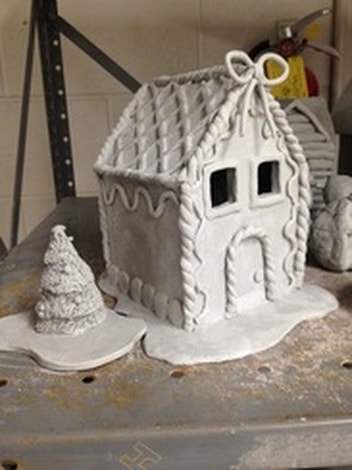
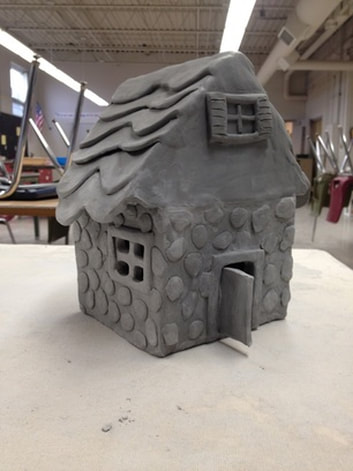
Week 13 & 14 - Slab Houses
Nov 27-1 AND Dec 4-8 Standards: Standard 1: 1,2,3,4 Standard 2: 1,2,4,5 Standard 3: 1,4,5 Learning Goal: Students will be able to apply the the slab method to construct a 3 dimentional house. Students will be able to use prior knowledge of using coil, slab, texture and additive elements. Students will decorate the house using prior knowledge gained in class Brainstorming: Students will watch Power Point of the various types of houses that can be created using slabs. Teacher Demonstrations: Demo on how to create templates for a more accurate box Demo on how to roll and save and attach the slabs Demo on how to make roof more interesting (Shingles, snow, etc..) Steps: 1. Students will develop an idea for their houses (birdhouse, gingerbread house, christmas house, whimsical house...) 2. Create a template for the house, with a template for the base, front wall, side wall and roof. 3. Roll slabs to cut out template shapes. (1 base, 2 wall for each template) 4. Let slabs harden to near leather hard state before attaching to maintain crisp edges and corners. 5. Attach side wall and front wall to base first and use coil on inside seam to attach well. 6. Repeat for the opposite walls. 7. Add most of roof designs before attaching to house. 8. Begin adding decorations. (Chimneys, windows, shutters, doorways, etc...) |
|
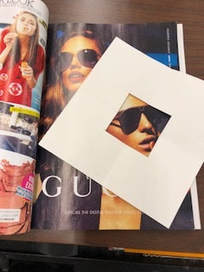
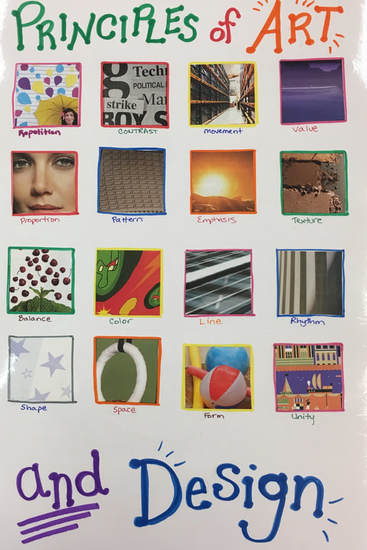
Week 12 - Principles of Design Wrap up
Nov 20-21 (Thanksgiving Week) Standards: Standard 1: 1-4 Standard 2: 1,2,4,6 Standard 3: 1,4,5 Learning Goal: Students will learn about the different design elements and principles and will be able to identify each one in advertising magazines. Task: Students will use a cut out square to identify different elements and principles found in magazines. Students must cut out and label each one and create a poster of all the different examples. Videos for Tuesday when we have a Sub :)
|
|
|
Week 11 - Paint and Glaze
Nov 13-17 Standards: Standard 1: 1,2,3 Standard 2: 1,2,3,4,5 Standard 3: 4,5 Learning Goal: 1. Students will be able to paint pinch pot sculptures with care and skill, using knowledge of color theory. 2. Students will be able to glaze pinch pots using glaze techniques learned in class. Daily Tasks: This week students will focus on a variety of tasks. Students will be catching up on their work. Some students will need 2 more days to work on painting their pinch pot sculptures, while others may need 3 or 4. Students who finish painting their sculptures will glaze their pinch pots, which is a 1-2 day assignment. Students who finish both the painting of the sculptures and the glazing of pots will work on brainstorming for the next project, by looking up images and making templates for the upcoming project which we will start either thurs/fri or Monday depending on the pace of the class. |
|
|
Week 10 - Small Vases and Paint Creatures
November 6-10 Standards: Standard 1: 1,2,3 Standard 2: 1,2,3,4,5 Standard 3: 4,5 Learning Goal: Using prior knowledge, students will create a pinch pot vase that consists of 1 or more pinch pots, has an added design and a foot on the pot. Brainstorming: Use Pinterest and Google to get IDEAS. Do not copy but use for inspiration. Teacher Demos: How to make a foot on the bottom of pot. This is a short 2-3 day assignment while waiting for our sculptures to fire. |
|
|
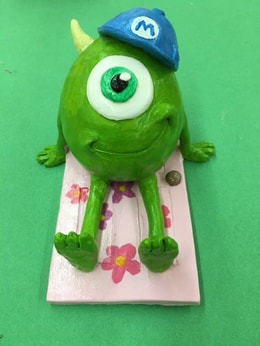
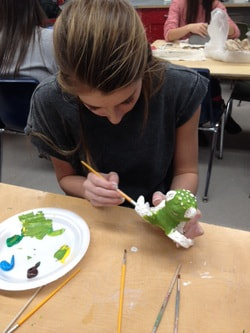
Week 8 & 9 - Pinch Pot Creatures
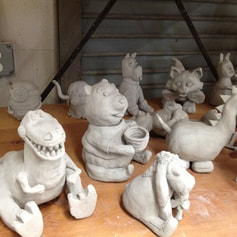
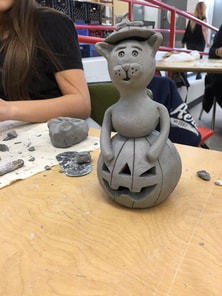
October 23-27 -AND- Oct 30 - Nov 3 Standards: Standard 1: 1,2,3,4 Standard 2: 1,2,4,5 Standard 3: 1,2,4 Standard 4: 3 Learning Goal for Creatures: Students will learn the "pinch pot" method of handbuilding and be able to apply that method of building to create a creature from clay. Students will be able to use prior knowledge of clay and problem solving skills to build more sophisticated works. Brainstorming: Power Point of example work Students will have hand outs placed on tables of creature images for idea development Students will draw or print out their image before beginning Teacher Demonstrations: * Teacher will give a demonstration on how to make pinch pots and combine two pinch pots and put them together to form the body of a creature. * Teacher will also demonstrate how to add extremities and detail characteristics to make the sculpture more advanced. Requirements: Must be made from pinch pots Must be able to stand on it's own Features must be additive not subtractive Must have some form of clothing |
|
|
Week 7 - Glaze Tumblers and Plates
October 17-21 Standards: Standard 1: 1,2,3,4 Standard 2: 1,2,4,5 Standard 3: 1,2,4 Standard 4: 3 Learning Goal for Glaze: Students will learn and be able to apply a variety of glaze techniques to their ceramic work. (Underglaze, Stencil, standard glaze and stain rubbings) Teacher Demo: Demo on how to apply and rub off glaze to get a weathered look for pottery. Review how to apply glaze to stencil plates |
|
|
|
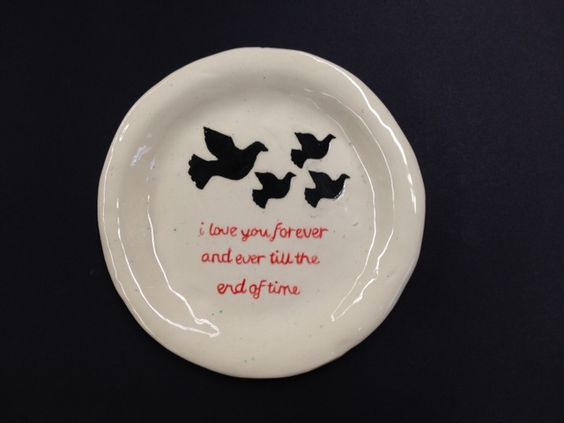
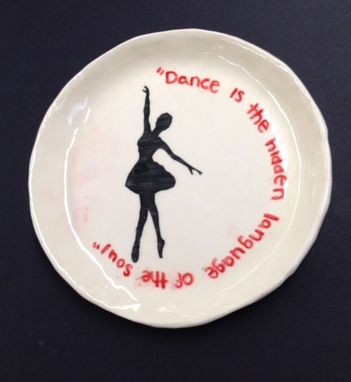
Week 6 - Finish Texture Tumblers and Begin Stencil Plates
October 9-13 Standards: Standard 1: 1,2,3 Standard 2: 1,2,3,4 Learning Goal: 1. Students will learn the "Press Mold" technique for handbuilding 2. Student will learn and be able to create and use stencils for pottery 3. Students will learn how and be able to use texture to embellish clay 4. Students will be able to work with leather hard clay 5. Students will learn and be able to "stain" with a glaze. Task: 1. Students will create a plate using a mold and on the plate they will apply a stencil. (Students may choose to add a quote or words using either an underglaze and paintbrush or by using noodle letters or stamps. 2. Students will make a tumbler that has a rolled on texture. Student may also add 3D elements as well. Teacher Demonstrations Demo on how to roll a slab for a press mold plate Demo on how to create and apply the stencil Demo on how to add textures |
|
|
Week 5 - Web Portfolios and Texture Tumblers
October 2-6 Standards: Standard 1: 1,2,3 Standard 2: 1,2,3,4 Learning Goal: 1. Students will be able to reflect on what they have created and learned by starting a digital portfolio and writing a reflection piece. 2. Students will be able to demonstrate how to successfully apply a texture to a slab created work. Task: Students will make a tumbler that has a rolled on texture. Student must also add other additive elements as well. Teacher Demonstrations Demo on how to create and apply the stencil Demo on how to add textures |
|
|
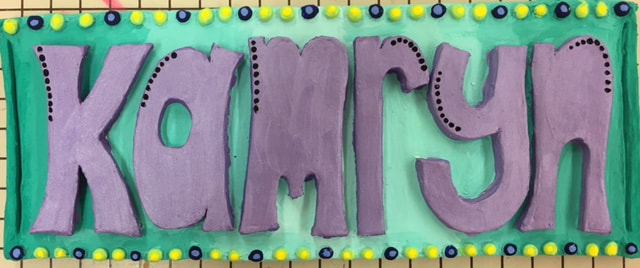
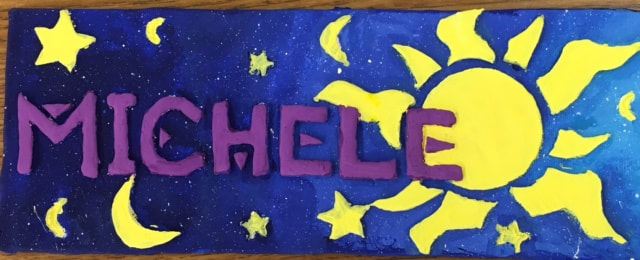
Week 4- Paint Name Tiles and Coil Pots
Sept 25-29 Standards: Standard 1: 1,2,3 Standard 2: 1,2,3,4,6 Learning Goal: Students will be able to paint a tile showing value and mixing original color. Students will be able to paint coil pot with a color scheme using rub and buff techniques Teacher Demos: Group demo on how to paint with value and fill in small areas Group demo on the proper way to apply rub n buff. Task/Requirements: Painting Tiles: Students will paint tiles showing some form of value from dark to light. Edges of tiles must be painted Craftsmanship is priority (paint all white areas.) Coil Pots: Students will paint their pot using a color scheme of their choice and finish it with a rubbing of rub and buff |
|
|
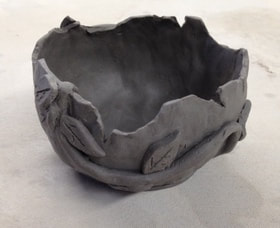
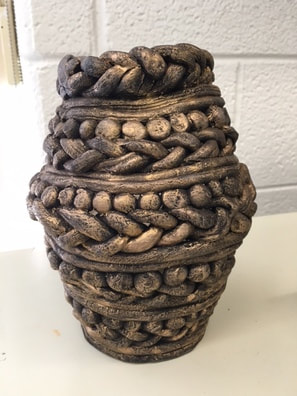
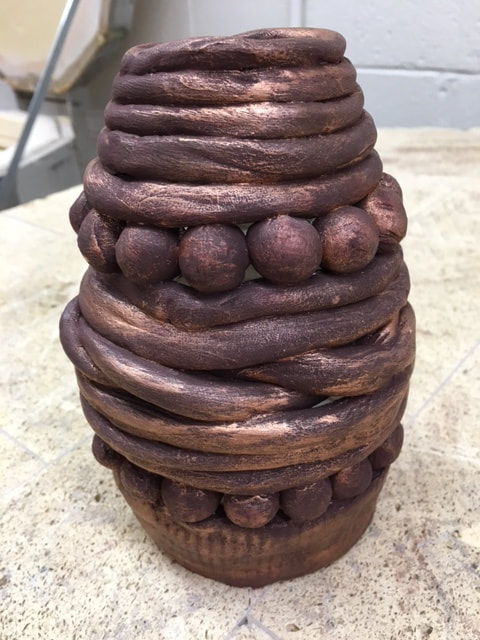
Week 3 - Coil Pots
Sept 18-22 Standards: Standard 1: 1,2,34 Standard 2: 1,2,3,4,6 Standard 3: 1,4,5 Learning Goal: Students will be able to create a decorative pot using coil building techniques. Students will be able to creatively use design principles to enhance their artwork. Brainstorming: * Power Point on history of clay, cultures who have used coil techniques and examples of modern day coil pots * Draw out sketches for their own pots Teacher Demonstrations: * How to start the base of pot * How to roll coils. * How to properly attach coils * How to add decorative elements and attach them together. Steps: * Begin with sketch drawing * Roll out slab for base * Start rolling coils and build higher * add decoration to pot by adding design elements Click here for Coil Pot Power Point |
|
|
Week 2 - Continue with Name Tiles
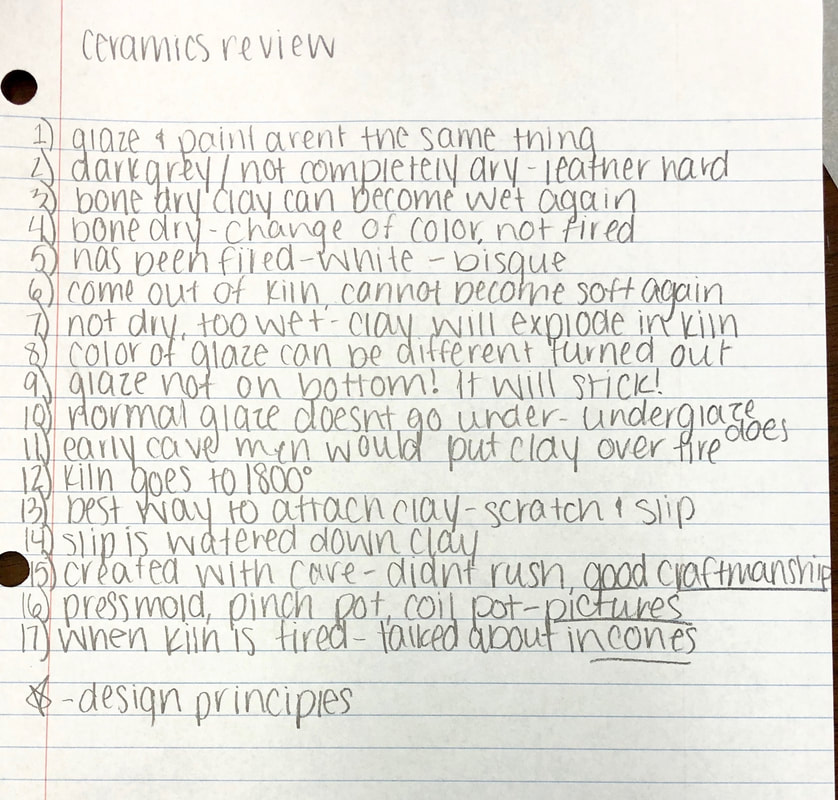
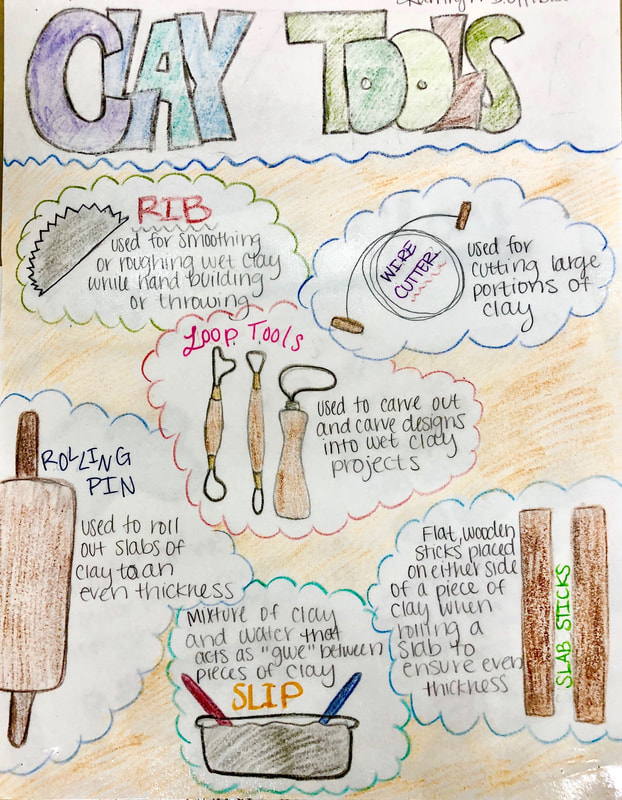
Sept 11-15 Standards: Standard 1: 1,2,3,4 Standard 2: 1,2,3,4,6 Learning Target: Students will be able to apply the basic techniques involved in the process of making clay artwork to a clay tile. Students will learn the termonology associated with clay construction. Last Friday was Demo Day, however we will review: How use slip, scratch and score. *Leather hard vs plastic stages of clay. *Discuss what makes clay explode in kiln. *How to store clay overnight. * How to carve once leather hard *Clay tools and their purpose |
|
|
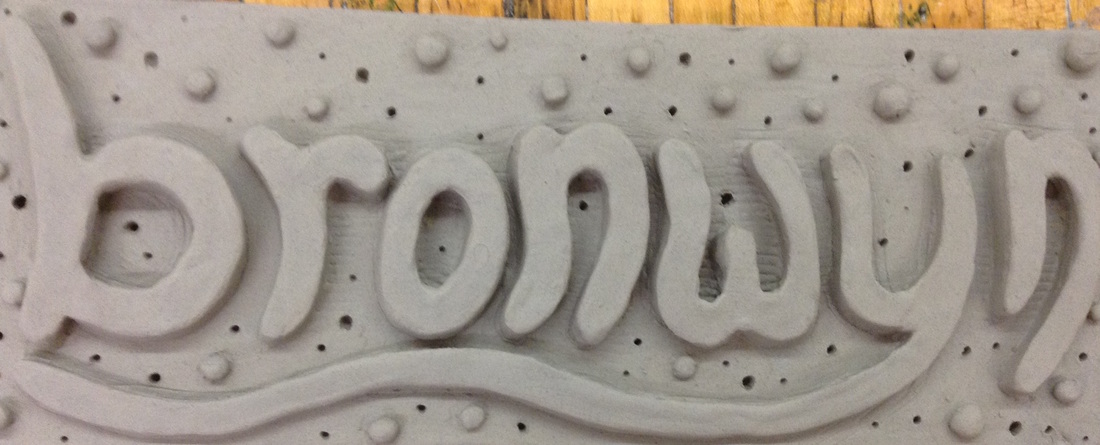
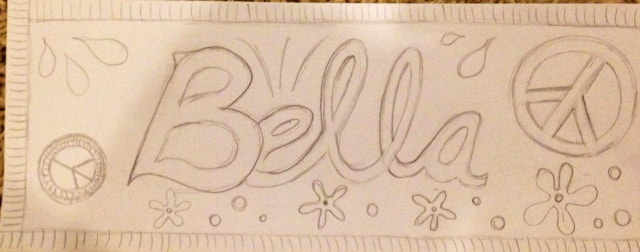
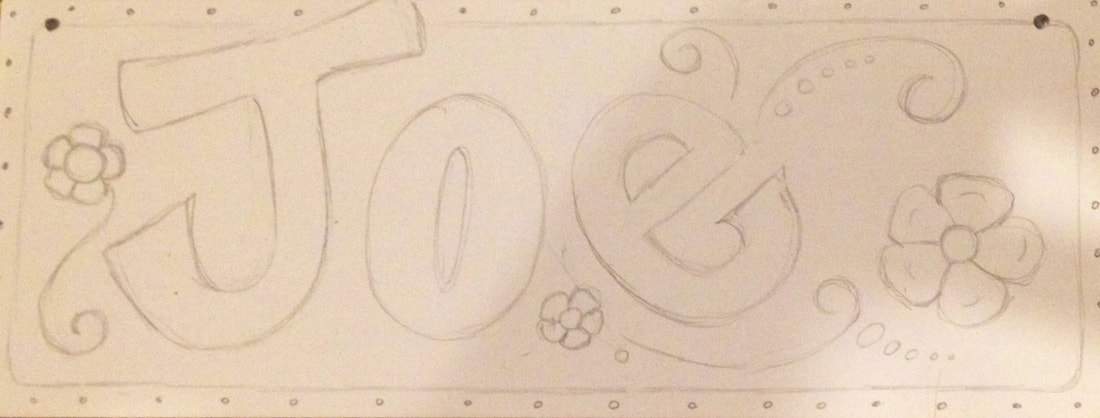
Week 1 - Intro to Class & Sketch Name Tiles
Sept 6-9 Standards: Standard 1: 1,2,3 Standard 2: 1,2,3,4 Learning Target: Students will be introduced to the basic design principles while designing a tile with their name on it. Students will learn the steps in developing an idea for clay. Task: Students will design a tile using their name which they will later create out of clay. This first week students will focus on their design skills and learning the basic components to creating a solid design. FIRST DAY OF SCHOOL POWER POINT |
|
