Jewelry Assignments
In art class it is perfectly normal for students to work at different paces. Some students finish up earlier than others and some students take more time. Please allow for some flexibility on dates, as I am flexible with my students and try to meet their individual needs. Generally speaking, students have a 2-3 day rolling deadline to finish up projects. Sometimes after introducing a new project I will still have students finishing up the previous one. This is normal.
Lessons are subject to change if I feel a change is in the best interest of the class.
Lessons are subject to change if I feel a change is in the best interest of the class.
Final Exam Week
June 3-7
Objective:
Students will finish up final exam project "stained glass windows."
Requirements:
10pt: Creative, challenging idea and well planed use of space.
10pt: Design is cut out well, with out a lot of fuzzies, and even thickness or lines.
10pt. Has minimum of 25 cut designs
10pt. Good Craftsmanship
10pt. Effort
Total: 50x2=100pt
Early Finishers:
Those who finish early or are waiting for their work to come out of the Kiln will work on the Westview Orchards Corn Maze competition. Theme: Happy 200th Birthday Westview Orchards. 1st Prize is $100. 2nd Prize: 4 passes to the orchard. 3rd Prize: $25 gift certificate.
Week of June 3RD
Final projects are to be completed by the day of the exam.
Blog Post is 5% of final exam grade
Tissue Window is 10% of final exam grade
Test is 5% of exam grade.
Total exam grade is 20% of final grade.
WEDNESDAY JUNE 5TH IS OFFICIALLY CLEAN THE ROOM DAY. Students should come prepared to clean tools, supplies, and surfaces.
Week 17 & 18 - "Stained Glass" WindowsMay 20-25
-AND- May 27-31 Objective: Students will learn about the design movement associated with Tiffany Glass and create a "window" design of their choice using design principles learned in class. Brainstorming: Power Point about Tiffany Glass and examples of Tiffany Glass Computer Lab to look up images and develop ideas Examples of the project Teacher Demonstrations: How to draw out image so that it is appropriate for a cut paper design. (Leave border around paper and all lines must connect to the border.) How to transfer image drawn on white paper to the black paper How to cut out paper using the exacto blades STUDENTS ARE ENCOURAGED TO BRING IN THEIR OWN SCISSORS, AS THE CLASS SCISSORS ARE NOT VERY GOOD. |
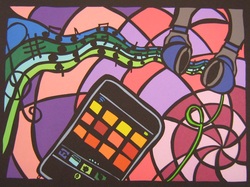
Photo taken from Art Room Online: Ms. Johnsons Art Room. Click on picture to get to her site.
|
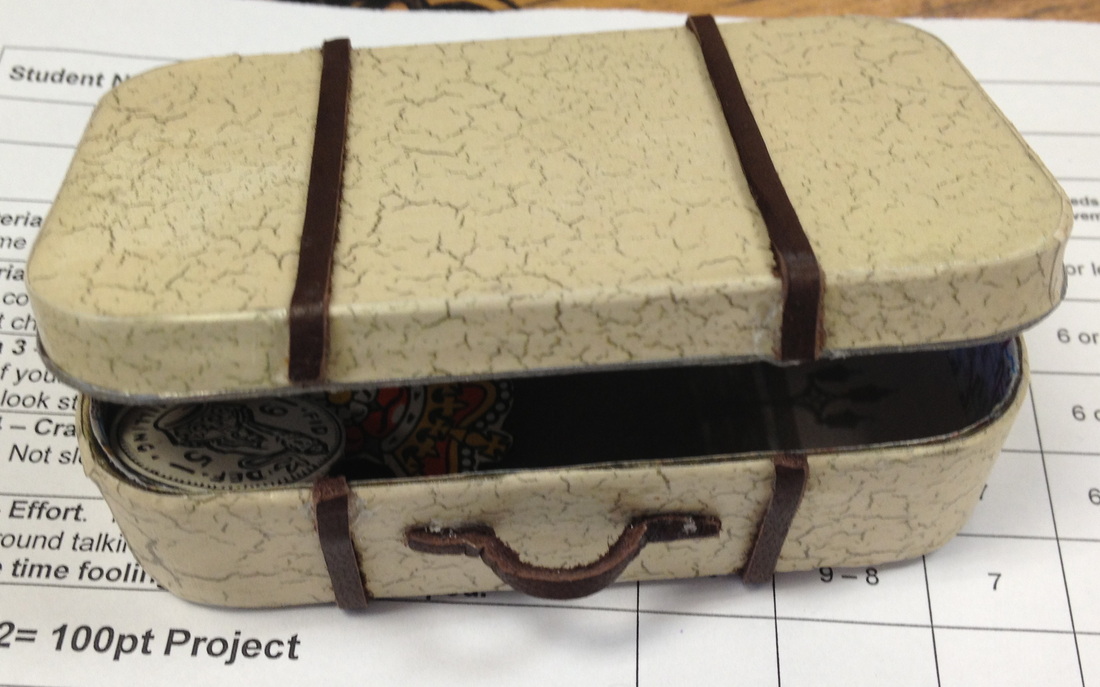
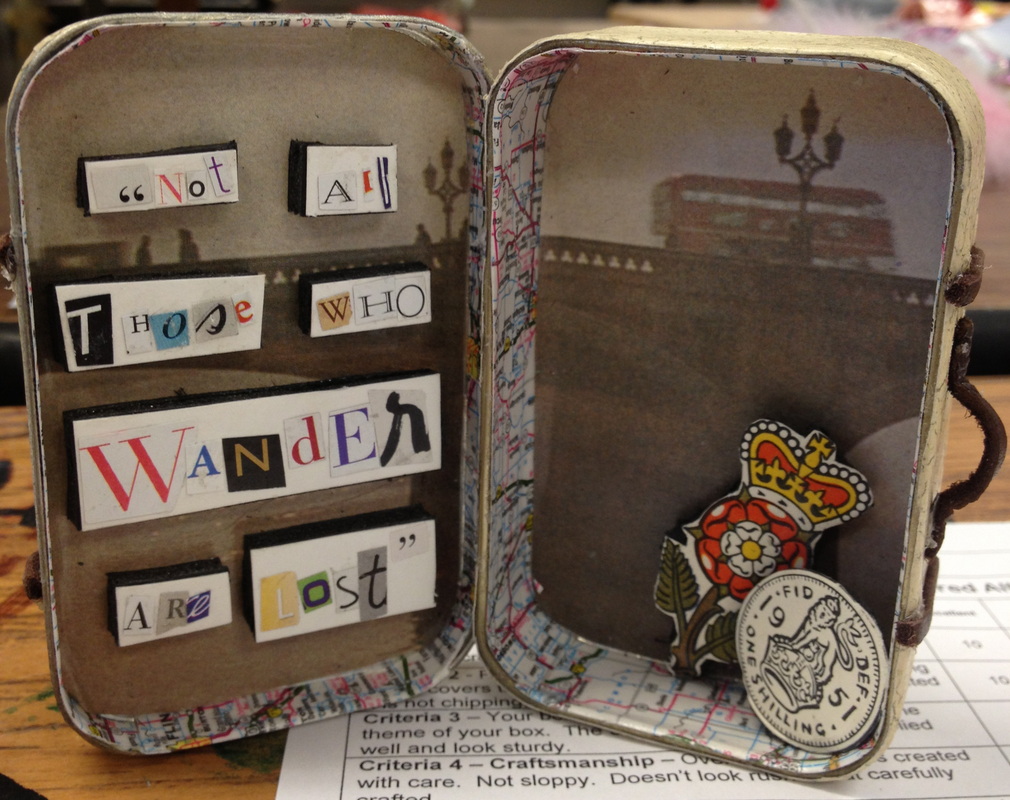
Week 15 & 16 - Altoid Tin Albums/BooksMay 6-10
- AND - May 13-17 Objective: 1. Students will take a book, poem or lyrics and create a mini book illustrating the themes in the writing. This book will be encased in a decorated Altoid tin. 2. Students may choose to create a "scrapbook" style book of themselves or a loved one. This may be a fitting theme for Seniors who are about to graduate and can use this book for their graduation party. Brainstorming: Power Point on different altoid altered tins and books Trip to the library to get ideas. Project examples Phones may be used as supplement technology to look up images Teacher Demonstrations: Teacher will demo different possibilities for decorating outer and inner casing of the altoid tin. Demo on how to fold the accordian book and adhere it to the tin using ribbon Supplies Needed to enhance the book: Magazines, newspaper, misc items from the house, family pictures, books of poetry, old photos, keys, buttons. Anything small and that may relate to the words in the songs/poems or literature. |
|
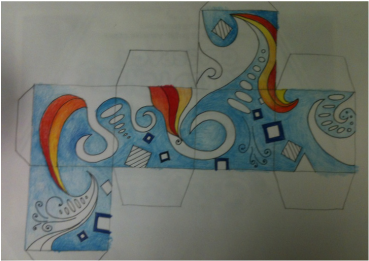
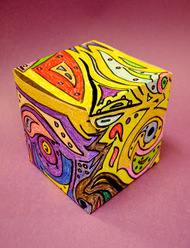
Week 13 & 14 - Cube DrawingApril 22-26
ALSO FINISH PAPER MACHE PROJECTS - AND - APRIL 29 - MAY 3 Objective: Students will use and apply deisgn principles learned in class to create a 3-D design cube. Drawing must show a minimum of 3 Principles of Design. Brainstorming: Students will have access to many pages and photo copies of various design ideas. They can take and modify these images to come up with their own unique designs. Students will also have access to various other examples that students have created to get ideas for thier own work. Teacher Demonstrations: - Demonstration on how to get the cube template drawn onto their paper. - Demonstration on how to add value to coloring - Deomonstration on what colors work best together using color theory - Demonstration on how to attache the cube together When completed, cubes will be hung with fish line from the ceiling. |
|
Week 12 - Wrap up Paper MacheApril 15-19 Objective: Students will learn to create a paper mache creature of thier choice using the design skills they have been learning all year long. Teacher Demonstrations: Demo on how to use paper pulp to get rid of lumpiness and to add more specific features. Demo how to use Model Magic air dry clay to add detail Demo finishing touches, such as final layer of paper mache and painting Notes: Students must use all materials to smooth out project to the best of their ability. Students must also push themselves to creativly paint their project. All projects must stand well on their own. |
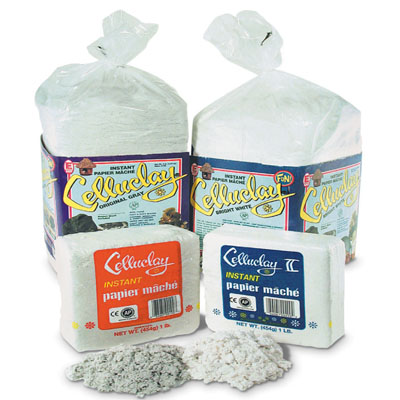
LOVE this stuff for paper mache!
|
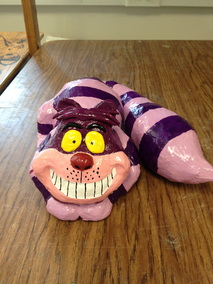
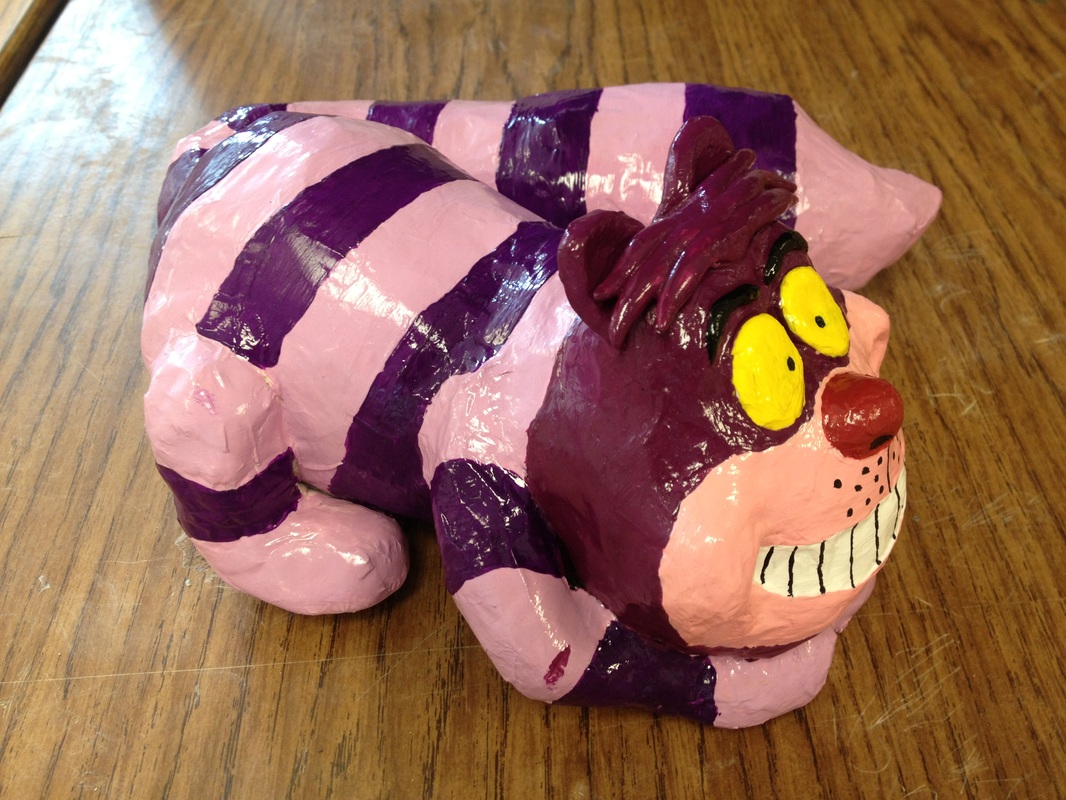
Week 11 - Paper Mache CreationsApril 8-12
Objective: Students will learn to create a paper mache creature of thier choice using the design skills they have been learning all year long. Brainstorming: Power Point on different types of creatures that can me made using paper mache (realistic or imaginative.) Trip to the library to research images and print up ideas for their own creature Teacher Demonstrations: There will be many demonstrations over the course of the week that cover the following: * How to create a basic skeletal form to work from using wire, paper and tape. * How to use newspaper to bulk up body and build muscle tone if desired * How to tear the paper small and apply glue to form so it can harden * How to add details once the form has hardened. * Stress the importance for small pieces and lots of layering so it does not look like a lumpy 4th grade paper mache project. |
|
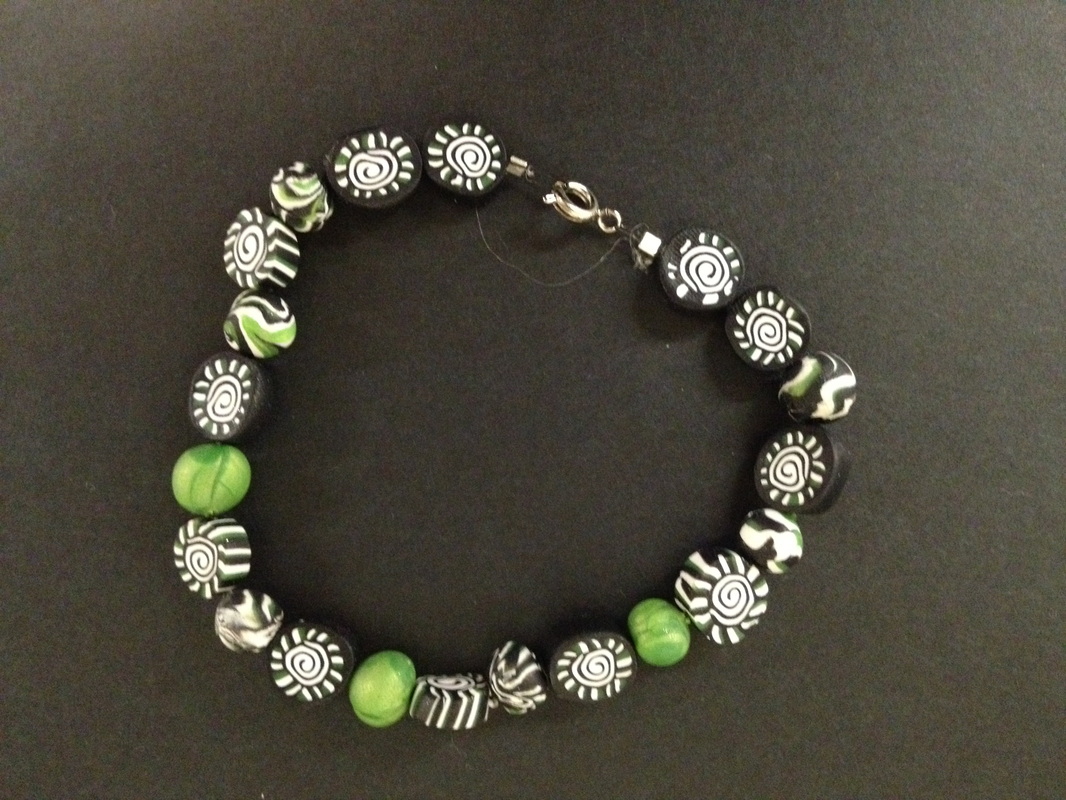
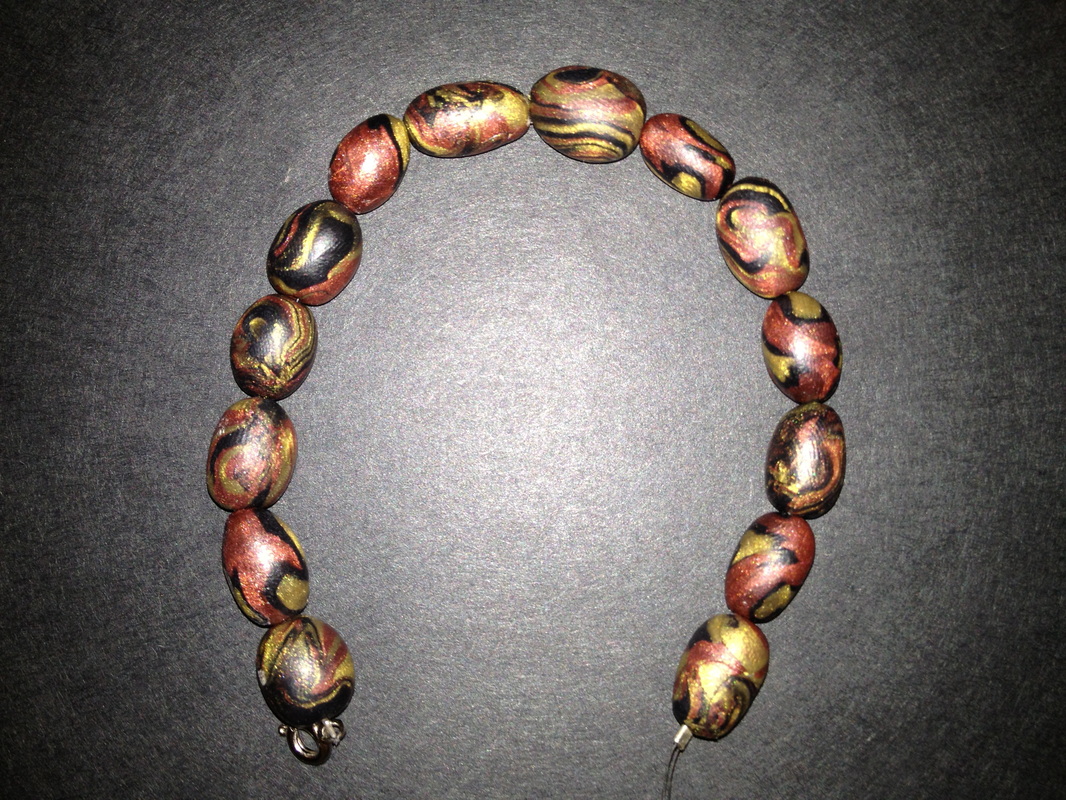
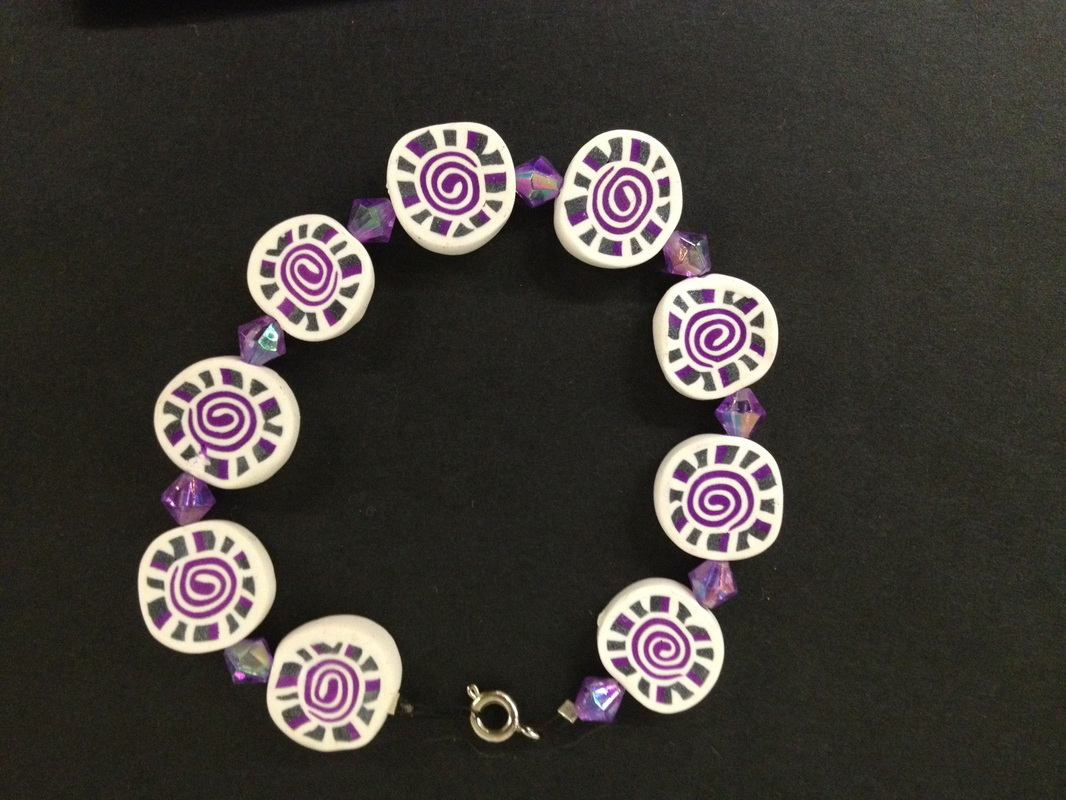
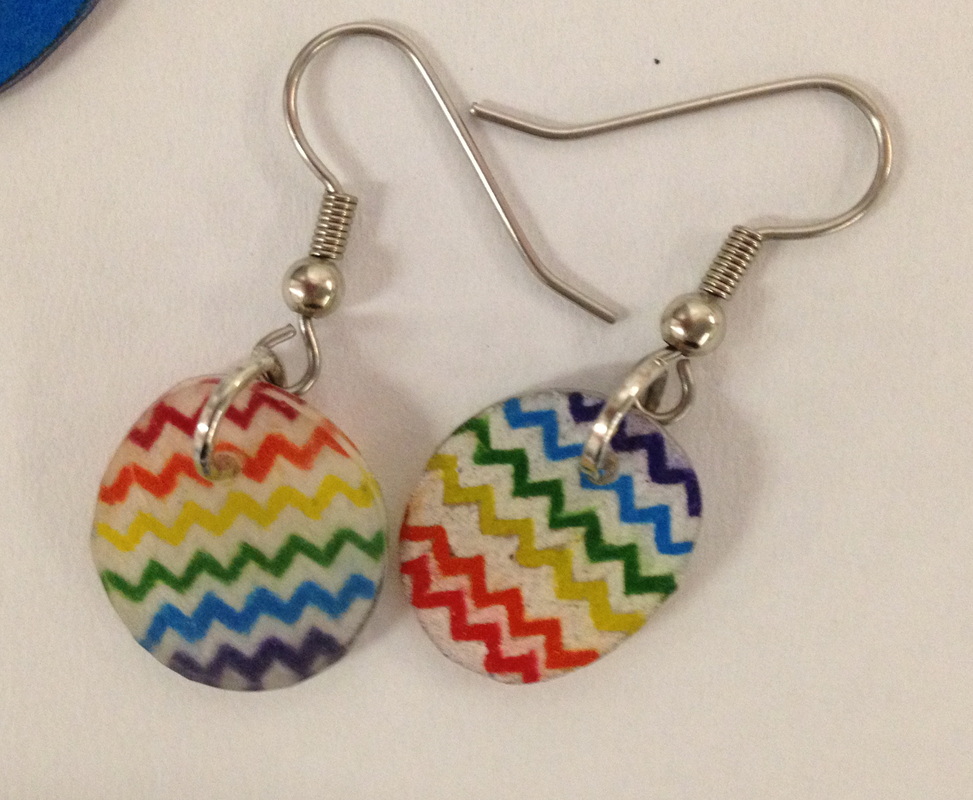
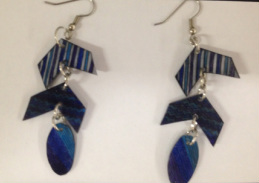
Week 9 & 10 - Polymer Clay JewelryMarch 18-22
-AND- March 25-28 Objective: Students will explore the different methods used in polymer clay jewelry to create a collection of jewelry consisting of pendants, bracelets and earrings based on design principles. Brainstorming: Power Point on the different methods of making polymer clay jewelry Handouts detailing step by step instruction Google on phones for online tutorials Teacher Demonstrations: Demo on how to prepare the clay for use Demo on how to prepare the surface of table for clay Demo on how to roll the clay, and combine clays together Show students the different techniques: Marbleizing, Canes, Jelly Roll, stripes, Checkers, etc... Project Specifics: Students will explore the different polymer cane techniques and develop 3 different canes. Students will be given black and white as the base colors, and they can choose one or two accent colors. From here they will develop their ideas for the canes. One may be simple, but one must also be fairly complex, containing at least 5 different elements in the layers. When finished, they will then slice the canes and press the pieces onto a pendant the shape of their choice. Left over cane can be cut up to make beads. These beads will be used in other projects. |
|
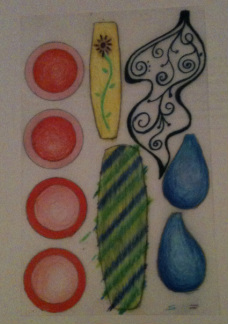
Week 7 & 8 - Shrinky Dink JewelryMarch 4-8 (ACT/MME Week)
- AND - March 11-15 Objective: 1. Students will create a pin, pendant, key chain, earrings or bracelet out of shrinky dinks using the design principle ALTERNATION. 2. Students will use up all the Shrinky Dink plastic to create jewelry of choice with any left over material. Brainstorming: * Power Point on various Shrinky Dink jewelry pieces as well as on the examples of jewelry that exhibits Alternation. * Examples of Shrinky Dink jewelry. * Use of iPhones to look up examples of Shrinky Dink jewelry on Etsy, Pinterest or Google. * Required sketches of drawing before beginning project. Teacher Demonstrations: * Demo on how to prepare the Shrinky Dink plastic if necessary. * Model how large to draw the image on the plastic to allow for shrinkage * Demo on how to cook the Shirnky Dink and press into the plastic after cooking to flatten or curve if desired. Steps: 1. Begin by brainstorming on the internet for possible ideas. 2. Look for patterns of interest. (You may trace patterns if desired.) 3. Sketch out the design for each piece/part of your jewelry. 4. Sketches are worth 25 points and must be good quality sketches. If you can't draw it well in a sketch I don't know if you can draw it well on final Shrinky Dink plastic. So it must be drawn well. 5. When sketches are approved, you may begin designing your jewelry on the plastic. 6. Sharpie markers, colored pencils or paint may be used to add color to the plastic. 7. Shapes must be 3x as big as the final shape desired, as the plastic shrinks. 8. Must have holes before shrinking to allow for thread, string or jump rings. 9. Attach all parts together with good craftsmanship. |
Cram as many as you can onto a half sheet.
|
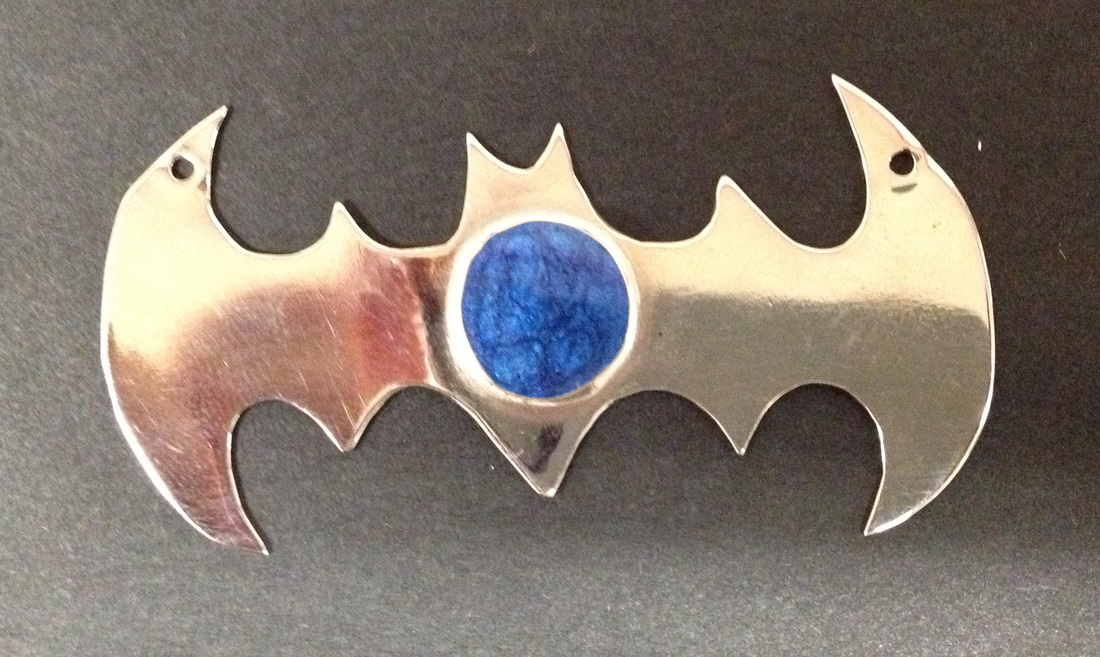
Week 6 - Finish Bezel Settings and Independent AssignmentFeb 25- Mar 1
Objective: 1. Complete second bezel setting with poured Epoxy. One of the bezel settings must be on a piece of jewelry that has an additional sweat soldered element. 2. Students who have finished both bezel settings will work on an Independent Assignment of their choice. Teacher Demonstrations: - How to solder the bezel setting so that no gaps are present - How to mix the epoxy glue and add pigment - How to pour the epoxy in to the bezel setting - Since the buffing machines are not working, there will be reminders on how to use the steel wool to buff to a near shine. |
|
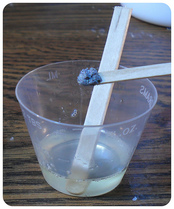
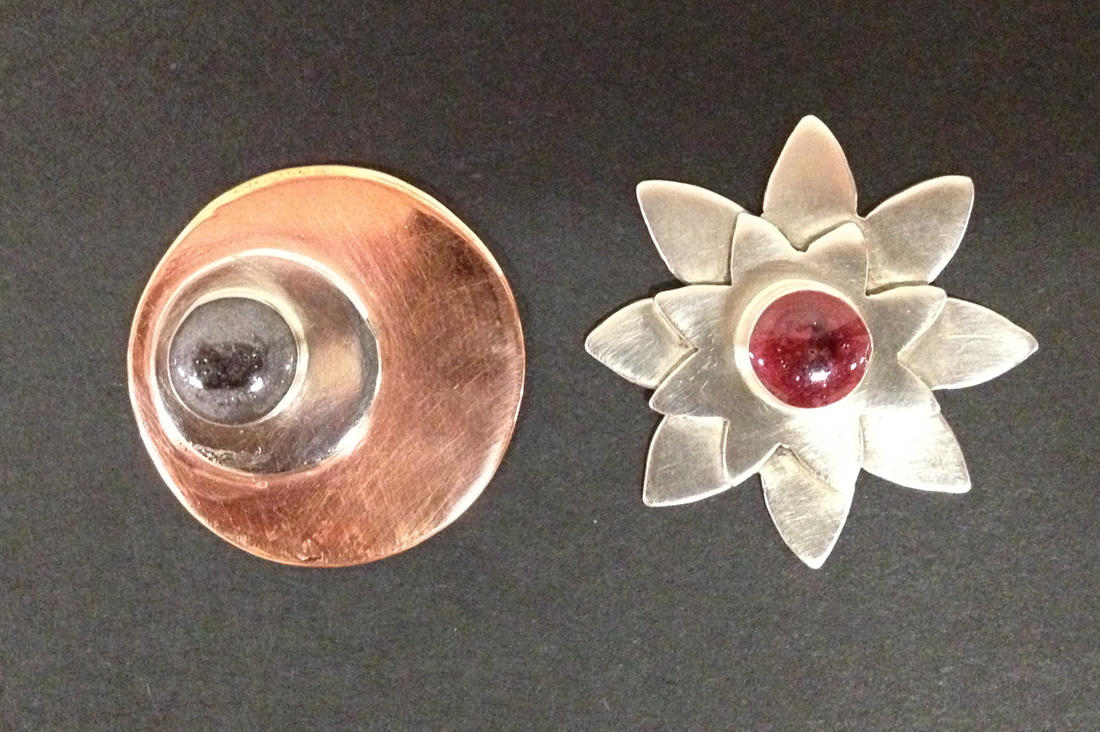
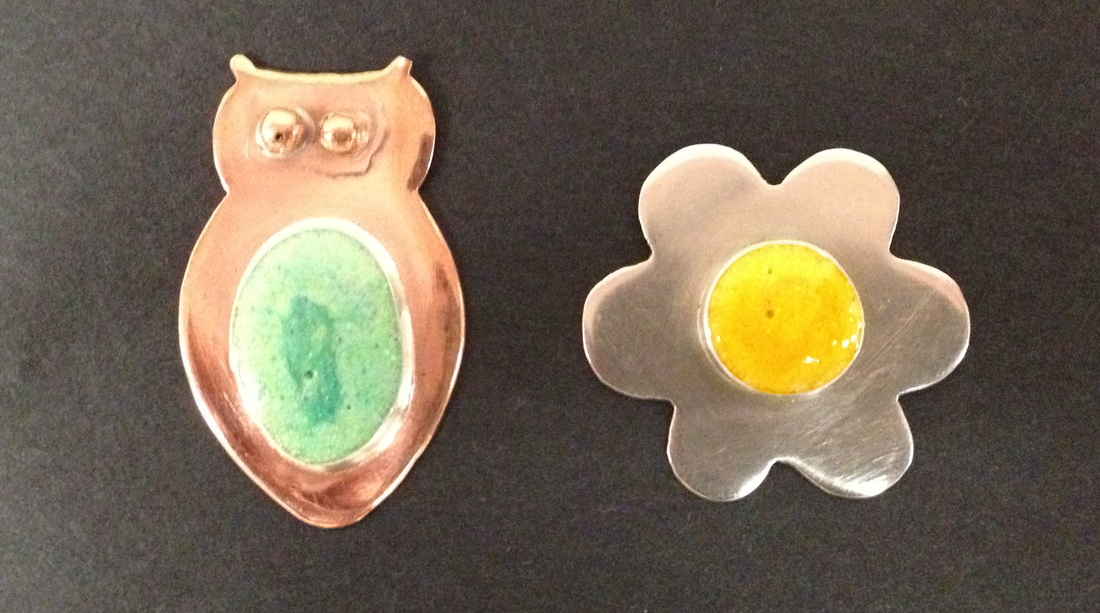
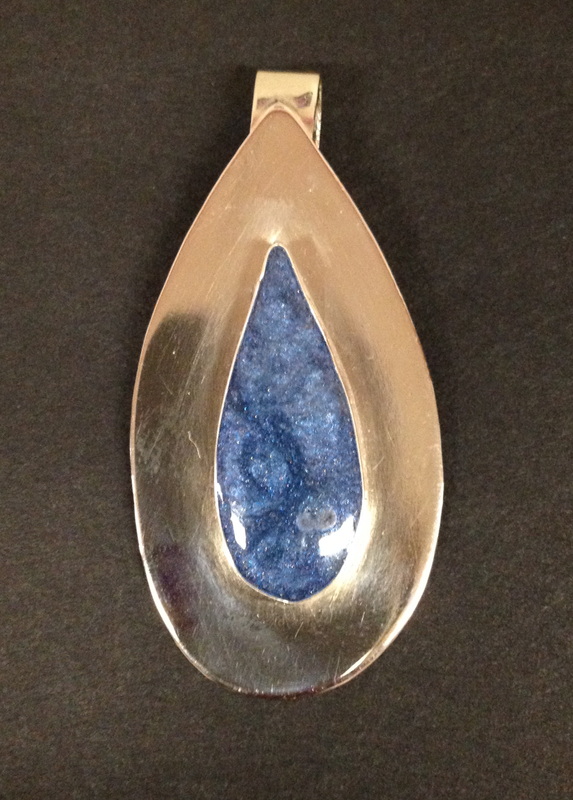
Week 4 & 5 - Bezel SettingsFeb 11-15 (Snow Day Monday)
- AND - Feb 19- 22 (Mid Winter Break Monday & Snow Day Tuesday) Objective: Students will learn what a bezel setting is and how to create one. Students will use design skills to create either two separate pieces of jewelry or one piece of jewelry containing two parts. Either choice must contain a minimum of two bezel settings. Brainstorming: Power Point showing different pieces that incorporate a bezel setting Examples of artwork that have bezel setting Video on how to make a bezel setting Teacher Demonstrations: Demo on how to form the structure of a bezel setting. Demo on how to mix epoxy color mixture Steps: 1. Design artwork 2. Saw the metal in the shape desired. 3. Using bezel wire, cut and shape the wire in the desired fashion. 4. Solder the bezel wire in the same way we soldered our rings. 5. Flatten the shape of the bezel so that the seams are together. 6. Solder quickly as bezel wire melts easily. 7. Reshape the bezel wire using the mandrils to get an oval or circular shape (unless a different shape is desired.) 8. Solder the bezel to the base metal. 9. Add pendant hole if desired. 10. Sand and file the metal. Make sure to file the edges of your bezel so that they are even. 11. Buff and finish your metal before adding epoxy color. 12. Mix up Epoxy color. Add pigment and stir, making sure not to make many bubbles. 13. Pour epoxy color mixture into the bezel to the height desired. 14. Wait 24 hours for epoxy to harden and you have a finished piece. |
|
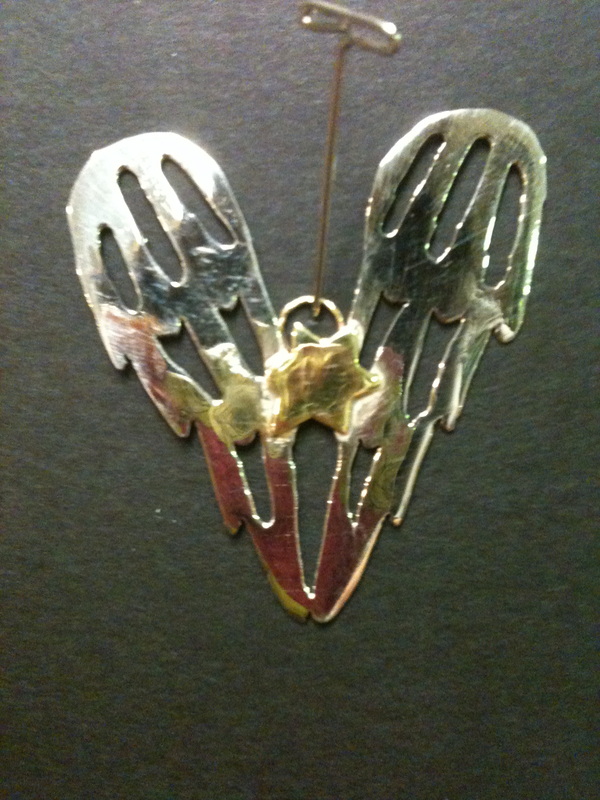
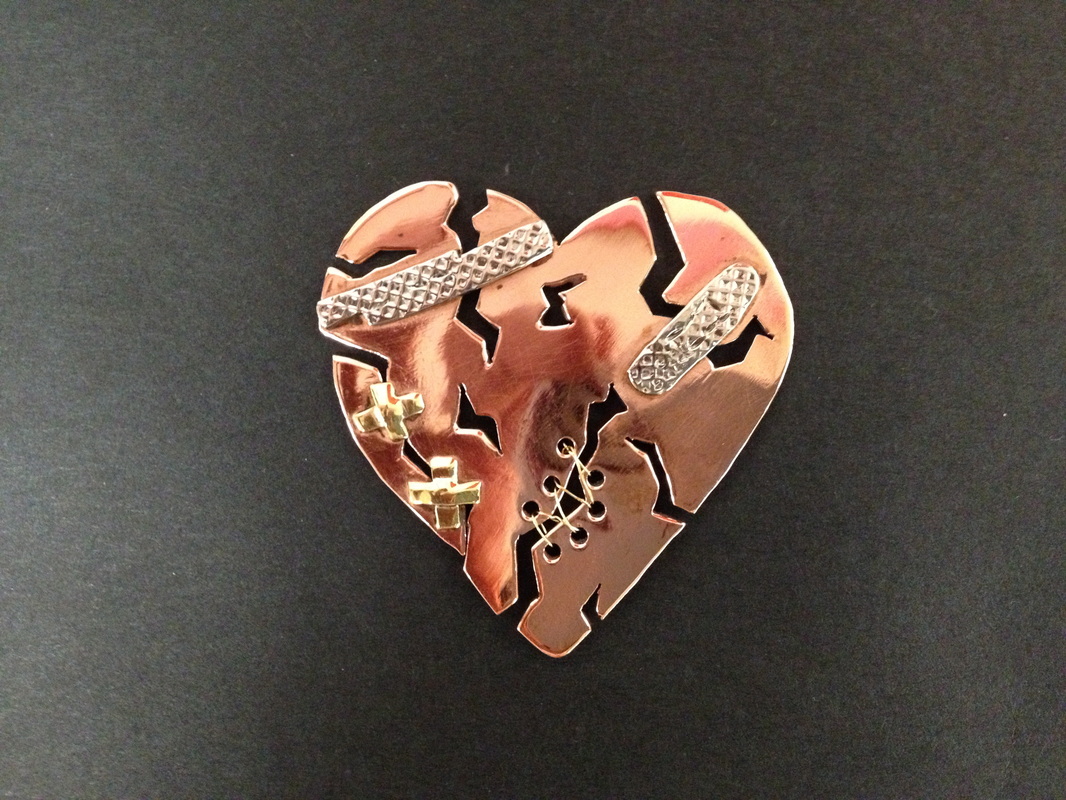
Week 2 & 3- Wrap up Heart Drawing and Begin Heart Pin/PendantJan 28 - Feb 1 (Snow Days Mon/Tues)
AND Feb 4-8 (Snow Day Friday) Objective: Complete Heart Drawing with sufficient design,skill and craftsmanship. Transform one of the hearts into a pin or pendant using design and soldering skills learned from first semester. Brainstorming: The bulk of the brainstorming for this project comes for the heart drawing completed last week. Students will have to somehow transform one of those designs so that it is suitable for a jewelry pin or pendant. So adjustments will have to be made as favorite drawings may not work as a real piece of jewelry unless the design is altered. A Power Point on heart jewelry will also be shown to the class. Teacher Demonstrations: Demonstration review on safety, sawing, and soldering. Materials: Copper/Brass/Nikel Silver sheet metal Copper and Brass Wire Pin Backs/Jump Rings |
|
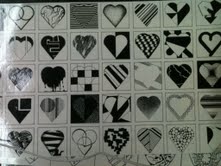
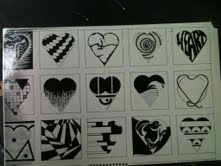
Week 1 - Heart Design
|
|
FIRST SEMESTER
Week 17 - Final Project (10% of overall grade)Jan 7-11
Objective: To creatively/thoughtfully design and make a piece of jewelry that exhibits two design Elements/Principles. Design should be well executed with good craftsmanship. Brainstorming: Students are shown a Power Point explaining the final project. Power Point has visuals which point out different design elements/principles as pertaining to jewelry design. Students are also given time at the computer lab to come up with ideas Students are given a worksheet to complete to develop their own unique ideas. STUDENTS MUST FINISH BY THE DAY OF EXAM (Meaning you have 7 days to complete this project) Steps: Day 1 1. Begin Brainstorming on day one. Use the library for ideas as well as draw out ideas for your work. 2. Get teacher approval for final image. Day 2-3 3. Draw out idea for jewelry and make sure it is well drawn as that is what you are sawing out of metal. 4. If student is sweat soldering, cut out all pieces. Day 3-4 5. File rough edges and to even out edges 6. If you are not soldering, file well and sand well. 7. Add textures where desired. Day 5-6 8. If soldering, begin and finish soldering in one day. 9. After soldering clean metal, file and sand where appropriate Day 6-7 10. Finish the metal. Buff metal or add patinas. PROJECTS DUE NO LATER THAN EXAM DAY. WORTH 10% OF OVERALL GRADE (FINAL EXAM IS COMPRISED OF 10% FINAL PROJECT, 5% BLOG ESSAY, 5% WRITTEN EXAM.) |
|
Week 16 - Independent Project
December 17-21
Objectives:
1. Finish independent jewelry assignments. These assignments should reflect students personal interests in jewelry design.
2. Finish wire wrapping projects
Daily Activities:
This week students are all working on different projects, so there are no group demonstrations. Teacher demonstrations will be one on one. Students will be working on a variety of activities not limited to sawing, filing, soldering, and buffing.
Early Finishers:
For those students who are finished with their independent projects, there will be smaller wire assignments available for the students.
1. They may make holiday jewelry or ornaments
2. They can make wire wrapped rings or earrings as gifts
3. They may work on homework for another class.
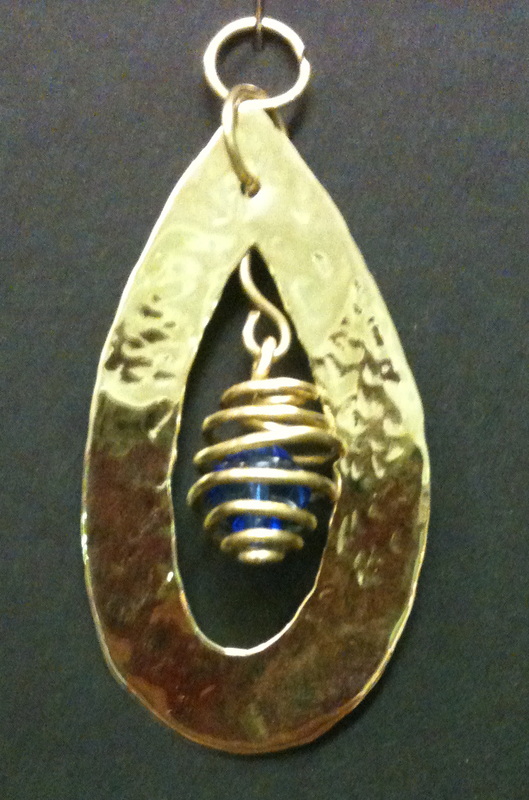
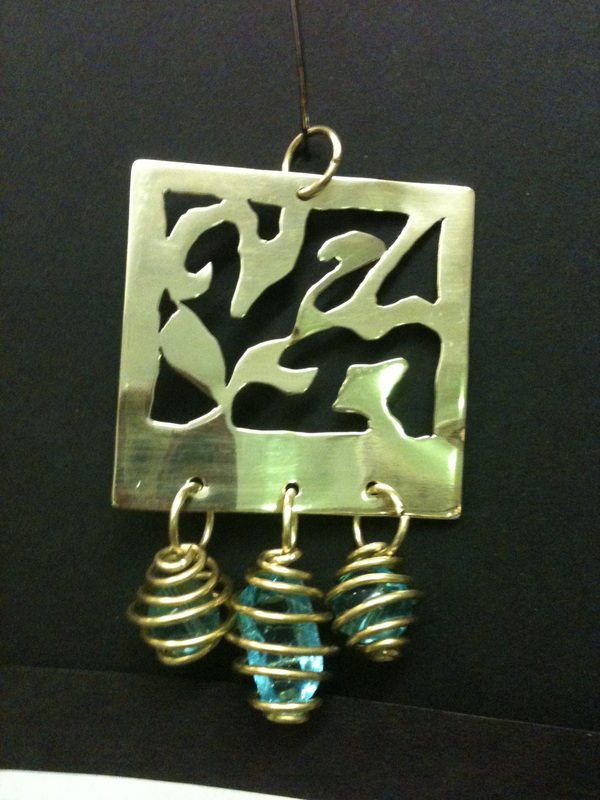
Week 15 - Wire Wrapping TechniquesDecember 10-15
Objective: To learn a variety of wire wrapping techniques which can be applied to various jewelry projects. Brainstorming: Handouts are provided to aid teacher instruction and give students ideas for work. Demonstrations: Daily demonstrations on how to create wire wrapped rings and wire wrap stone pendants. Possible 1-2 day projects include: 1. Wire wrapped rings (create 2 or 3) 2. Wire wrapped stones 3. Creating bead cages for pendants, bracelets and charms 4. Wire wrapped bracelets with stones. 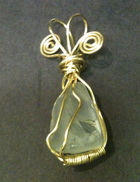
|
|
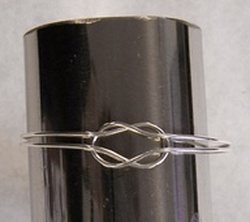
Week 14 - Wire Sailor Knot BraceletDecember 3 - 7
Objectives: 1. Student will create a sailor knot bracelet from copper or brass using knowledge of soldering gained in previous assignments 2. Students will create a piece of jewelry using wire to create a piece of jewelry of choice. May or may not involve soldering. Brainstorming: Teacher examples of work. Demonstrations: Step by step demonstration of how to construct the sailor knot bracelet. Individual demonstrations on how to create the free choice project. Steps for the Sailor Knot bracelet: 1. Measure out 2 pieces of 12g wire that are 6" in length 2. Bend each piece of wire in half and gently hammer with the rawhide hammer to bring wire together. 3. Bend each piece so it has an arch. 4. Interlock to two halves together and pull tight. 5. wrap wire together with soldering wire. 6. Solder the knot. 7. Solder the bracelet wires. 8. File edges, sand the residue, use steel wool, buff to finish. |
|
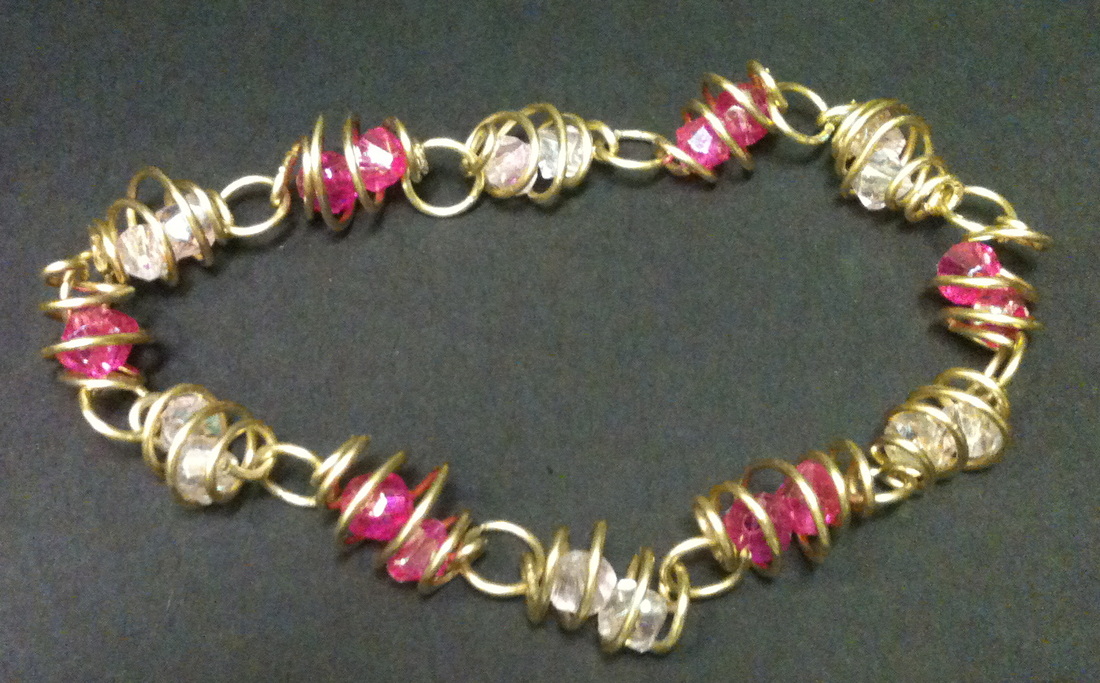
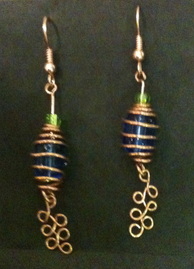
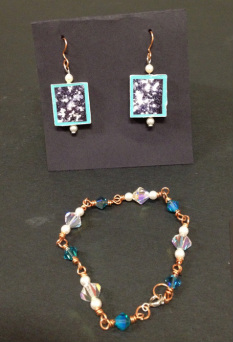
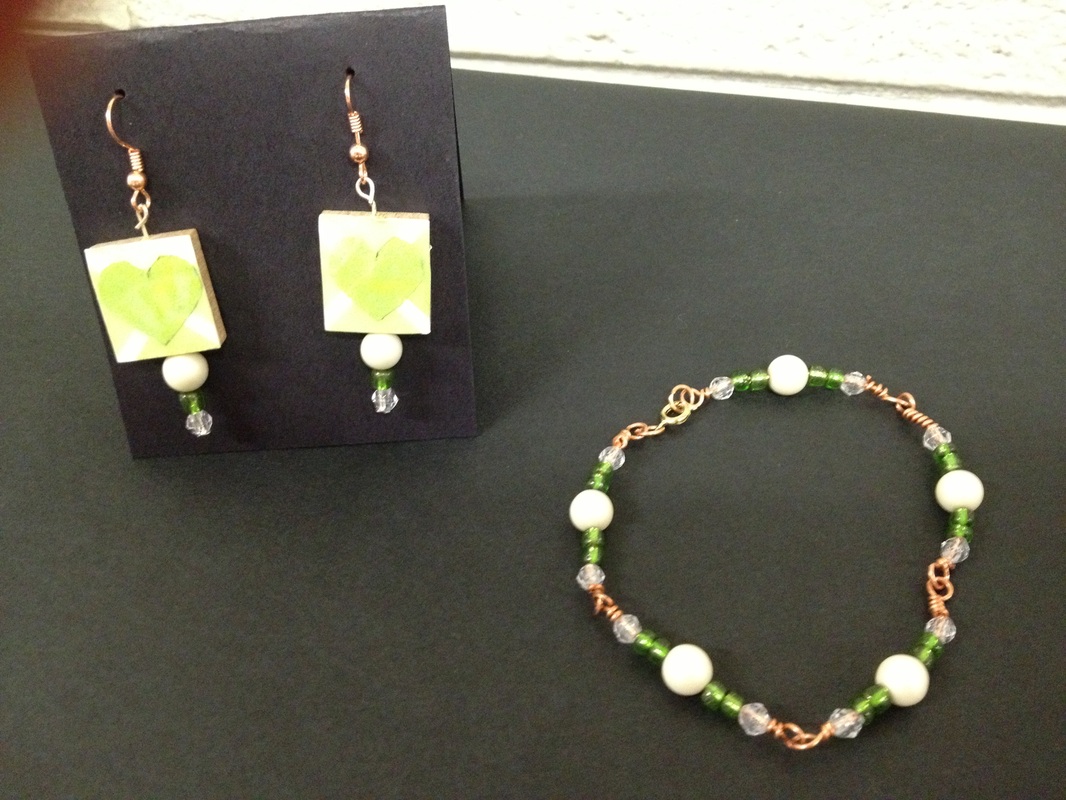
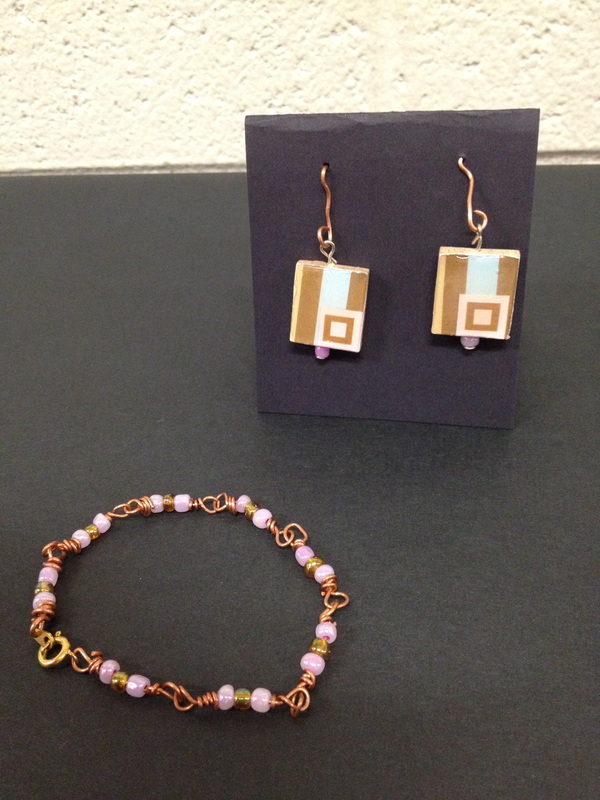
Week 13 - Scrabble Earrings and Matching BraceletNovember 26-30
Objective: 1. Students will use Design Principles to create a set of matching earrings and a bracelet using wire, beads and Scrabble letters. Brainstorming: Power Point of different examples of Scrabble jewelry and wire wrapped bead bracelets. Student examples of work. Demonstrations: How to search for papers to apply to Scrabble tile. How to add papers to the Scrabble letter and use Diamond Glaze. How to drill holes and add beads to earrings. How to use round nose pliers to create wire wrapped beaded bracelet. Steps: Earrings 1. Decide the theme or look of the jewelry. (Purchase own beads if necessary) 2. Look through papers or bring in own papers 3. Use Modge Podge to glue paper to Scrabble letter 4. Let dry and cut excess paper with Xacto knife 5. Add other layers of papers with Modge Podge 6. Add Diamond Glaze when dry. Any plastic gemstones can be added at this time. 7. Glue on jump ring at top of earring. 8. When dry, drill holes and add beads using eye holes. 9. Finish with ear hook Bracelet: 1. Take copper/brass wire (20g) and make an eye hole at the end and wrap excess wire in manner desired. 2. Add 1-3 beads in desired manner 3. Finish with an eye hole and wire wrap. 4. Begin next eye hole by looping the wire into the previously finished eye hole. 5. Repeat steps 1-3 until bracelet is as long as wanted. 6. Finish with a jump ring and clasp. |
|
Week 12 - Art Reflection Blogs and Wire WrappingNovember 19 & 20 (Thanksgiving Week)
Objectives: 1. Students will begin their quarterly "Reflection Blog Posts" and reflect upon their growth in class to date. 2. Students will learn basic wire wrapping techniques and form a basic shape (a heart or shape of choice) from wire that has been wrapped with wire and beads. This technique can be applied to future work. Brainstorming: Examples of wire wrapping projects are available. Students will sketch out basic idea for their shape and design. Demonstrations: Teacher demo on the different ways to approach this simple method of wire wrapping. Teacher demo on how to pound the wire flat if students desire that look. Steps: 1. Measure out 8.5 inches of 16 or 18 gauge wire. 2. Measure out 4ft of 20 or 22 gauge wire. 3. Decide the shape you want to make (most will make hearts) 4. The end of the heart must have some decorative shape or element to it. (Swirl, spiral, beads) 5. Begin wrapping the 20g wire around the 18g wire in tight loops, leaving no gaps in-between. 6. Continue to do so until nearly the entire length of the 8" wire has been wrapped. 7. Snip off ends of the wrapped wire and use plier to "smoosh" ends in. 8. Bend the wire to form the desired shape (heart.) 9. Wrap the wire around to secure the form. 10. Finish or polish with lemon juice BLOG POST: Click on the file below for directions to the Quarter 1 Jewelry Blog Post. |
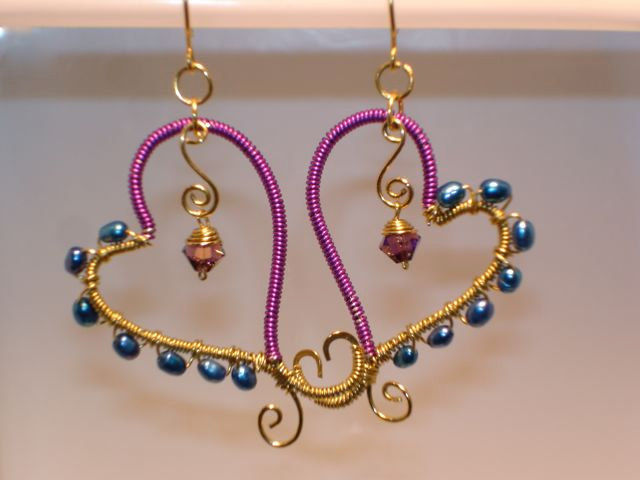
Variation of the assignment from Etsy.com
|
| quarter_1_reflection_blog.pdf |
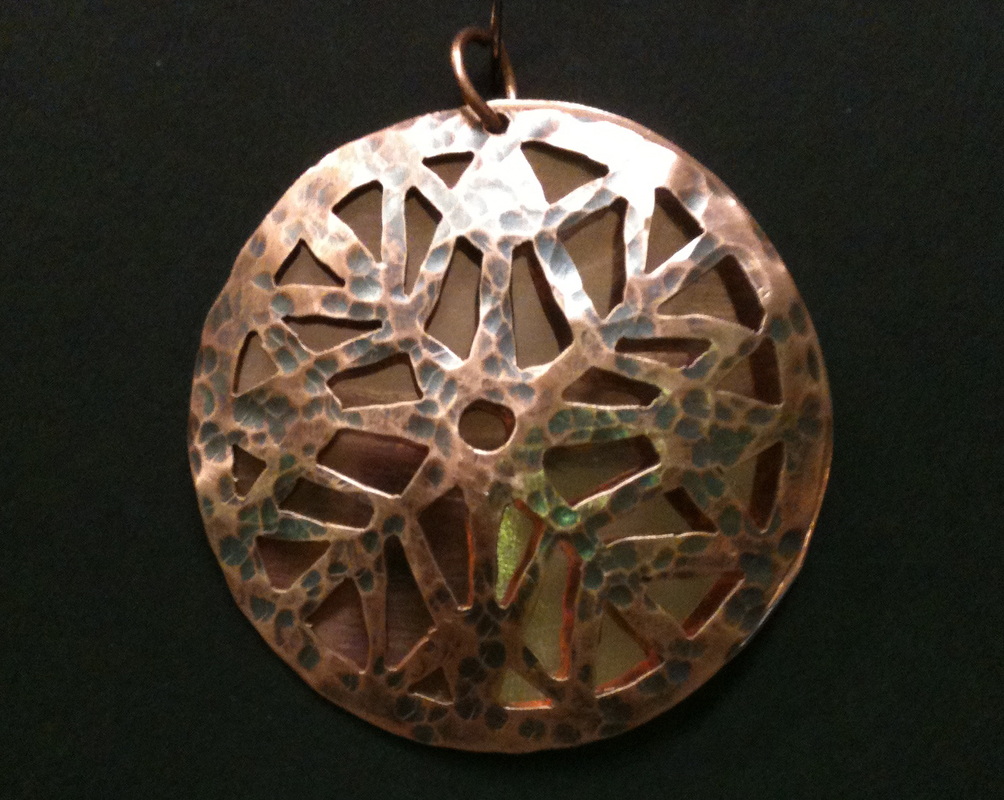
Week 11 - Nature Pendants and Independent ProjectsNovember 12 - 16
Objectives: To create a pendant based on something found in nature.To apply materials, techniques, and processes with sufficient skill, confidence, and sensitivity that personal intentions are carried out in artworks. To hone in on design, sawing and finishing skills Demonstrations: How to safely use the Fordom tool to polish and add texture. How to use head pins and eye pins to add beaded charms Students this week will be wrapping up their nature pendant designs. Some students are doing more complex designs so they are taking longer and will be given more time. The students who finish early will work and make headway on their independent jewelry projects. |
|
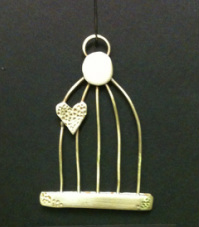
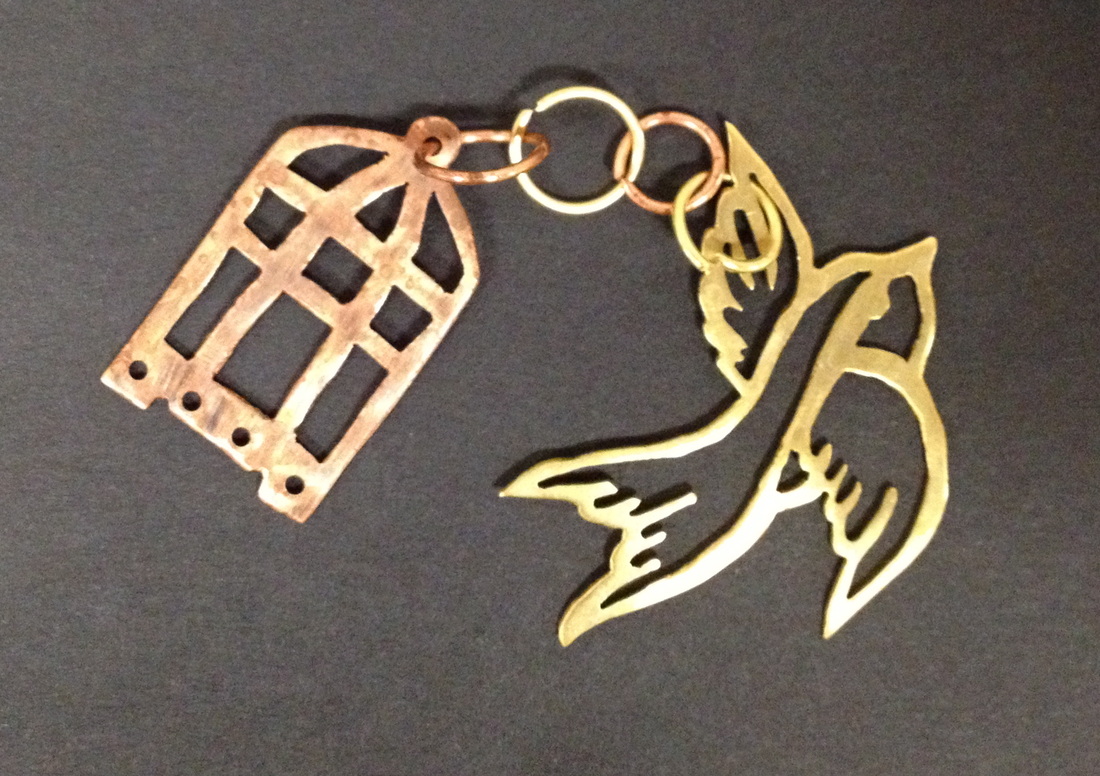
Week 10 - Nature Pendant with CharmsNovember 5-9
Objectives: To create a pendant based on something found in nature. To apply materials, techniques, and processes with sufficient skill, confidence, and sensitivity that personal intentions are carried out in artworks. To hone in on design, sawing and finishing skills Brainstorming: Students will go to the computer lab to look at various images and print up 3 ideas for their own work. It is stressed that students should NOT COPY other artists work but use it as a frame of reference for their own ideas. Click on the file below for brainstorming handout given to students.
Steps 1. Gather Ideas 2. Draw sketch for overall combined charm pendant and turn in for credit 3. Draw out individual shapes for the pendant so that it can be glued down to metal and sawed out. 4. Solder if necessary. 5. Add texture if necessary 6. File, sand and finish metal. (Buffing is not necessary if sanding is done well.) 7. Combine using jump rings 8. Bring in own chain or combine with black roping. |
| ||
Week 9 - Complete Ring Design and Work on Independent ProjectsOctober 29 - November 2
Objectives: Students will create 2 different rings that showcase their design skills, their creativity and metalsmithing skill. Students will become more comfortable with the soldering process and learn to basic to intermediate soldering skills. Students will develop their own creative thinking skills buy coming up with a jewelry project of their choice. Teacher Demonstrations: Reminder demonstration on the proper use of the torches at the soldering stations. - Red = Gas - Green = Oxygen - What the flame should look like - What the torch should sound like - The difference between soldering and sweat soldering - The differences between the Solders (easy, Medium, Hard) - How to turn off the torch properly See Week 8 Lessons on Ring Design. Students should have rings completed by Tuesday. Students will turn in their best ring of the two for evaluation. When students have completed both rings, they should get out their Independent "Free-Choice" projects and make good headway on those. Independent work should fall into the realm of things students know how to make given what we have already learned in class so far. |
|
Week 8 - Ring Design and Independent Projects
|
October 22-26
Objective: Students will create 2 different rings that showcase their design skills, their creativity and metalsmithing skill. Students will become more comfortable with the soldering process and learn to basic to intermediate soldering skills. Brainstorming: Students will draw out 3 different ideas for a sweat soldered ring. Power Point was given last week to show examples Teacher Demonstrations: Demo on how to file down uneven edges of the ring where it was soldered together Teacher emphasis on creativity and not just creating something simple and easy Teacher explanation of the differences and uses for Easy, Medium and Hard solder Steps for Ring #2 1. Measure your finger for ring size. 2. Double check ring size by cutting out strip of paper and trim to the widest part of your finger. 3. Trace the length of that paper on your graph paper and start designing your ring in that space. 4. Ring band may be more creative this time and not just straight across 5. Think about an interesting shape to sweat solder onto the ring. * Design can go all the way across the ring or just sit on top of it. * Design can extend beyond the edges of the ring as well. 6. Solder design onto ring with Medium solder 7. Bend ring so that edges touch with no gaps. 8. Solder with Easy solder 9. File uneven edges and sand off scratches 10. Buff |
|
Week 7 - Ring DesignOctober 15-19
Objective: Students will create 2 different rings that showcase their design skills, their creativity and metalsmithing skill. Students will become more comfortable with the soldering process and learn to basic to intermediate soldering skills. Brainstorming: Students will draw 6 different ring design possibilities. Three designs for each ring. Ring 1: Must have a negative shape cut out of it. It may be a simpler ring but could include texture or be a shape other than straight across. Ring 2: Must have a sweat soldered element to it. Can use wire or another metal to for sweat soldering. Student should try to challenge themselves on the shape of the ring and not settle for a simple rectangular band. Example drawings will be provided. Teacher Demonstrations: Teacher will demonstrate the soldering process as applied to rings. Things to remember when soldering: ALWAYS REMEMBER SAFETY!!!
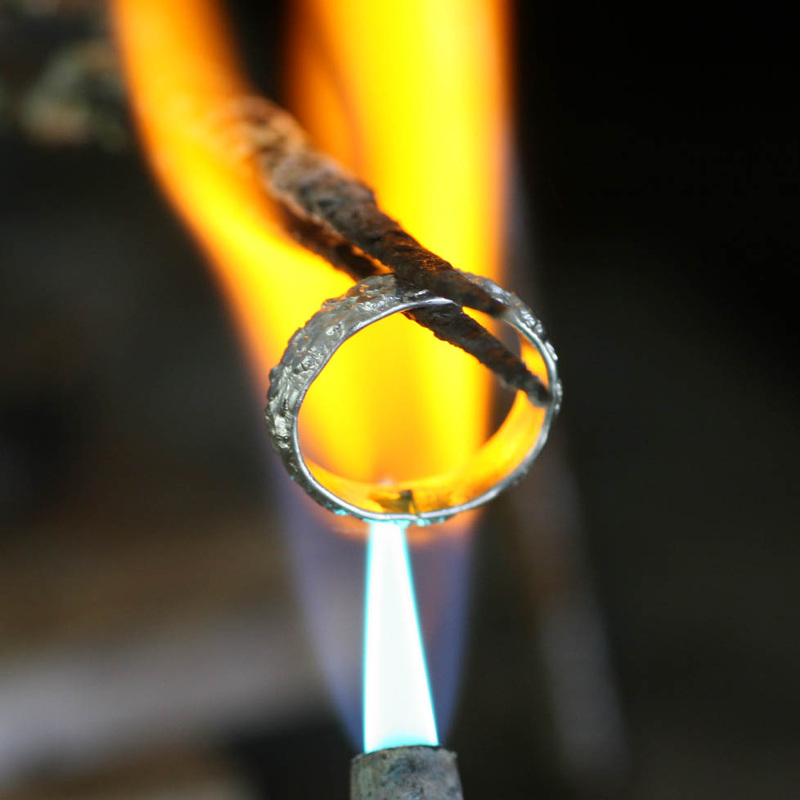
Three Tips for Soldering
|
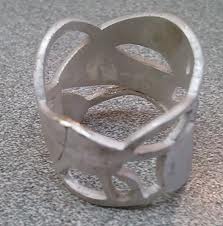
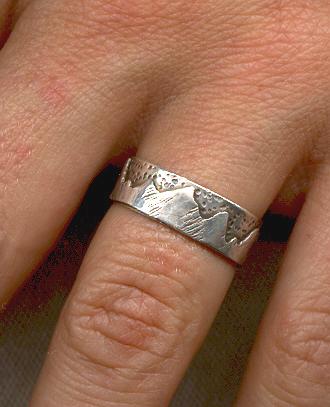
Ring with negative shapes cut into it.
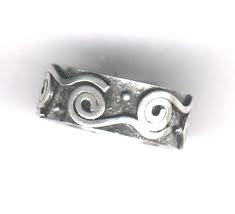
Sweat soldered ring
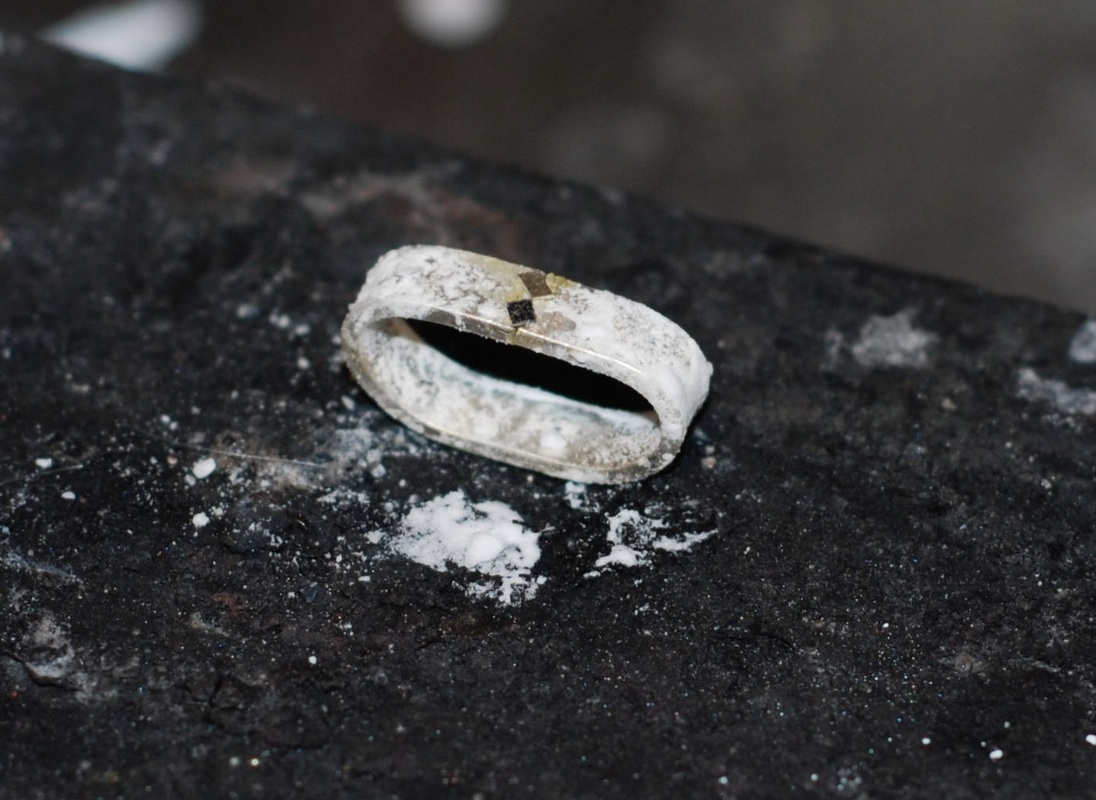
Flatten ring so that edges of metal touch with no gaps.
|
Steps for ring #1:
1. Measure your finger for ring size.
2. Double check ring size by cutting out strip of paper and trim to the widest part of your finger.
3. Trace the length of that paper on your graph paper and start designing your ring in that space.
4. Do not design your ring so that negative spaces are cut too close to the edge of your metal. This is asking for disaster.
5. Get creative and don't use easy images that first pop into your head. (Hearts, stars, peace signs, etc..)
6. Show the teacher ALL of your WELL DRAWN ideas. If it is sloppy - I won't look at it and you won't get metal to begin the project.
7. Glue on metal and saw out design.
8. File edges (sand/buff later)
9. Anneal the metal and then hammer the ring so that edges join together for soldering.
10. Solder metal
11. Sand metal using low to high
Week 6 - Independent Projects and Wrap up Texture Bracelets
October 8-12
Objective:
Students will strengthen their jewelry skills by creating self driven works. The independent project allows students to work on areas of interest while guided by the teacher.
Brainstorming:
Students went to the computer lab to gather images and ideas for a project of their choice.
Students need to modify these images to create a work of their own to suit their ability levels.
Teacher Demonstrations:
No group specific demonstrations will be given, but rather more one on one work with the students to help them achieve their goals.
Projects will not be completed with in the week. This is a semester long project that students will work on here and there while other students are finishing up work.
Steps:
1. Discuss idea with teacher and get approval
2. Work out design on paper
3. Decide metals to use
4. Begin sawing process
Texture Bracelet Wrap-up
1. Focus on sweat soldering the dominant design.
2. SANDING and STEEL WOOL to finish!!
3. Add Liver of Sulphur patina and buff if desired.
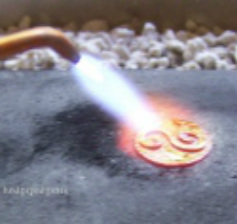
Week 5 - Continue with Texture BraceletsOctober 1-5
Objective: Students will hone in on craftsmanship skills. Filing and sanding are stressed more than in the first assignment Students will be introduced to the soldering process and the safety precautions that must be followed. Students will learn and understand the vocabulary associated with metalsmithing and soldering. Brainstorming and Learning: Students may be at various stages in the project, but by Monday students should be wrapping up the sawing process. Then filing and sanding begins. Students need to understand that filing and sanding is just as important as sawing the metal. Teacher Demonstrations: (This may be spread out into next week depending on student progress.) 1. Filing and sanding properly. File away from the handle and use pressure to cut away uneven metal. 2. Adding texture to metal by using stamps and hammers 3. Learning to use the Dapping Block to add shape if desired 4. How to saw and cut jump rings to connect the bracelet parts 4. Soldering. SAFETY FIRST Wear proper eye wear and tie back hair and loose clothing, How to turn on gas and light torch. Where to turn off gas in case of emergency. What is solder and how to do it. How is Sweat soldering different from regular soldering What is Pickle and how to use it properly What is Oxidation What is Annealing |
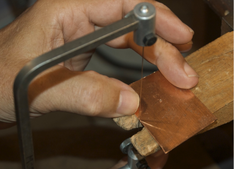
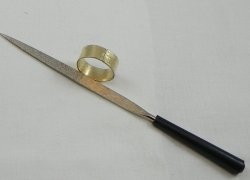
Jewelers saw to cut metal
Sweat Soldering
|
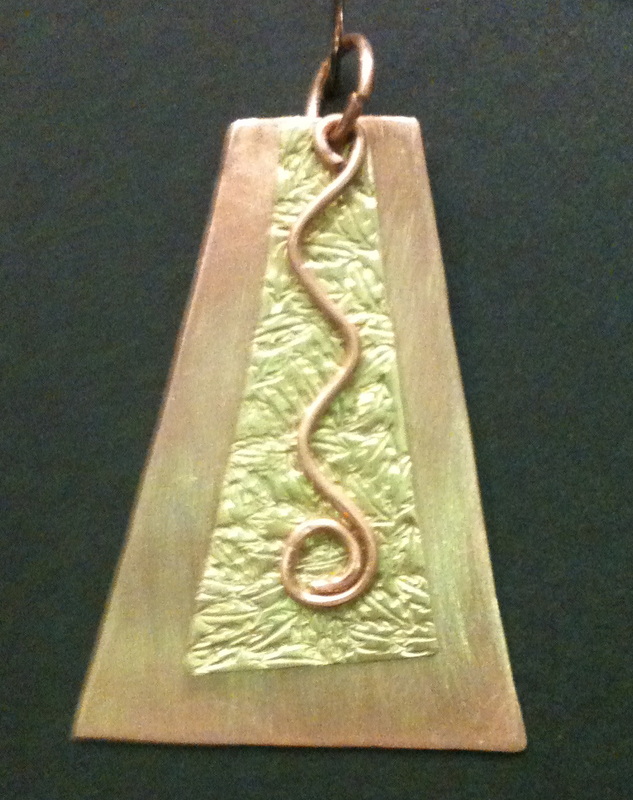
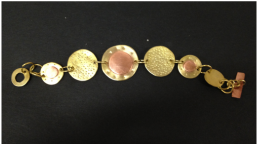
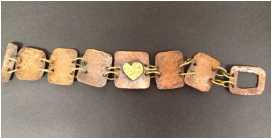
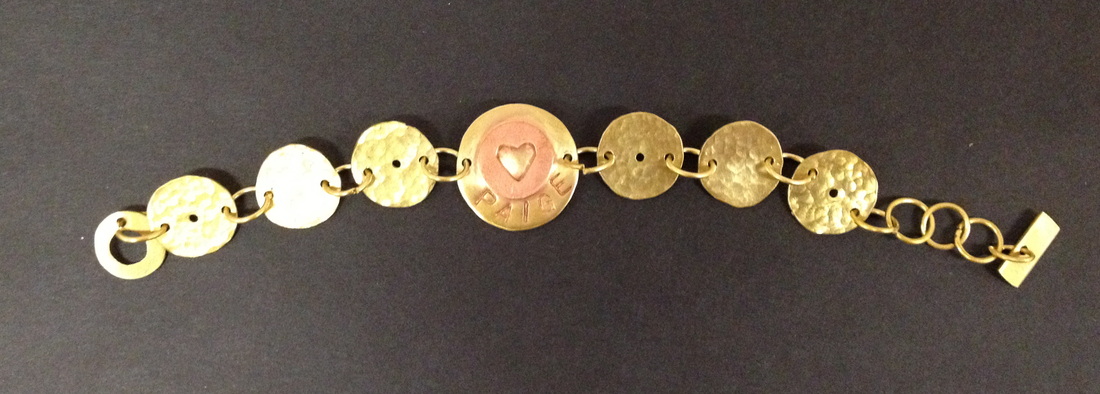
Week 4 - Principle of Design Texture BraceletsSeptember 24-28
Objective:
Students will design and create a bracelet using knowledge gained in the previous assignment about the Elements of Art and the Principles of Design. Students will design a bracelet which shows Dominance, Texture, Line, Shape, Pattern. This project will combine saw piercing, wire bending, creating a pattern around a bracelet and they will learn to "sweat solder' metal onto metal. This project is projected to take 2 weeks to complete as it combines many different metalsmithing techniques that can be used in future lessons. Brainstorming: 1. Start with the Dominant shape. What do you want it to be? (A letter, a symbol, a shape) 2. Draw it out. 3. How could you repeat these shapes to create a pattern for the rest of your bracelet? Draw the pattern . Teacher Demonstrations: * Review on sawing metal * Review on filing and sanding * Introduction to soldering, the supplies used when soldering and safety * Demonstration on applying texture to metal * Demo on sawing jump rings * Demo on finishing metal (either buffing, sanding or adding a patina) |
|
Steps:
- Draw 3 designs on paper and turn in for 10 points.
- Glue the different parts of the design on paper with glue stick and saw out your bracelet pieces.
- File the edges of your metal so that nothing is sharp and sides are even.
- Solder your design onto the dominate shape.
- Clean the metal and the base before soldering.
- Place the cut metal design onto the dominant shape of the bracelet and solder it onto the surface.
- Quench in water and place in pickle.
- Work on adding textures to the various other pieces of your bracelet.
- Experiment with scrap metal to see what textures you can create.
- Experiment with the dapping block to add a rounded surface if desired
- Saw jump rings and link to combine the bracelet parts.
- Finish the surface by sanding (a must.)
- Either finish to a high polish or use a liver of sulfur to emphasize your design. Only if you do not choose to high polish.
Week 3 - Principles of Design and Intro to the "Independent Project"
September 17-21
Students this week are also continuing to finish up their Balanced Pendants.
|
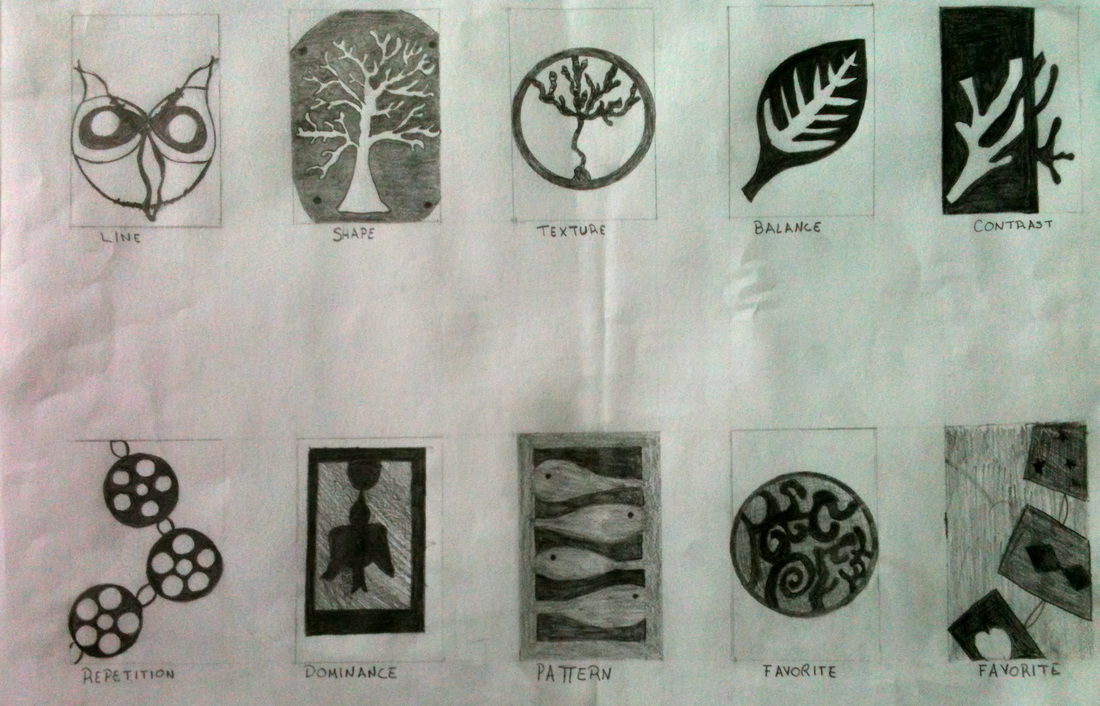
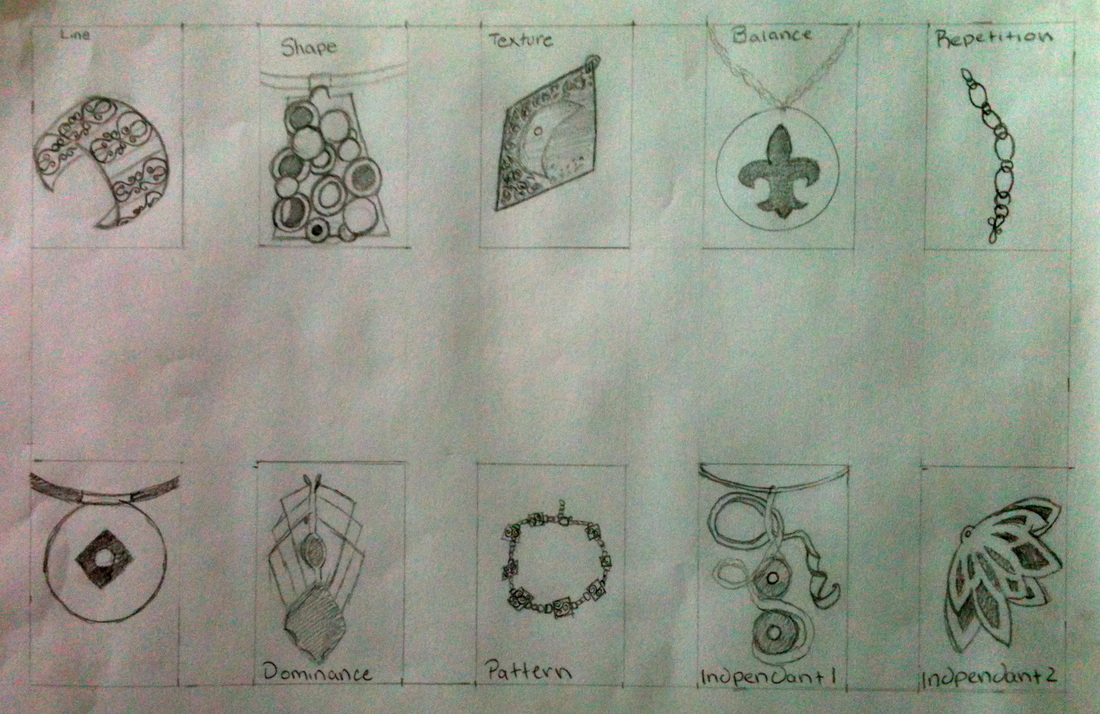
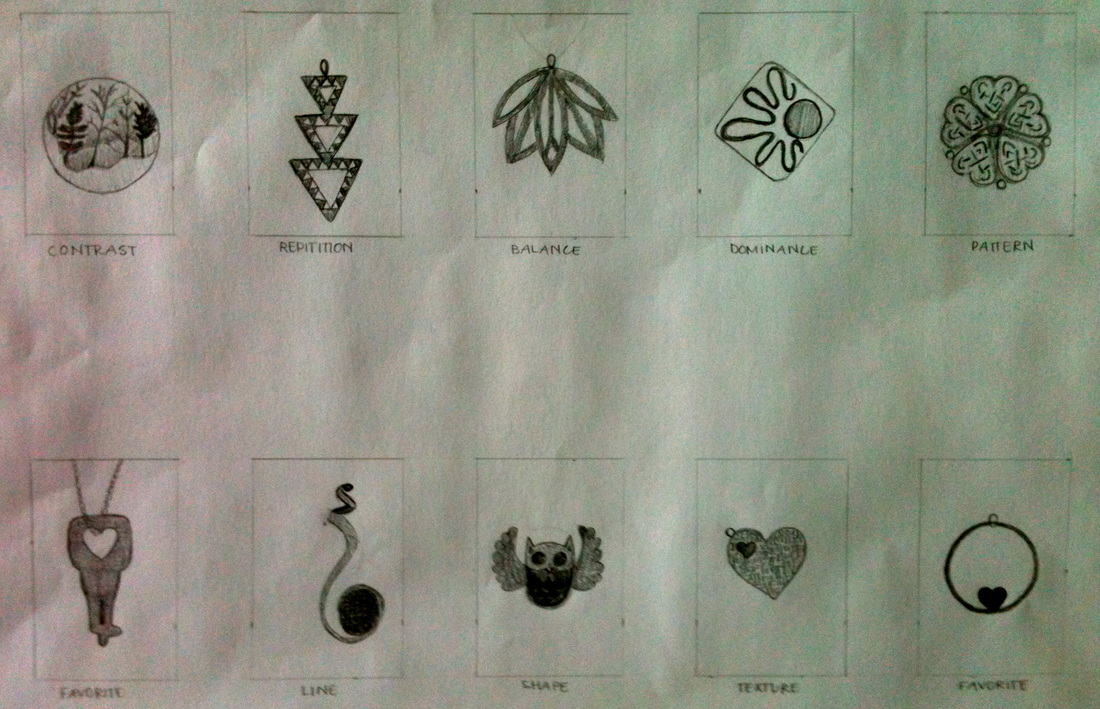
Objective:
Students will learn about the different Principles of Design and Elements of Art and how to apply those principles to their own artwork. Students will strengthen their drawing skills by drawing examples of jewelry that exemplify the design principles. Brainstorming: * Power Point on the different Design Principles and how they are applied to jewelry examples * Computer Lab to gather images of jewelry that exemplify the design principles. * Teacher example of the project * Instructions for Lab. Demonstrations: * Demonstration on acceptable drawings for the project Steps: * After gathering images for drawing, students will measure out paper so that 10 even boxes fill the page. * Label each box for the different elements and principles (Pattern, Repetition, Dominance, Contrast, Balance, Line, Shape, 2 favorites) * In each box carefully draw the jewelry that exemplifies the design principle. * MAKE SURE TO DRAW EVEN LINES AND CIRCLES THAT ARE CIRCULAR. SLOPPINESS NOT ACCEPTED. ** INDEPENDENT PROJECT** Students are to look up and turn in an idea for an independent project. This project will be an ongoing project though out the semester. Students will work on this project when they have finished up their work early. Please see the attached document for further instruction. Click here for the Independent Project Guidelines. |
|
Week 2 - Balanced Pendant
September 10-14
|
Objective:
To design and create an original pendant using the Principle of Design "Symmetry." What are Symmetry and Balance? Students will learn the basics to piercing and cutting metal with a saw, cutting negative shapes, filing, sanding and buffing. Brainstorming: * Students are given 12 shapes to fill with "half designs." These designs need should be creative and original and include at least 1 negative shape. Designs need to touch the outside edges of the shape. * Once 12 designs are finished, student chooses top 3 to finish and draw the other half of the design to create symmetry. Design sheets are turned in for credit. Teacher Demonstrations: * What is and how to use a bench pin. * How to saw metal properly * How to insert a saw blade into saw properly * How to use the drill press * How to file properly * How to sand properly * How to buff properly Steps: * After finishing final design, glue the design onto sheet metal with glue stick * Use drill press to get starting holes in negative shapes * Cut negative shapes first, as it is easier * Cut outside shape of metal * File edges of metal so that edges are smooth and rounded and EVEN. * Sand so that scratches are gone and metal is shiny * Sand the edges of metal so that saw marks are gone. * Use steel wool for further finishing * Using Buffing machine to add shine. |
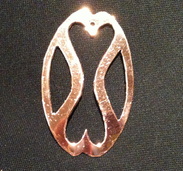
Examples of student work. |
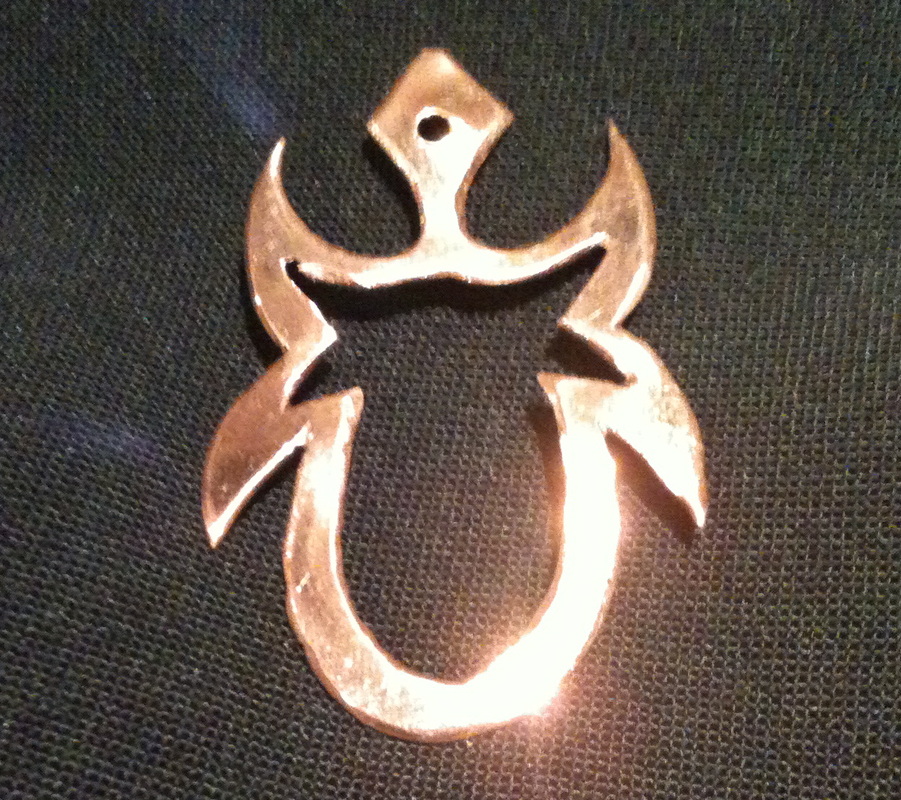
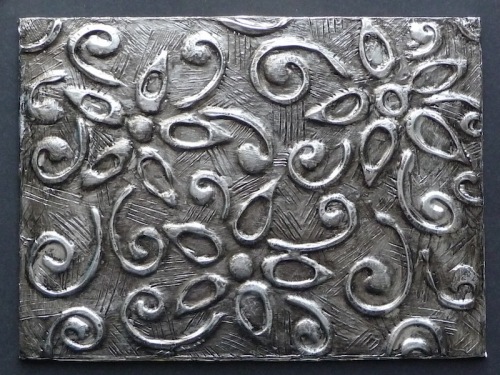
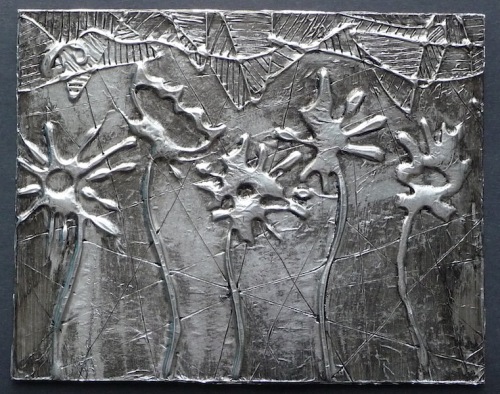
Week 1 - Art Nouveau Tiles
September 5-7
|
Objective:
Students will learn about the art movement Art Nouveau and how it connects to jewelry design. Students will also design and create a tile that is Art Nouveau inspired. Brainstorming: Power Point on Art Nouveau Hand outs of Art Nouveau design ideas. Sketch out 2 design ideas for tile. Teacher Demonstrations: How to draw out images How to apply glue How to apply foil and get in edges How to apply polish for a patina look. Steps: After approved sketch, students draw out final design Students use glue to trace over design Let glue dry Apply glue stick over dried glue design Apply back side of foil over glued design Use q-tips to press into design and Students will create a raised relief tile using pencil, glue and foil. Design should refelct Art Nouveau imagery. Start with 2 sketches. Final drawing must be approved. |
artclubblog
artclubblog
|
