In art class it is perfectly normal for students to work at different paces. Some students finish up earlier than others and some students take more time. Please allow for some flexibility on dates, as I am flexible with my students and try to meet their individual needs. Generally speaking, students have a 2-3 day rolling deadline to finish up projects. Sometimes after introducing a new project I will still have students finishing up the previous one. This is normal.
Lessons are subject to change if I feel a change is in the best interest of the class.
Click here for State of Michigan Standards and Benchmarks for Art Education
Lessons are subject to change if I feel a change is in the best interest of the class.
Click here for State of Michigan Standards and Benchmarks for Art Education
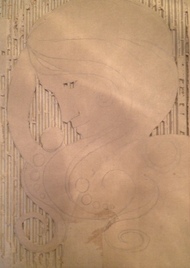
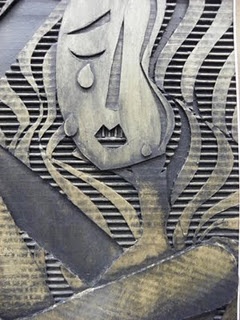
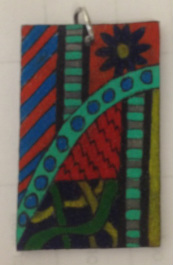
Week 18 & 19 - Tissue Paper WindowsMay 26 - 30 -AND- June 2-6 Standards: Standard 1: 1,2, Standard 2: 1,2,4,5 Standard 3: 1,5 Standard 5: 4 THIS PROJECT COUNTS AS 50% OF YOUR FINAL EXAM GRADE Objective: Students will learn about the design movement associated with Tiffany Glass and create a "window" design of their choice using design principles learned in class. Brainstorming: Power Point about Tiffany Glass and examples of Tiffany Glass Chromebook to look up images and develop ideas Examples of the project Teacher Demonstrations: How to draw out image so that it is appropriate for a cut paper design. (Leave border around paper and all lines must connect to the border.) How to transfer image drawn on white paper to the black paper How to cut out paper using the exacto blades |
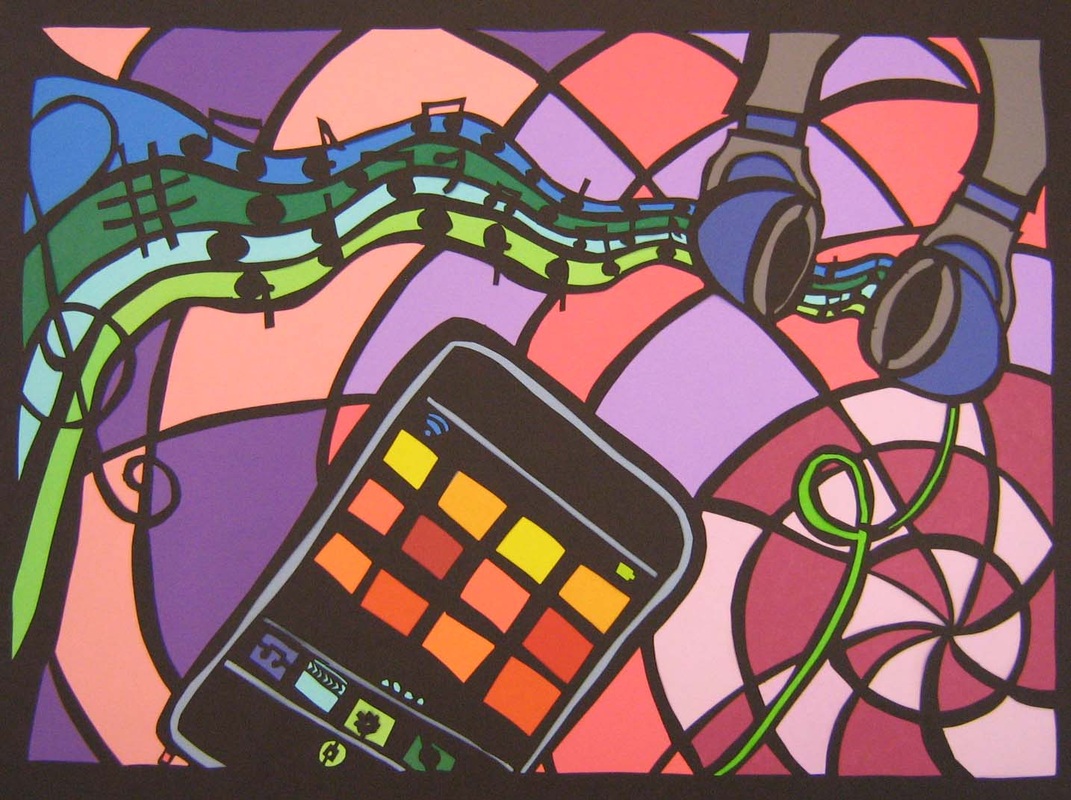
Photo taken from Art Room Online: Ms. Johnsons Art Room. Click on picture to get to her site.
|
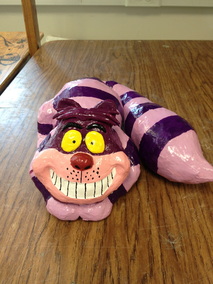
Week 15, 16 & 17 - Paper Mache CreaturesMay 5 - 9
May 11 - 15 May 19 - 23 Standards: Standard 1: 1,2,3,4 Standard 2: 1,2,4,5 Standard 3: 1,4 Objective: Students will learn to create a paper mache creature of their choice using prior knowledge of sculpture skills learned earlier in class. Brainstorming: Power Point on different types of creatures that can me made using paper mache (realistic or imaginative.) Chromebooks to look up inspiration CLICK HERE FOR POWER POINT Teacher Demonstrations: There will be many demonstrations over the course of the week that cover the following: * How to create a basic skeletal form to work from using wire, paper and tape. * How to use newspaper to bulk up body and build muscle tone if desired * How to tear the paper small and apply glue to form so it can harden * How to add details once the form has hardened. * Stress the importance for small pieces and lots of layering so it does not look like a lumpy 4th grade paper mache project. edit. |
|
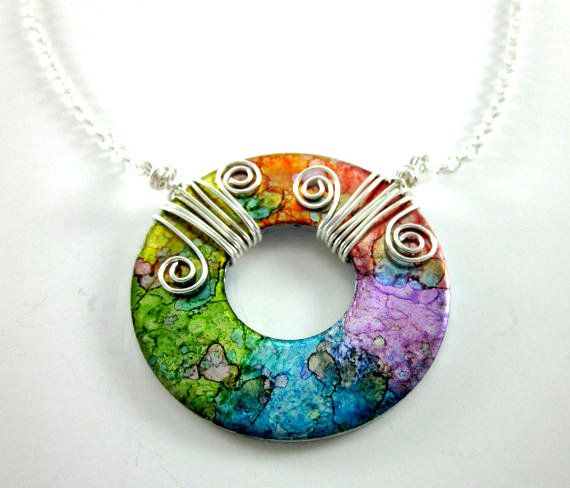
Week 13 & 14 - Wire Wrapping
|
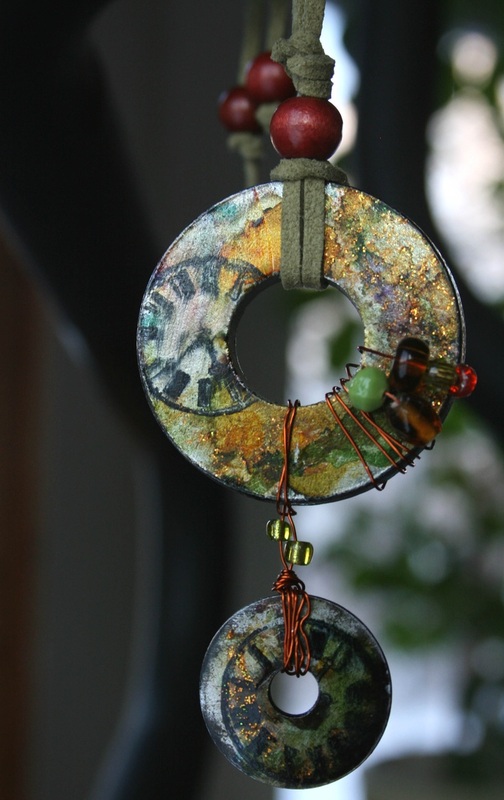
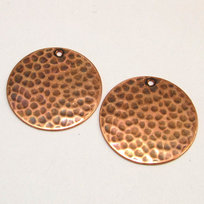
Tutorial and Images for "Washer Pendants"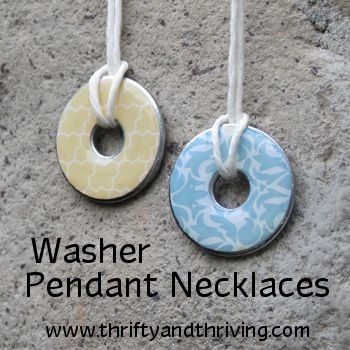
Click the picture for the tutorial
|
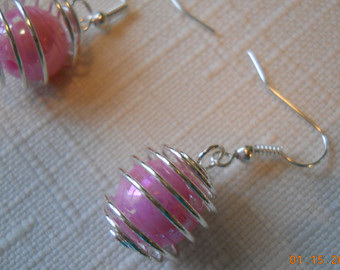
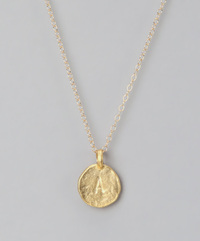
How to make a bead cage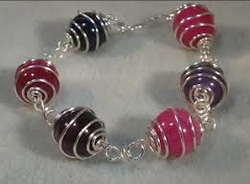
Use about 4-6 inches of wire to make a bead cage. Some beads will take less wire and some more. But make sure you cut the same amount of wire for the same bead for the second cage.
You also don't have to spread out the bead cage as shown above. It can be consistent like this pic too.
|
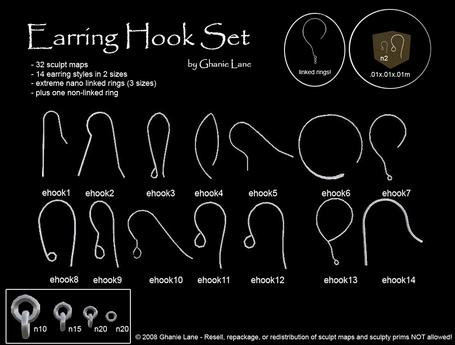
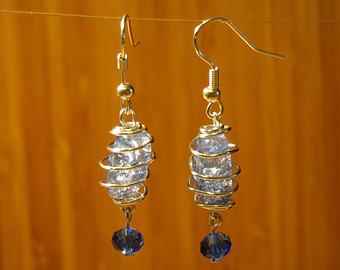
How to make earring hooks.
|
Bead Ring TutorialsSimple Bead Ring Click the link Below
|
For the second video go to the 9:50 min mark to learn how to make a 3 bead ring. |
Week 12 - Plaster SculptureApril 14 - 17 (Good Friday off)
Standards: Standard 1: 1,2 Standard 2: 1,2,3,4 Standard 3: 4 Standard 4: 1 Objectives: 1. Students will learn about the artists Jean Arp and Henry Moore and use their work as inspiration. 2. Students will learn the process of creating "Subtractive Sculpture." 3. Students will design and finish their own creative subtractive sculpture. Brainstorming: Power Point of images from famous artists as well as other examples Past student work as examples Chromebook for inspiration and images Teacher Demonstrations: Demo on how to mix the plaster into their own containers Demo on how to start carving. Demo on how to use and clean the different tools. Demo on how to sand and finish Steps: 1. FInd images for inspiration, but do not try to replicate. 2. Discuss options for beginning. (Drawing on areas to carve or free carve.) 3. Make sure the original block (square) shape is no longer visible once you carve. (You want the sculpture to be rounded or have new angles and not still look like a block.) 4. Consider carving a negative shape into the sculpture or adding texture in a spot. 5. Sand-Sand-Sand your projects until very smooth. No air bubbles should be visible. |
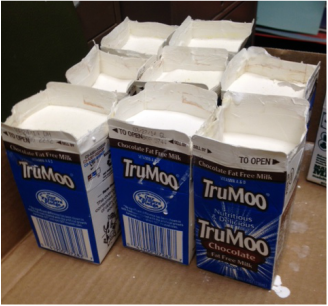
Students mixed their own plaster in school milk containers.
|


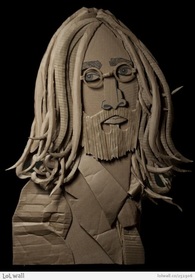
Week 10 & 11- Cardboard PortraitsMarch 24-28
- AND - March 31 - April 4 Standards: Standard 1: 1,2, Standard 2: 1,2,4,5 Standard 3: 1,5 Standard 5: 4 Objective: Students will learn basic facial proportions Students will use design principles learned to create either an abstracted or "realistic" portrait out of cardboard. Brainstorming: Power Point of different examples and approaches to the project Examples of actual work Students will start with thumbnail drawings to gain ideas Teacher Demonstrations: Demo on how to start the idea with drawing sketches Demo on how to transfer drawing to cardboard Demo on how to cut and rip cardboard with out ripping the foundation backing. Demo on how to add other cardboard elements Steps: 1. Search the Internet for portrait ideas. 2. Sketch ideas on paper 3. Depending on the type of portrait student choses, the next step is to draw out on paper in actual dimensions, the portrait design. 4. Transfer this image to the cardboard or cardboard pieces. 5. Cut out the negative space, leaving the corrugated board underneath. 6. It is OK to leave some remnant scrap cardboard paper where desired. 7. With white glue, add additional levels of cardboard where design dictates. 8. Student may choose to leave the portrait all cardboard or they may choose to add paint as well. |
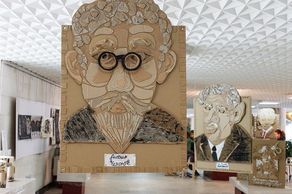
Source Unknown
|
Week 9 - Complete Pop Art Paper Mache and Blog ReflectionMarch 17 - 21
Standards: Standard 1: 1,2,3,4 Standard 2: 1,2,3,4,5 Standard 3: 1,2,4,5 Standard 4: 1,2,3 Objectives: (See lesson below for a complete list of project objectives) 1. Students will complete their "Monumental" sculptures based off of the work of Pop artist Oldenburg. 2. Students will write a reflection blog post about their work, their choices as well as what they have learned about Pop Art Sculpture and Monumental sculpture. Brainstorming: This week students should all be finishing the construction of their Pop art sculptures and all should start painting by no later than Wednesday. Before painting, students should make sure to google their images so that they are accurately representing the brand. If it is not accurate, the humor of the Pop art is lost. Pop Art Blog Post (Formative Assessment) Either on your Blog or directly into Edmodo you need to write a reflection about the following: INCLUDE A PICTURE OF YOUR FINISHED PROJECT Tell me about the pop art sculpture that you (or you and your group) made. 1. What is your sculpture of? (What object?) 2. Why did you choose this object to re-create? 3. How/why does this fit into the category of Pop Art sculpture? 4. Tell me what you know about Pop Art sculpture? What is it poking fun at? 5. Why are so many Pop Art sculptures LARGE/BIG? What are big sculptures called? What is it glorifying? 6. Did you like working with a group? 7. What were some of the positives of working in a group and what were some of the negatives? 8. Overall, are you happy with the final outcome of your work? |
NEW EDMODO GROUP CODES!!!
|

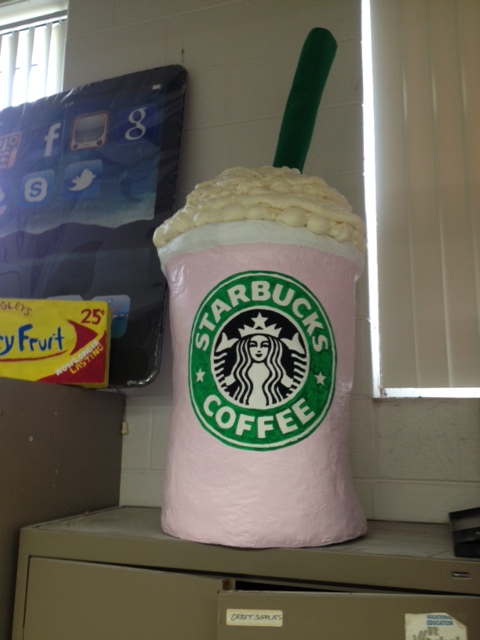
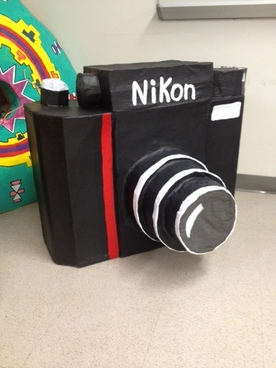
Week 6, 7 & 8 -Pop Art Paper MacheFebruary 24-28
March 3-7 (MME Week - 3 Full days) March 10-14 (Snow Day Wednesday) Standards: Standard 1: 1,2,3,4 Standard 2: 1,2,3,4,5 Standard 3: 1,5 Objectives: 1. Students will learn about the artist Claes Olderberg 2. Students will further their knowledge of Pop Art and Monumental Sculpture 3. Students will create a paper mache sculpture based off of the theme of pop art. Brainstorming: Power Point on Claes Oldenburg and Pop Art Paper Mache examples Past student work. You Tube Video of Oldenburg's work Using Google/Pinterest to search for work. Task: 1. Students will decide if they want to work solo or as a team to create a larger scale sculpture. 2. Students will brainstorm ideas for their own work. 3. Start by building an armature for their work. 4. Slowly build using newspaper, poster board, cardboard, paper pulp etc... STUDENTS MAY BE NEED TO BRING IN OR PURCHASE THEIR OWN SUPPLIES IF THEY WANT SOMETHING SPECIFIC FOR THEIR OWN WORK. (For example, foam or some chicken wire.) |
Oldenberg's "The Store" and "Soft Sculpture"
Scan through the video below. It's kind of comical how they are handling this soft sculpture of a sandwich with protective gloves.
|
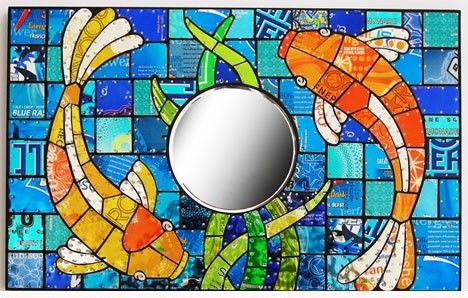
Week 3,4 & 5 - Pop Can MosaIcsFebruary 3-7
February 10-14 February 18-20 (President's Day Mon/Ice Day Fri) ALL STUDENTS NEED TO BRING IN POP CANS FOR THIS PROJECT TO SHARE WITH OTHER STUDENTS IN THE CLASS. Standards: Standard 1: 1,2, Standard 2: 1,2,4,5 Standard 3: 1,5 Standard 5: 4 Objective: Students will learn about "Found Object" art and the Recycled Art movement. Students will design and create a pop can mosaic using design principles learned in class. Brainstorming: Students will view Power Point on different images and possibilities Students will use Chrome Books to search for ideas on the internet. Students will draw out a min. of 2 different sketches for ideas for final project. Steps: 1. Search internet for examples to get ideas on the possibilities. 2. Search internet for pictures to aid in drawing idea on paper 3. Create 2 thumbnails and get approval by teacher 4. Begin drawing actual size drawing on paper. 5. Drawing should be divided into parts so that image maintains the "mosaic" look. 6. Once drawing is complete, students will take either a pencil or thick black marker to draw over lines so that there is space between the pieces of the mosaic. This also maintains the "mosaic" look. 7. STUDENTS WILL EITHER CHOOSE TO BUY THEIR OWN WOOD BOARDS (I will buy the small nails) FOR THIS ASSIGNMENT OR THEY WILL BE ABLE TO USE POSTERBOARD AND GLUE. 8. Students will cut pop cans so that they are flattened. 9. Next students will trace the divided elements of their mosaic drawing onto the pop cans and cut them out. 10. Students who have wood boards will nail the pieces of the pop cans onto the wood and students who have cardboard will use glue. 11. Glue or nail until all pieces are in desired locations and artwork is finished. |

Source Unknown
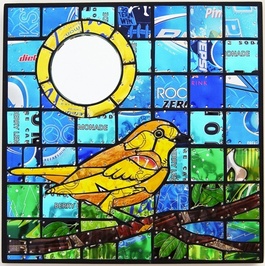
Artist: Jill Helms
Click the picture to be directed to her website.
Artist: Jill Helms
Click the picture to be directed to her website.
|
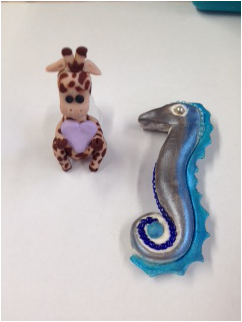
Week 2 - Polymer Clay Cont...Jan 27 - Feb 1
Due to the snow day last week and the possibility of more this week, the pace of the projects are still TBD. Standards: Standard 1: 1,2,3,4 Standard 2: 1,2,4,5 Standard 3: 1,4 Objectives: 1. Students will create a small polymer clay sculpture of their choice. * Sculpture should be challenging to the students ability level and contain multiple elements and layers (such as clothing, or other details.) 2. Students will create a polymer clay pen based on a "cane" of their choice. Brainstorming: Students will use their Chromebooks to look up different types of Polymer clay sculpture. Studetns will use their Chromebooks to find different "cane" ideas for their pens. Examples of pens covered with polymer clay canes. Teacher Demonstrations: On how to use Foil or old clay as the substance for a sculpture and cover it with clay. How to create basic canes and how to cut and add them to a pen permanently. |

|
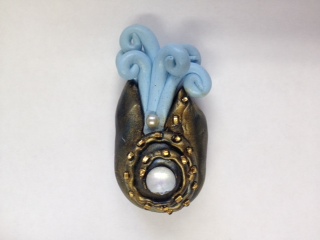
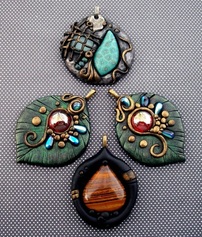
Week 1 - Polymer Clay ExplorationJan 21-24 (Snow Daw Friday)
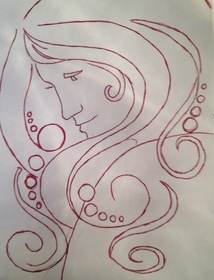
Standards: Standard 1: 1,2,3,4 Standard 2: 1,2,4,5 Standard 3: 1,4, Objective: Students will explore the different methods used in polymer clay jewelry to create a pendant that reflect a Principle of Design. Brainstorming: Power Point of the different examples of polymer clay jewelry Video on how to make a polymer clay pendant with beads and texture. Use Chromebook for online tutorials and ideas Sketch out 4-5 ideas for pendants. Teacher Demonstrations: Demo on how to prepare the clay. Demo on how to prepare the surface of table for clay Demo on how to roll the clay, and combine clays together Show students the different techniques: Marbleizing, Canes, Jelly Roll, stripes, Checkers, etc... Click here for a link to my Pinterest page on polymer clay |
|
Second Semester
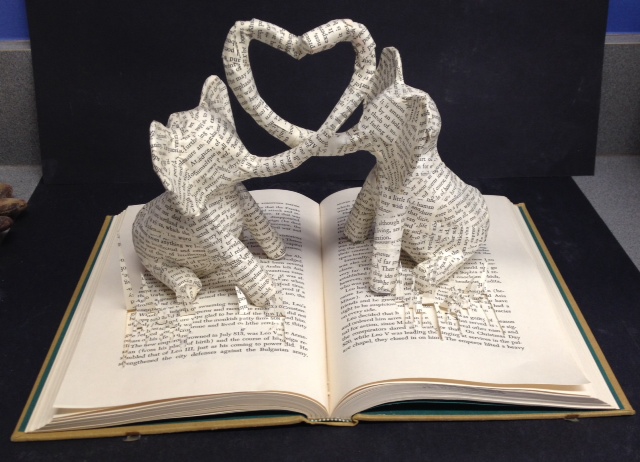
Week 17 & 18 - Midterm Book Sculpture and Blog PostJanurary 6-10
-AND- Janurary 13-17 Standards:Standard 1: 1,2,3,4 Standard 2: 1,2,4,5 Standard 3: 1,4, Objectives: 1. Students will make either an additive or subtractive sculpture by cutting up old books. 2. Students will reflect upon growth and learning in Midterm blog post Brainstorming: See Week 16 Lesson Steps: Monday - Friday 1. Continue to work on books sculptures as planned. 2. If making a pop-up sculpture you should begin paper macheing no later than Tuesday. 3. If you don’t have a solid workable idea on Monday then you need to switch plans FAST and start anew. Thursday/Friday - Midterm Blog Post 5% Grade On your blog, you must post a picture of a minimum of 3 projects (if not more) that you have completed in class this semester. In a short paragraph of no less than 175 words explain to me the projects that you have made. *Which are the ones you have liked and the ones you didn’t? *Why do you feel certain ones are more successful than others? *Are you happy with the craftsmanship and quality? *Think about the level of difficulty and how may or may not have improved with some projects. *Are you proud of your work or not? *What are some things you are hoping to do next semester? Write this on YOUR BLOGGER BLOG! Post to Edmodo!!! I will review in class on Thursday. DUE TO THE SNOW DAY BEFORE BREAK – IF YOUR ZENTANGLE IS STILL UNFINISHED YOU HAVE UNTIL THE 15TH TO TURN IT IN FOR CREDIT. |
Student Work
Student Work
Student Work
Click here for a link to Blogger.
Click here for a link to Edmodo
Click the file above for a break down of Midterm requirements. | ||
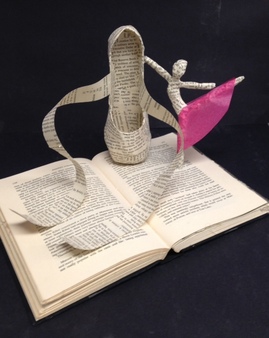
Week 16 - Book SculptureDecember 16-20
Standards: Standard 1: 1,2,3,4 Standard 2: 1,2,4,5 Standard 3: 1,4, Objective: Students will make either an additive or subtractive sculpture by cutting up old books. Brainstorming: - Students will watch 3-4 short videos of different approaches to book sculpture - Students have hands on access to project examples - Power Point of different examples of Book Sculpture - Students will use Chromebooks to find examples of book sculptures they enjoy - Students will create sketches to develop their their own ideas. Teacher Demonstrations: - Demo on how to prepare book for cutting - Demo on how to form small sculptures to accompany book sculpture - Demo on how to cut and glue book pages Steps: 1. Students should surf the web to find examples of projects they would like to create. 2. Students should decide whether or not they want to make a "RELIEF" book sculpture or a raised book sculpture. Book can be standing or laying down. There are not hard fast rules. 3. Choose a book. 4. Based on the words and images in the book, students may choose to develop their idea around the theme of book. This is not required, however. 5. If doing a relief sculpture, students should draw their image on paper first. The pages of the book should be traced onto paper so they know how big to make the image. 6. Once idea is established, each student will follow a different set of steps depending on the idea. -Some will start cutting pages out immediately -Some will begin making sculptures to attach to their books. 7. Students making sculptures will use paper mache and book pages to form their objects. |
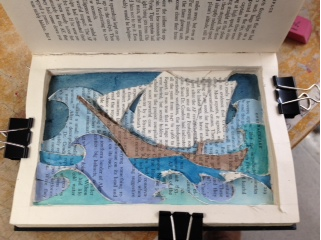
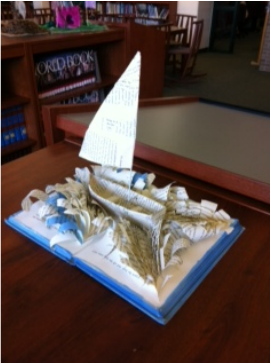
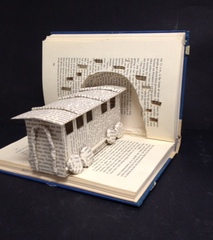
Student Work
|
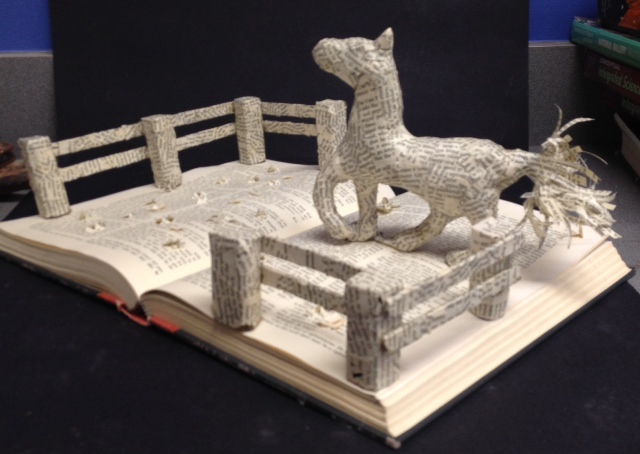
Week 15 - Wrap Up Block Letters, Chromebook Distribution & Begin Book SculpturesDecember 9-13
Standards: Standard 1: 1,2,3,4 Standard 2: 1,2,4,5 Standard 3: 1,4, Objectives: 1. Students will wrap up their block letter designs by painting it in a style that reflects the work of a famous artist/painting. 2. Students will use design skills learned in class to develop an idea for a book sculptural. Brainstorming: - Students will watch 3-4 short videos of different approaches to book sculpture - Students have hands on access to project examples - Power Point of different examples of Book Sculpture - Students will use Chromebooks to find examples of book sculptures they enjoy - Students will create sketches to develop their their own ideas. Teacher Demonstrations: - Demo on how to prepare book for cutting - Demo on how to form small sculptures to accompany book sculpture - Demo on how to cut and glue book pages Steps: 1. Students should surf the web to find examples of projects they would like to create. 2. Students should decide whether or not they want to make a "RELIEF" book sculpture or a raised book sculpture. Book can be standing or laying down. There are not hard fast rules. 3. Choose a book. 4. Based on the words and images in the book, students may choose to develop their idea around the theme of book. This is not required, however. 5. If doing a relief sculpture, students should draw their image on paper first. The pages of the book should be traced onto paper so they know how big to make the image. 6. Once idea is established, each student will follow a different set of steps depending on the idea. -Some will start cutting pages out immediately -Some will begin making sculptures to attach to their books. 7. Students making sculptures will use paper mache and book pages to form their objects. |

Photo found on flicker. Does not belong to me or my students.
Other Links to watch
|
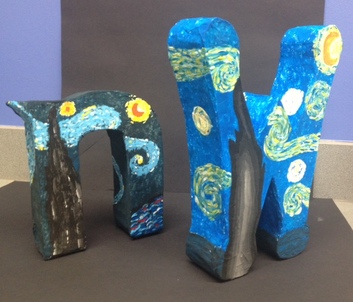
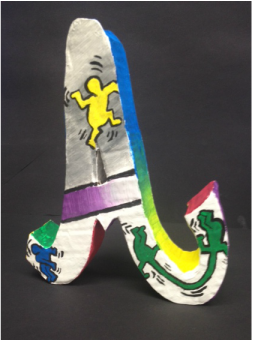
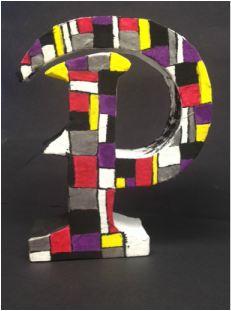
Week 12 - 14 - Famous Painting Block Letter DesignNovember 18-22
November 25 & 26 (Thanksgiving Week) -AND- December 2-6 Standards: Standard 1: 1,2, Standard 2: 1,2,4,5 Standard 3: 1,5 Standard 5: 4 Objective: 1. Using design principles learned in class, students will design, form and paint a block letter of their choice. 2. Students will learn basic forming techniques involved in paper mache art that will be necessary for when we being more complex paper mache projects. 3. Students will learn art history by painting their letter using the style and images from a famous painting of their choice. Brainstorming: - Students will have visual examples of what the project outcome should resemble (both still images as well as a physical example of the project in progress.) - Students must draw three thumbnail sketches of letters they want to create to generate ideas for their final project. Teacher Demonstrations: Demo on how to transfer image to cardboard Demo on how to make the letter 3 Dimentional using hot glue and cardboard Demo on how to use the paper mache as well as paper pulp Demo on different ideas and techniques that can be used in painting General Notes: This project is an introduction to paper mache and is meant to be a simpler design project. Students have been working very hard on metals projects for the last 8 weeks and are in need of a creative shift. The purpose of this project is to "lighten up" a little bit and enjoy the creative process, while gaining important knowledge about materials and techniques needed for more complex future projects. Click here for a link to detailed construction instructions |
|
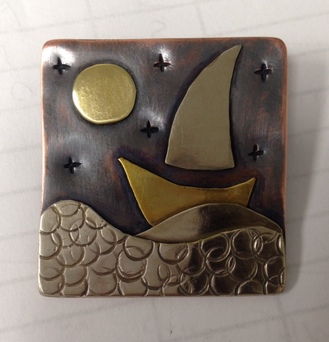
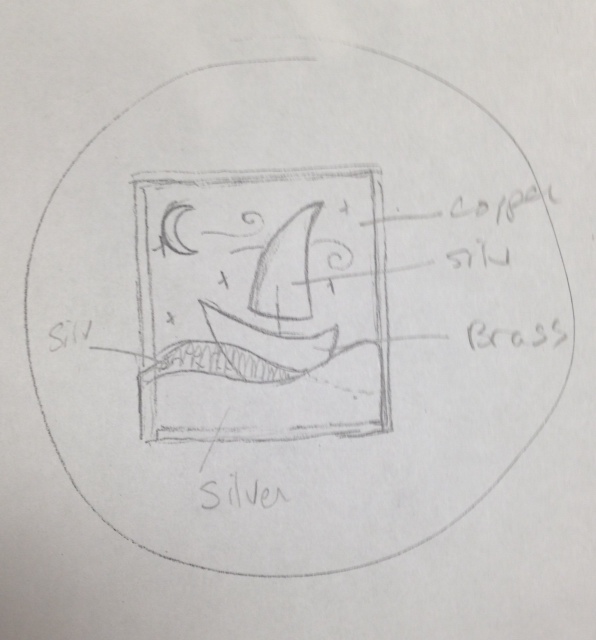
Week 10 & 11- Landscape PinsNovember 4-8
-AND- November 11-15 Standards: Standard 1: 1,2,3,4 Standard 2: 1,2,4,5 Standard 3: 1,4, Objective: 1. Students will further develop their design skills by designing a landscape pin which must contain a foreground, middleground and background. 2. Students will learn the techniques involved in "sweat soldering." 3. Students will continue to work on craftsmanship skills, by finishing their metal to a soft smooth shine. Brainstorming: Students will create 3 different thumbnail sketches of "landscapes" that contain a foreground, middleground and background. Landscapes can be fictional and whimsical. Must have texture on the pin somewhere. Students should view examples of the project found on this really good school website. Teacher Demonstrations: Demo on how to design and label the elements of the landscape. Demo on how to trace and cut the separate elements of the landscape. Explanation of the different types of solder (easy/medium/hard) Instructions on how to sweat solder metal together. How to clean metal How to finish metal Steps: 1. Create 3 thumbnail sketches for your pin design 2. Trace the seperate elements of your design onto tracing paper 3. Cut and glue elements onto appropriate metal 4. Cut and file your pieces 5. Add teaxture to your metal 6. Melt appropriate solder onto the pieces of your metal 7. Clean with pickle 8. Sweat solder each layer of metal onto your base and clean with pickle inbetween steps. 9. Add any additional texture desired 10. Sand and steel wool your piece to a dull shine. 11. Add any blackener where desired and finish. |
|

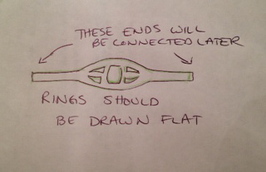
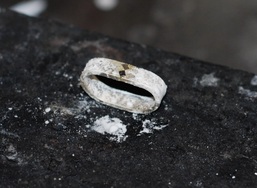
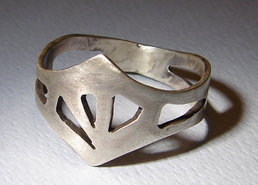
Week 8 & 9 - Ring Design/Soldering & Safety
|
|
Week 6 & 7 - Copper Etching and Beaded Bracelets & Blog Post
October 7-11
-AND- October 14-18 Standards: Standard 1: 1,2,3, 4 Standard 2: 1,2,3,5 Standard 3: 1,4 Standard 4: 2,3 Objective: 1. Students will learn the processes of designing and creating a copper etched piece of jewelry 2. Students will learn basic beading and terminology used with wire/beaded bracelet Brainstorming: Students will view Power Point of different examples of etched jewelry and bracelets Students will have books available with images infulenced by Celtic knot design Students will create 5 thumbnail sketches of their idea Teacher Demos: On how to start their thumbmails. On how to apply design to metal How to prepare metal for etching Demo on SAFETY WHEN USING ETCHANT Discuss benefils of using Copper vs Brass Demo on how to create a beaded wire wrapped bracelet Task: 1. Students will design sketches for a small copper plate that will become a part of a bracelet they create. 2. Students will sand the metal to get reid of any residue that will inhibit the etching process 3. After approval, students will re-create their drawing on the metal using sharpie, nail polish, a paint pen or other. 4. Once drawn, the metal must be prepared for etching. 5. After the etching process, students will create a beaded chain for each side of the etched metal and create a bracelet. |

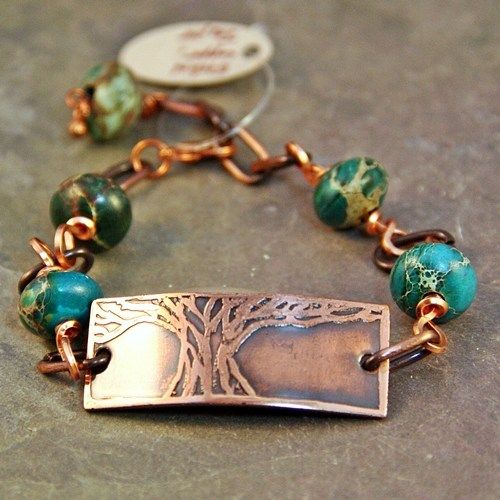
Natrissa's Designs
|
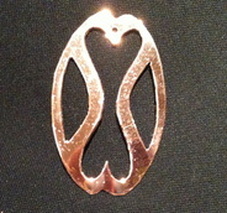
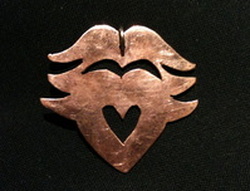
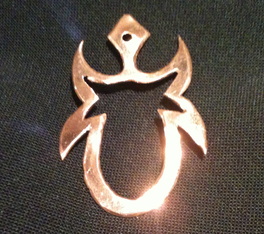
Week 5 - Balanced Copper/Brass Pendants
|
|
Week 4 - Intro to Metals/Basic PendantsSept 23-27
Standards: Standard 1: 1,2,3 Standard 2: 1,2,3,4 Standard 3: 1,4,5 Objective: Students will learn the vocablary, tools and skills involved in creating simple metal jewelry. Task: Students will create a simple pendant made of two parts. 1. A textured circle 2. A smooth buffed circle with initials hammered in. Teacher Demonstrations: * What is and how to use a bench pin. * How to saw metal properly * How to insert a saw blade into saw properly * How to use the drill press * How to add texture and use Liver of Sulpher * How to use the dapper block * How to file properly * How to sand properly * How to buff properly |
|
Week 3 - Shrinky Dink Jewelry and Design Art BlogsSept 16-20
Standards: Standard 1: 1,2,3,4 Standard 2: 1,2,3,4,5,6 Standard 3: 4,5 Standard 4: 2 Objective 1: 1. Students will apply their knowledge of design principle and Pop Art to create jewelry with: a. a Pop Art Theme b. a Design Principle Theme c. Remaining material should be used for student choice jewelry Task: (Mon-W/Th) students will be creating their Shrinky Dink jewelry. Emphasis on good craftsmanship is key with this assignment. 1. Students will design their jewelry and then trace onto the SD paper. 2. Students color their designs using colored pencil. 3. Students shrink and then turn into jewelry using methods shown in class demonstrations. (Earrings, keychains, magnets, bracelets) Objective 2: Students will create their own art blogs. These blogs will be used for student reflection on their own work, the artistic process and the work of others. Wednesday is Make your Blog day. See the instructions for creating a blog and uploading it to Edmodo on the flie link below.
|

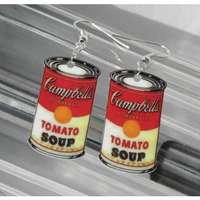
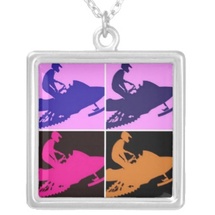
Pop Art
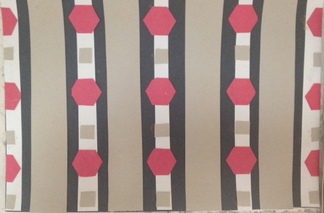
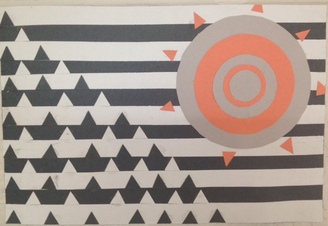
Design Principle

Use Edmodo to turn in blogs
| ||||
Week 2 - Finish Principle of Design Collages/Shrinky Dink JewelrySept 9-13
Standards: Standard 1: 1,2,3,4 Standard 2: 1,2,3,4,5,6 Standard 4: 2 Standard 5: 4 Objective: 1. Students will finish up their Principles of Design collages, labeled with the principles used. 2. Students will learn about about the Pop Art movement from the 1970's. 3. Students will design jewelry with a Pop Art Theme Brainstorming: Students will view Power Point on Pop Art History Students will go to computer lab to print up images. (Printed images are necessary for assignment.) Task: Students will create a minimum of 2 pop art pieces of jewelry. Jewelry can be earrings, pendant, bracelet. With the remaining shrinky dink paper, students may create whatever jewelry they like, however, ALL of the space of the paper MUST be utilized. |
|
Week 1 - Intro to class/Basic Design PrinciplesSept. 4-6
Standards: Standard 1: 1-4 Standard 2: 1,2,4,6 Standard 3: 1,4,5, Objective: Students will learn the fundamental design principles necessary for creating good artwork. Students will create 3 small design collages based off of a different Principle of Design. Click on the file below for the outline of the assignment.
Homework: Turn in Parent Signature slips this Friday
|
| ||
