In art class it is perfectly normal for students to work at different paces. Some students finish up earlier than others and some students take more time. Please allow for some flexibility on dates, as I am flexible with my students and try to meet their individual needs. Generally speaking, students have a 2-3 day rolling deadline to finish up projects. Sometimes after introducing a new project I will still have students finishing up the previous one. This is normal.
Lessons are subject to change if I feel a change is in the best interest of the class.
Click here for State of Michigan Standards and Benchmarks for Art Education
Lessons are subject to change if I feel a change is in the best interest of the class.
Click here for State of Michigan Standards and Benchmarks for Art Education
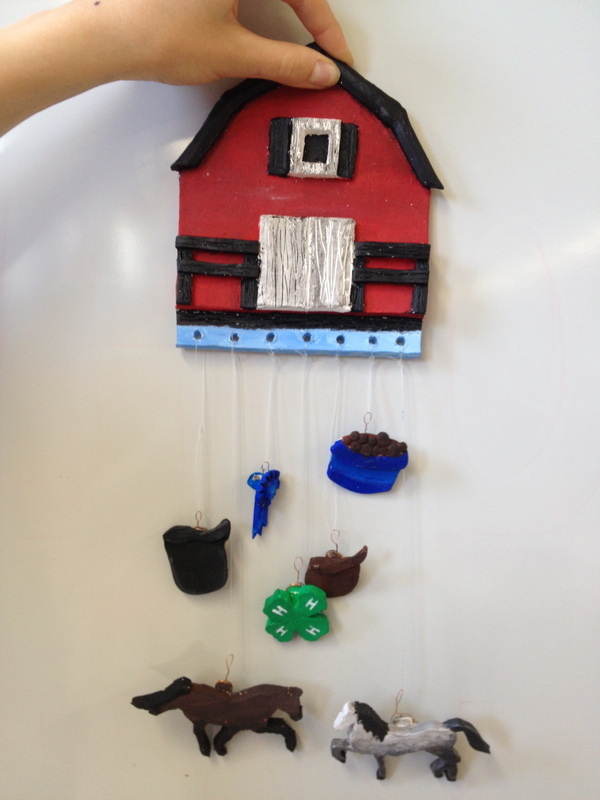
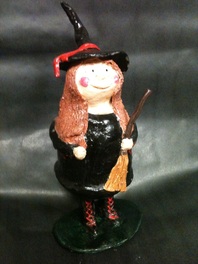
Week 17 & 18 - Clay Mobiles
May 19 -23
-AND- May 26 - 30 Standards: Standard 1: 1,2 Standard 2: 1,2,3,4 Standard 3: 4 Standard 4: 1 Objective: Students will create a mobile based off of a theme of choice. Mobile should hang in balance and be connected to a larger hanging mechanism (stick, clay base etc..) Brainstorming: Chromebooks to look up inspiration for ideas. Search Pinterest and Etsy too! Teacher Demonstrations: - Demo on how to tie and hang mobile parts - Demo on how to use sticks from nature as hanger from mobile. Sticks can be wrapped in yarn or other materials as well. CLICK HERE FOR POWER POINT |
|
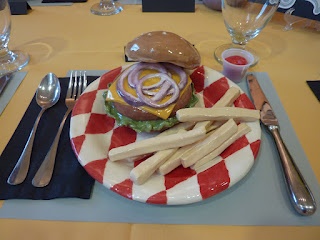
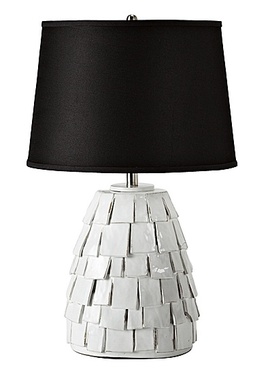
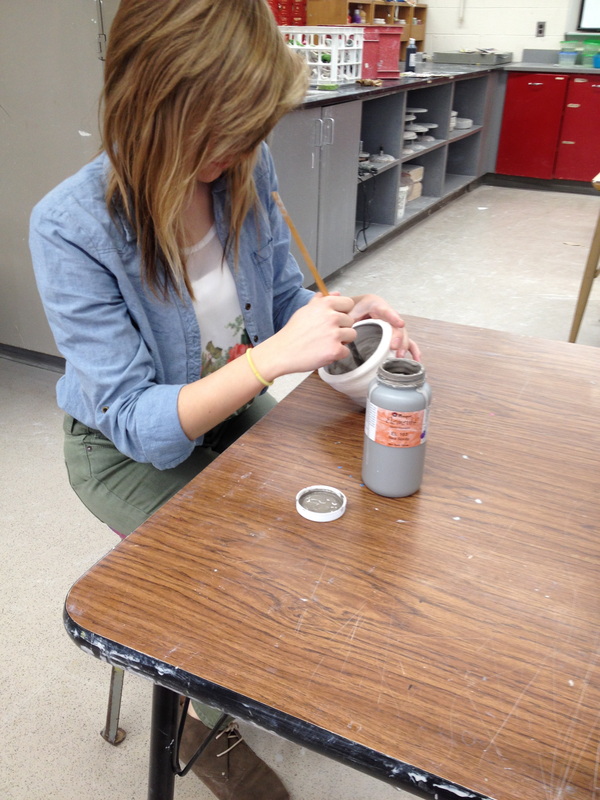
Week 15 & 16 - Glazing and Choice ProjectMay 5 - 9
-AND- May 11 - 15 Standards: Objectives: 1. To glaze wall pockets with sufficient skill so that personal intentions are carried out in ones artwork. 2. To create a clay project using proper clay forming techniques. Student may choose from the following: a.To create a Pop Art inspired plate of food based off of the work of artist Claus Oldenberg. -OR- b. To create a lamp with added decoration and texture (student will have to purchase own lamp kit at hardware store) using either a coil or slab technique. Brainstorming: Power Point on different examples of both projects Student examples of both assignment options Chromebooks to use for inspiration Teacher Demonstrations: I have already given instruction over the course of the year for students to know how to begin their project. Most demonstrations will come one on one with each student as I wander the room. I will give a demonstration on how to attach all the lamp parts to make a lamp. 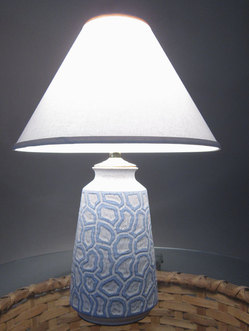
T. Weber Potter
Click the picture to visit his Etsy site
|
Source Unknown
Click on the link to view the source
Source Unknown
|
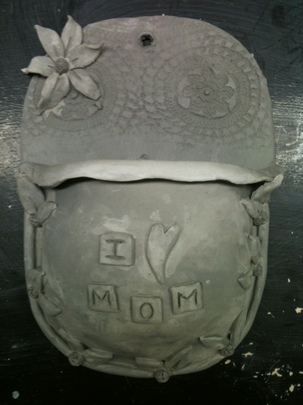
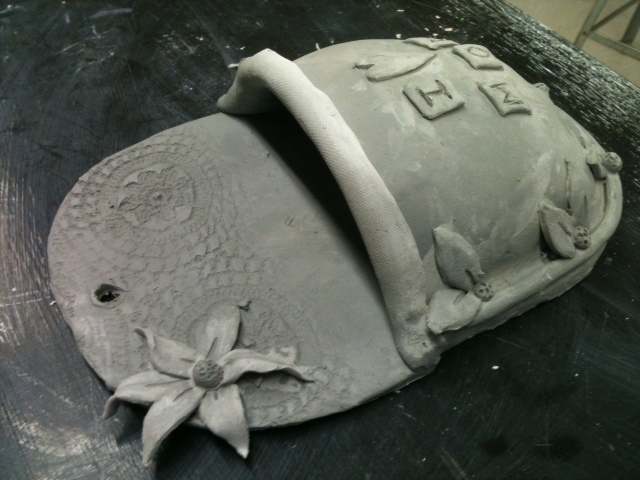
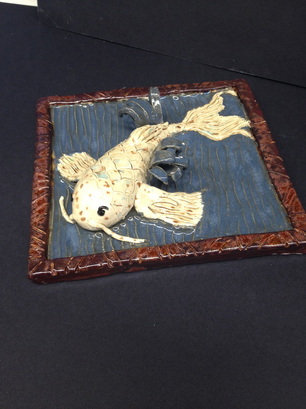
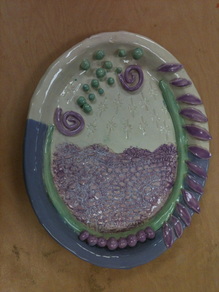
Week 13 & 14 - Paint Masks & Wall PocketsApril 21 - 25
Standards: Standard 1: 1,2 Standard 2: 1,2,3,4 Standard 3: 4 Standard 4: 1 Different students will be working on different things all through-out the week. I have some student who have not yet begun their mask and some who are finished making theirs. The objectives for the week will cover different students at different times. Objectives: 1. - Students will use design skills to create an original mask. 2. - Students will use prior knowledge learned in class about color theory and "scumbling" to paint and embellish their mask. 3. - To Using Mothers Day as the theme, students will design and create a wall pocket that exhibits good clay techniques, shows evidence of Principles of Design/Elements of Art, such as line and texture. Brainstorming: 1. - Students will use Chromebooks to find images to aid in design of mask. (both for construction and for painting.) 2. - For the wall pockets, students will find images on their Chromebooks to get inspiration for the wall pockets. These images should not be replicated as their project, but used as inspiration for their own ideas. 3. - Physical examples of the project will also be provided for inspiration. Teacher Demonstration (For Wall Pockets): Many of the skills needed to make this project have been learned though out the year. However, there will be a demonstration on how to use newspaper to create the pocket for this artwork. The teacher will also demonstrate how to add on decorative elements, curl the slabs and suggest poking holes in it for drainage. |
|
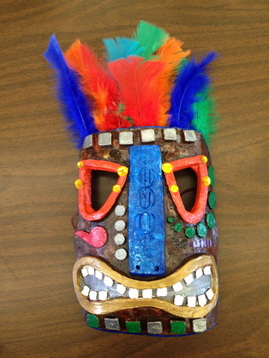
Week 12 - MasksApril 14 - 17 (Good Friday off)
Standards: Standard 1: 1,2 Standard 2: 1,2,3,4 Standard 3: 4 Standard 4: 1 Objective: 1. Students will learn the history behind Green Men and its architectural significance. 2. Students will explore other cultures to make a mask or green man out of clay. 3. Students will use design skills to create an original mask. Brainstorming: Power Point on various images of Green Men and Masks Use Chromebooks to gather images for inspiration Teacher Demonstrations: *Classroom instruction breaking down the proportions of the human face. *Demo on how to use the plastic masks to form a basic human face, but then add embellishments. * Demo how to create your own mask form base. * Stress the need to layer the look of the mask and green men with leaves and/or decorative elements. Steps: 1. Find an idea 2. Create or use a premade mask form. 3. Roll out a slab to drape over the form 4. Decide upon the placement of the facial features and whether or not they are cut out or added on. 5. Add embellishments and textures with clay. 6. Poke holes in the temples to mask can be strung and hung. |

|
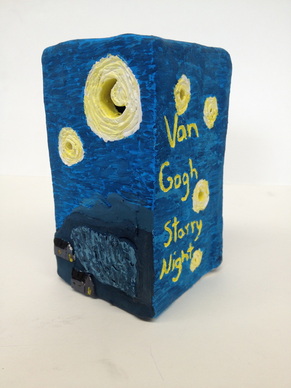
Week 11 - Finish Famous Paint Sculpture & Glaze
|
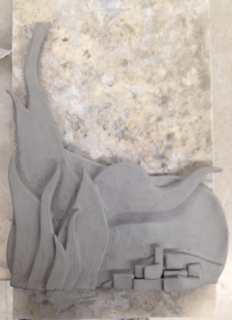
Van Gogh - Starry Starry Night
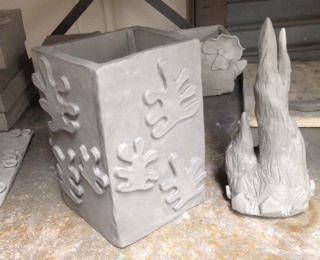
Matisse Vase &
Van Gogh Starry Starry Night Sculpture
|
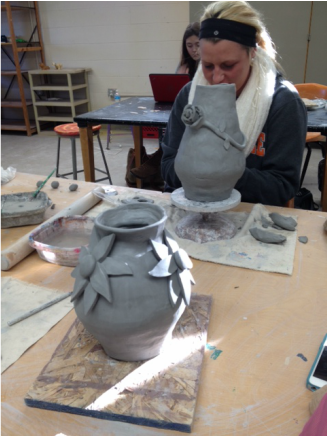
Week 10 - Famous Painting Re-Creation
March 24 - 28
Standards: Standard 1: 1,2 Standard 2: 1,2,3,4 Standard 3: 4 Standard 4: 1 To view the Power Point for this assignment click here. Objective: 1. Students will search and explore many different famous/important artists though out art history. 2. Students will use prior knowledge of ceramic construction methods and problem solving skills to create a three-dimensional version of a famous painting of their choice. Brainstorming: 1. Power Point showing examples of student work and expectations of the project. 2. Use link provided to the right for a list of artists to search. 3. Google and Pinterest Teacher Demonstrations: For this project students are going to develop their own idea of how to represent a flat painting as a sculpture. Some may choose to make tiles, while other may choose round sculptures of boxes. For this reason, there will not likely be a group demonstration, but rather one on one help. |
Links to help you find famous artists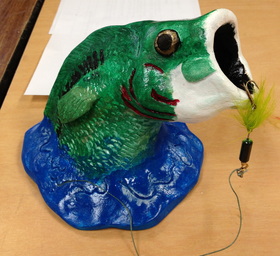
Student Work based off of Winslow Homer
Student Work
|
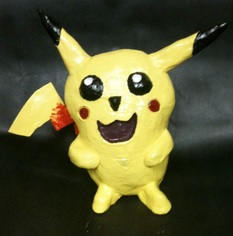
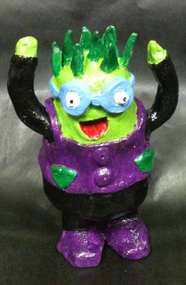
Week 8 & 9 - Free Choice Clay & GlazeMarch 17 - 21
- AND - March 10-14 (Snow Day Thursday) Objective: 1. Students will use the knowledge of clay to develop a project of their choice. 2. Students will glaze their vases using the glazes of their choice. Brainstorming: Students should view Pinterest and Google to get ideas for their free choice project. Teacher will have a list of possible ideas Teacher Demonstrations: There will be no group presentations for this project, as everyone will be doing something different. All demonstrations will be one on one. Possible Ideas for Projects: (Projects must challenge students ability level.) Cars Animals Cartoons Pottery Dish Ware Clay Busts Fictional Characters Boxes Flower Tiles/ 3 or 4 part tiles Garden Art |
|
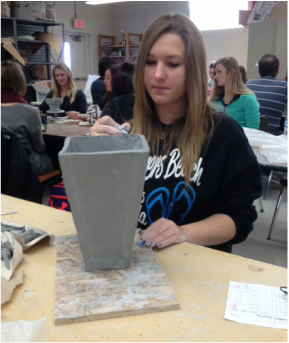
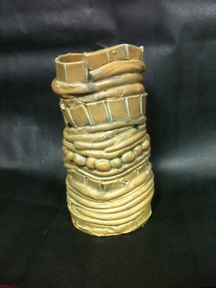
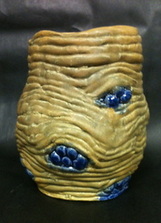
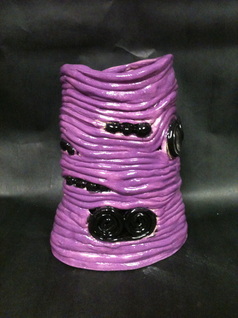
Week 6 & 7- Creative VasesFeb 24 - 28
-AND- March 3-7 (MME Week - 3 full days of class) Standards: Standard 1: 1,2,34 Standard 2: 1,2,3,4,6 Standard 3: 1,4,5 Objectives: 1. Students will create a complex vase using either a slab or coil pot method. 2. Vases should involve more complexity in shape and craftsmanship than achieved earlier in the year. 3. Students will develop and learn to rely on their own creativity. Brainstorming: Power Point of different possibilities for this project Student will search Pinterest, Etsy and Google for ideas. Student will need to sketch out their idea before beginning. Teacher Demonstrations: Demo on how to start slab vases by drawing a paper template first Demo on how to form rounder/shaped coil pots Demo on how to smooth out coils successfully. HEIGHT REQUIREMENT OF 7" TALL |
|
Week 5 - Glaze/Paint Tiles and Animal SculpturesFebruary 18-21 (Presidents Day Mon & Ice Day Fri)
Standards: Standard 1: 1,2,3 Standard 2: 1,2,3,4,6 Objective: Students will learn about the characteristics of the new glazes ordered. Students will paint or glaze their animals and tiles so that personal artistic intentions are carried out in their work. Brainstorming: Power Point of different approaches to glazing animal sculptures. Task: Students will paint/glaze both the tile and sculpture in the manner of their liking. Students are reminded to use value with their paint. |
|
Week 4 - Finish Animal Sculptures & Glaze TilesFebruary 10-14
Standards: Standard 1: 1,2,3,4 Standard 2: 1,2,4,5 Standard 3: 1,2,4 Objectives: 1. Students will create a non-cartoon animal sculpture focusing on forming muscle tone and using proper clay hand-building techniques. 2. To glaze relief tiles with sufficient skill that personal intentions are carried out in artwork. Teacher Demonstrations: - On easy ways to add and define muscle tone - How to carve out sculpture successfully so that they do not blow up in kiln. - On how various ways to add texture to the animal. - Discussion about choosing glaze or paint to finish off their tiles. Tasks: * Students are half way finished with their animal sculptures and may need until wednesday to complete them. Students should continue to work on muscle tone and texture * When sculptures are done, students should either paint or glaze their tiles. |
|
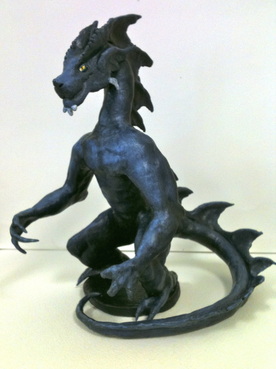
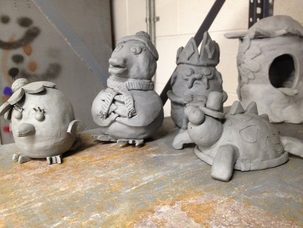
Week 3 - Animal Sculptures
February 3 - 7
Standards: Standard 1: 1,2,3,4 Standard 2: 1,2,4,5 Standard 3: 1,2,4 Objective: Students will create a non-cartoon animal sculpture focusing on forming muscle tone and using proper clay hand-building techniques. Brainstorming: Power Point on the different kinds of sculptures they should be looking for. Students will use their Chromebooks to search for images of animal sculptures. Students should find and save or "pin" a front, side and back view of the animal they wish to create. Images of "sculptures of animal" rather than "photos of actual animals" help the student more. Teacher Demonstrations: - Teacher demonstration on how to begin the basic structure - Demonstration on how to add muscle tone for a more realistic representation of their animal. Steps: 1. Find an animal and get approval from Mrs Joe 2. Wedge clay to get rid of air bubbles. 3. Start basic body shape and keep in mind MUSCLE/BONE STRUCTURE 4. Work on shape, make sure snouts are 3-D, don't draw on facial features, make them with clay. 5. Add texture where appropriate |
|
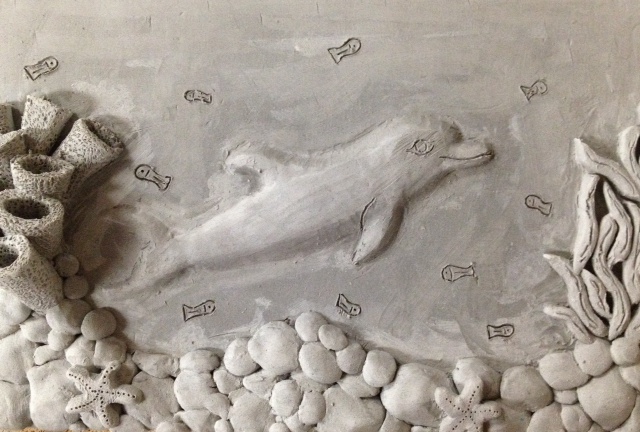
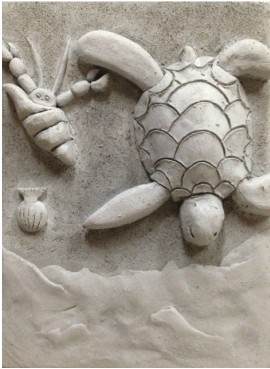
Week 1 & 2 - Relief TilesJan 21-24 (Snow day Friday)
-AND- Jan 27- Feb 1 (Snow days MTW) Standards: Standard 1: 1,2,3 Standard 2: 1,2,3,4 Objectives: Students will design and create a relief tile that successfully shows an understanding of composition and space, texture and dimension. Tile should have a foreground, middleground and background. Brainstorming: Examples of past student work Power Point on various approaches to the project. Use Chromebooks for ideas. Draw a sketch of tile before beginning. Teacher Demonstrations: Basic group demonstration on how to begin by adding layers to tile as well as carving away areas. - Stress rounding off cut edges so that the tile doesn't look like it has cookie-cuter images on it, but rounded off images. - More detailed painting demonstrations will come after projects are fired. Click for my Pinterest Ceramics Page |
|
Second Semester
Week 17 & 18 - Midterm Tiles and Blog Posts
Janurary 9 & 10 (Snowdays M/T/W)
-AND- Janurary 13-17 (Midterm Week) Standards: Objective: 1. Students will choose between 3 projects to create a final project for midterm. A. A small coil pot B. a small sculpture C. A small platter 2. Students will reflect upon their growth and learning in a Midterm blog post Tile Brainstorming: Students will use Chromebooks to gather ideas for projects. Power Point of exampels will be shown. Steps: Thurs/Fri Choices: 1. Create a SMALL coil pot. Pot must have a shape other than straight vertical. You must draw the shape on paper before starting and have it approved by me. 2. Create a small sculpture. (We will be making animal sculptures first thing 2nd semester, so keep that in mind.). No mushrooms. Spend no less than 20min to find an example of a SIMPLE sculpture to follow. 3. Create a small dish. (No ashtrays) with a simple design and/or texture ALL WET CLAY PROJECT MUST BE COMPLETED NO LATER THAN FRIDAY!!! MONDAY 1/13 – Midterm Blog Post 5% Grade & Review Exam On your blog, you must post a picture of a minimum of 3 projects (if not more) that you have completed in class this semester. In a short paragraph of no less than 175 words explain to me the projects that you have made. *Which are the ones you have liked and the ones you didn’t? *Why do you feel certain ones are more successful than others? *Are you happy with the craftsmanship and quality? *Think about the level of difficulty and how may or may not have improved with some projects. *Are you proud of your work or not? Write this on YOUR BLOGGER BLOG! Post to Edmodo!!! TUESDAY 1/14: Glaze/paint projects |
Click the file above to view requirements.Click here for a link to BloggerClick here for a link to Edmodo
Pistrucci Artworks
| ||
Week 16 - Wrap up Glazing/Painting & Create StampsStandards:
Standard 1: 1,2,3 Standard 2: 1,2,3,4,5 Standard 3: 4,5 Objective: 1. Students will paint or glaze or paint their slab houses & salt/pepper shakers with sufficient skill and confidence so that personal intentions are carried out in their artwork. 2. Students will learn the technique of scumbling. 3. Students will create clay stamps for use in future projects Brainstorming: - Students should use Chromebooks and Google Images to get inspiration for painting their houses. - Students will use Chromebooks to view the tutorial on how to make clay stamps. Tasks: Students are in all different stages of completion for both the houses and S/P shakers. Some may need the entire week to complete both, while other students are completely done. For students who are finished, they must create a min of 2 different clay stamps. 1 raised relief stamp and 1 subtractive stamp. |
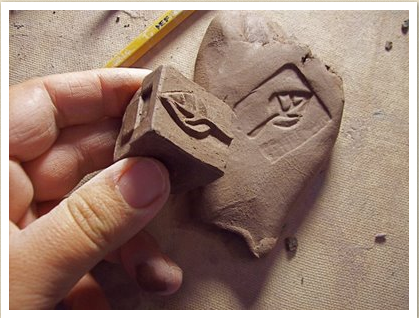
Image taken from LaPella Art. Click on the Photo to see their tutorial.
Click on the picture above to see the tutorial on how to make clay stamps. Scroll down to second post for instructions.Click Here for some Stamp Ideas #1
More Stamp Ideas....And More |
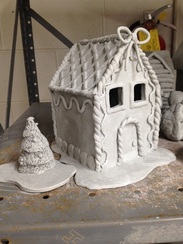
Week 15 - Paint Houses & Glaze Salt/Pepper ShakersDecember 9-13
Standards: Standard 1: 1,2,3 Standard 2: 1,2,3,4,5 Standard 3: 4,5 Objective: 1. Students will paint or glaze or paint their slab houses & salt/pepper shakers with sufficient skill and confidence so that personal intentions are carried out in their artwork. 2. Students will learn the technique of scumbling. 3. Students will continue to work on their craftsmanship skills. Brainstorming: - Students are encouraged to use their phones & CHROMEBOOKS to find images with color to aid them in the painting of their houses. Teacher Demonstrations: -Demo on how to scumble different shades of paint lightly over a color to alter the depth and interest in the color. Steps: All students know how to glaze and paint at this stage of the game, but there is an emphasis on doing it cleanly and neatly, and making sure no glaze touches the bottom. |
|
Week 13 & 14 - Salt Pepper ShakersNovember 25 & 26 (Thanksgiving Week)
-AND- December 2 - 6 Standards:
Standard 1: 1,2,3,4 Standard 2: 1,2,3,4,5 Standard 3: 1,4,5 Objectives: Salt and Pepper Shakers Students have learned the basic hand-building techniques over the course of the first 11 weeks: Coil, slab, press mold, & pinch pot. 1. Using prior knowledge of these techniques, students will design and create a set of salt and pepper shakers using the hand-building technique of their choice. 2. Students will continue to develop problem solving skills, as this assignment requires more creative thought. Brainstorming: -Power Point of visuals (Examples of the various style and options for salt/pepper shakers - Handouts on tables of various ceramic salt/pepper shakers -Students will be asked to search their phones on Pinterest or Etsy for examples/ideas they would like to explore. Demonstration & Tasks: Since each student will be creating a S/P shaker of their own choice and own method, there won't be a group demonstration on how to form the project, as each student will need individual attention and instruction. 1. Student will need do decide and possibly draw out their idea for their project and show it to Mrs. Joe 2. After discussing with Mrs. Joe the best way to form the project (slab. coil, pinch, etc...) students will begin to form their project out of clay. 3. Students will first work on the basic shape and add details later. 4. Depending on where they choose to have the salt and pepper poured into the project, students will cut a hole in the base and use a cork to plug it up. Therefor, students should have a "foot" so that the cork will not make the shaker sit uneven. |
Ceramic Salt and Pepper Shakers
|
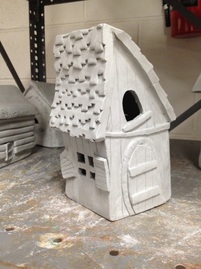
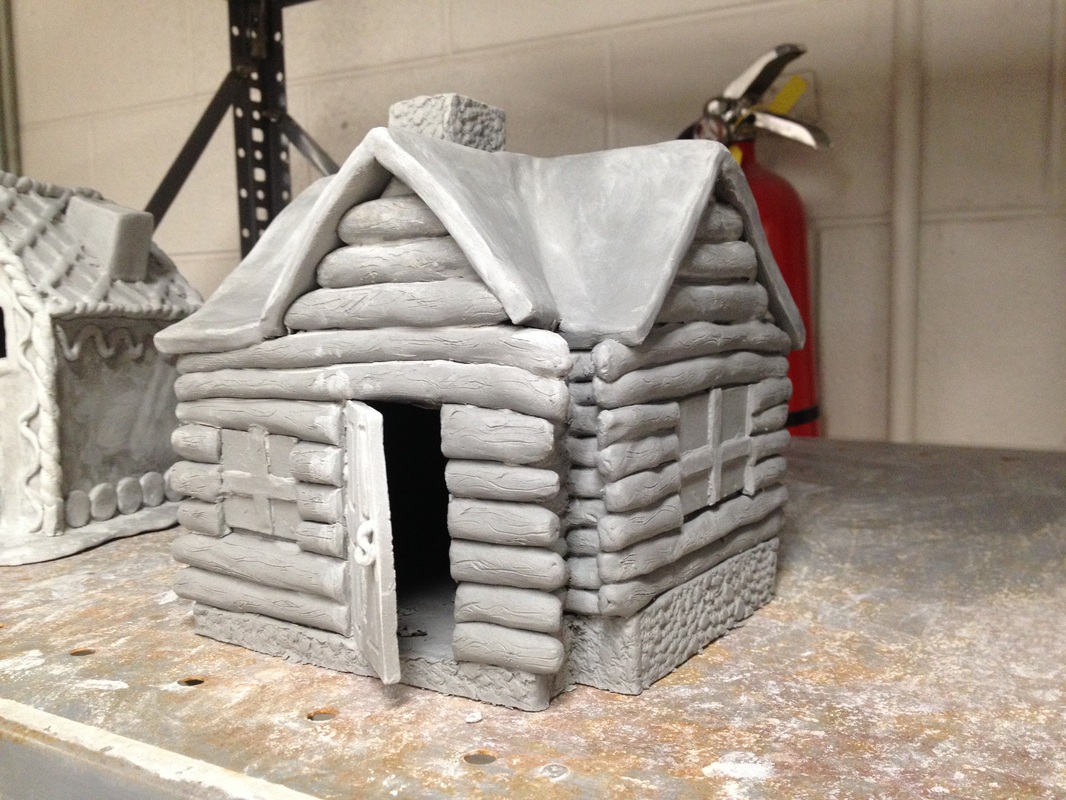
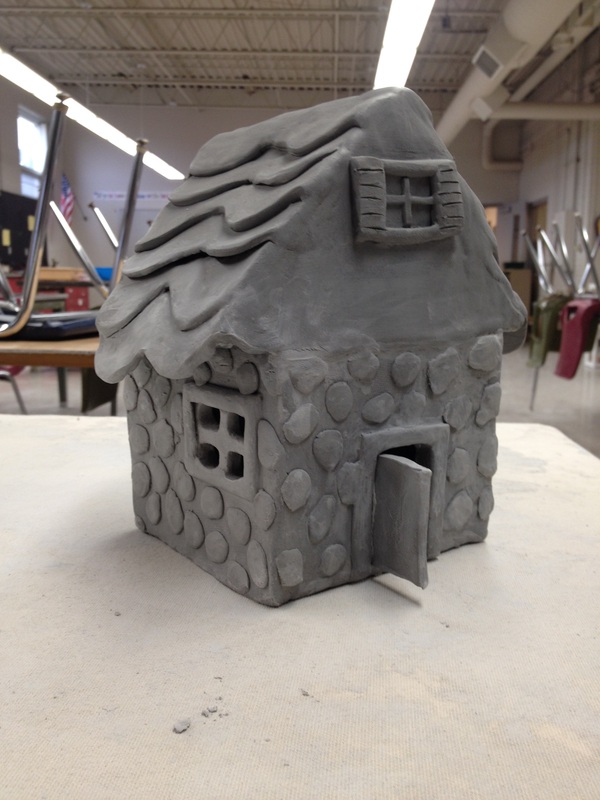
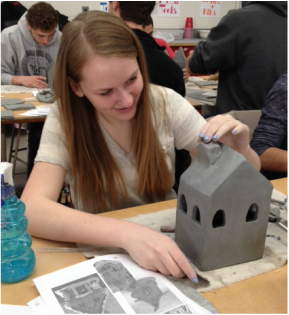
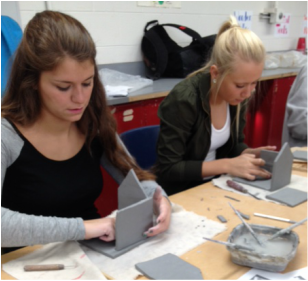
Week 11 & 12 - Clay Houses
November 11-15
-AND- November 18-22 Standards: Standard 1: 1,2,3,4 Standard 2: 1,2,4,5 Standard 3: 1,4,5 Objectives: Students will learn the slab method of forming ceramic pottery and sculptures Students will create a house of their choice formed from slabs Students will decorate the house using prior knowledge gained in class Brainstroming: Students will watch Power Point of the various types of houses that can be created using slabs. Students will go to the library to print up various idea images, but NOT copy the work of another Teacher Demonstrations: Demo on how to create templates for a more accurate box Demo on how to roll and save and attach the slabs Demo on how to make roof more interesting (Shingles, snow, etc..) Steps: 1. Students will develop an idea for their houses (birdhouse, gingerbread house, christmas house, whimsical house...) 2. Create a template for the house, with a template for the base, front wall, side wall and roof. 3. Roll slabs to cut out template shapes. (1 base, 2 wall for each template) 4. Let slabs harden to near leather hard state before attaching to maintain crisp edges and corners. 5. Attach side wall and front wall to base first and use coil on inside seam to attach well. 6. Repeat for the opposite walls. 7. Add most of roof designs before attaching to house. 8. Begin adding decorations. (Chimneys, windows, shutters, doorways, etc...) |
|
Week 10 - Paint Sculptures/Glaze Sgraffito/Zentangles
November 4-8
Standards:
Standard 1: 1,2,3
Standard 2: 1,2,3,4,5
Standard 3: 4,5
Objectives:
1. To paint pinch pot sculptures with care and skill, using knowledge of color theory.
2. Glaze sgraffito mugs/vases with clear glaze and decide upon an interior color for mug.
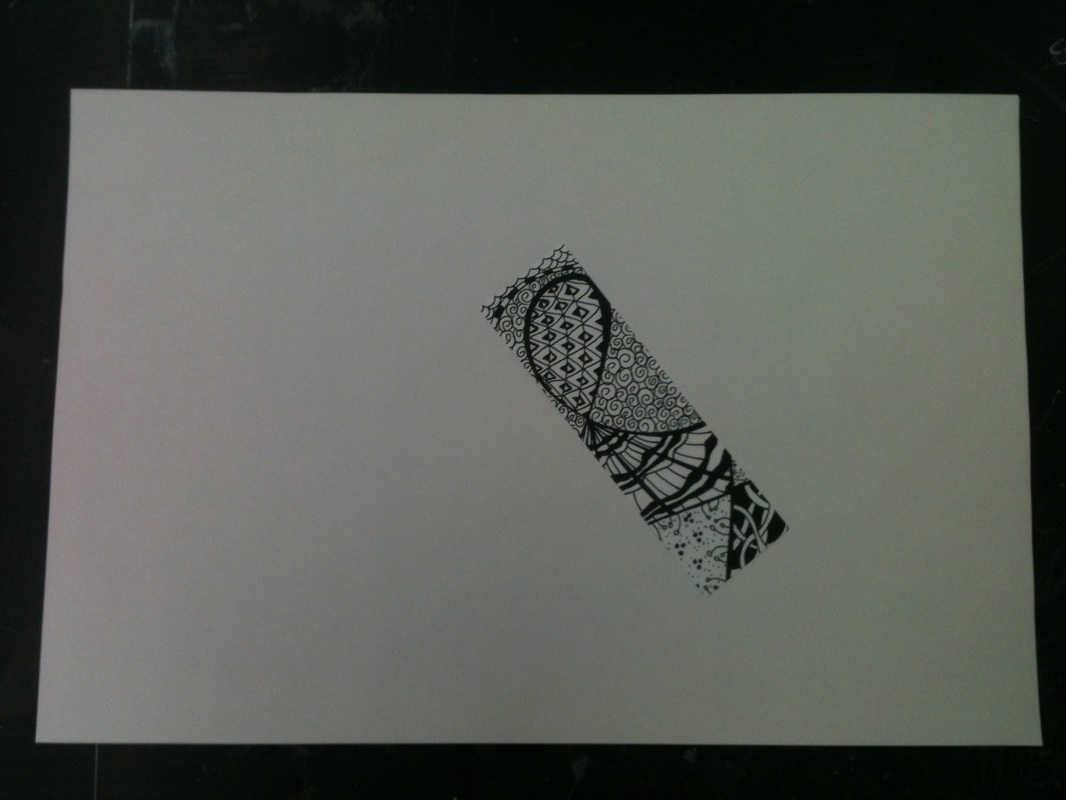
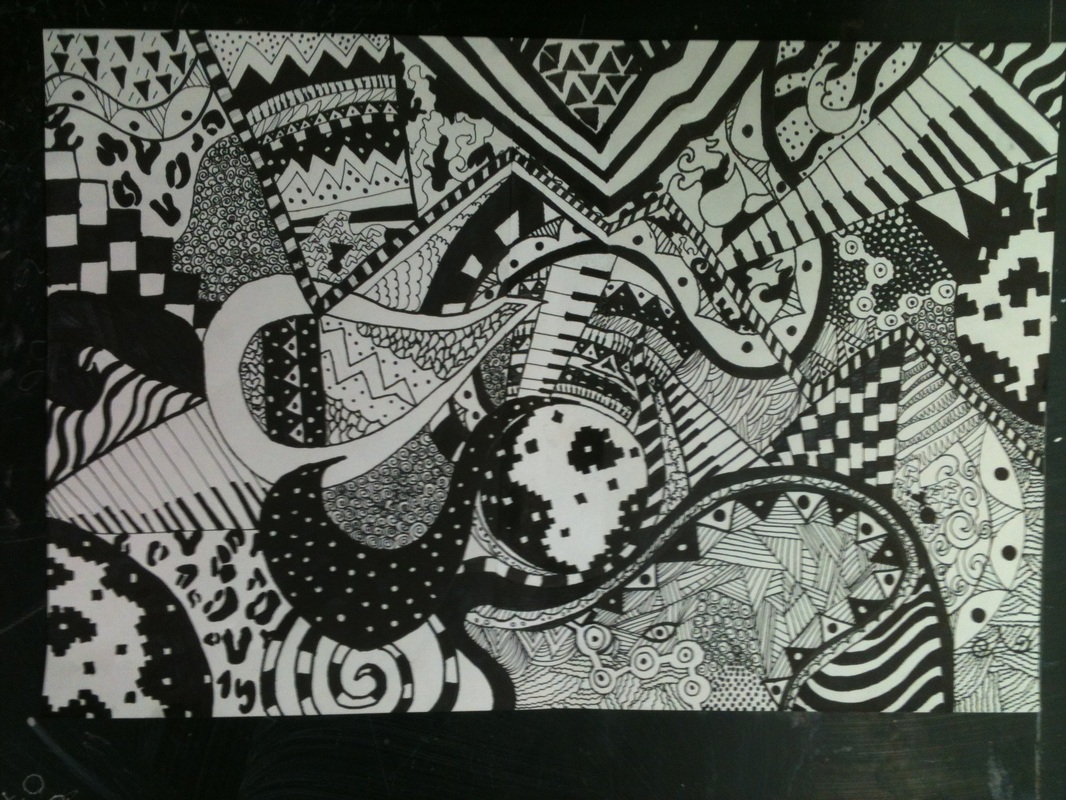
3. Work on Zentangle drawings making sure to incorporate a 50/50 ratio of black to white space.
Daily Tasks:
This week students will focus on a variety of tasks. Due to two days of "Challenge Day" and "Senior Skip Day" on friday, students are all on different stages of their projects. This week students will be catching up on their work. Some students will need 2 more days to work on their pinch pot sculptures, while others may need 3 or 4.
Students who finish painting their sculptures will glaze their sgraffito mugs, which is a 1 day assignment.
Students who finish both the painting of the sculptures and the glazing of mugs will work on their Zentangle drawings. Students may also choose to create a small turkey sculpture in honor of Thanksgiving.
Standards:
Standard 1: 1,2,3
Standard 2: 1,2,3,4,5
Standard 3: 4,5
Objectives:
1. To paint pinch pot sculptures with care and skill, using knowledge of color theory.
2. Glaze sgraffito mugs/vases with clear glaze and decide upon an interior color for mug.
3. Work on Zentangle drawings making sure to incorporate a 50/50 ratio of black to white space.
Daily Tasks:
This week students will focus on a variety of tasks. Due to two days of "Challenge Day" and "Senior Skip Day" on friday, students are all on different stages of their projects. This week students will be catching up on their work. Some students will need 2 more days to work on their pinch pot sculptures, while others may need 3 or 4.
Students who finish painting their sculptures will glaze their sgraffito mugs, which is a 1 day assignment.
Students who finish both the painting of the sculptures and the glazing of mugs will work on their Zentangle drawings. Students may also choose to create a small turkey sculpture in honor of Thanksgiving.
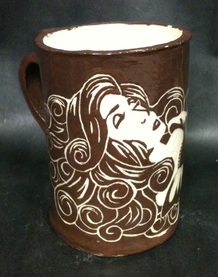
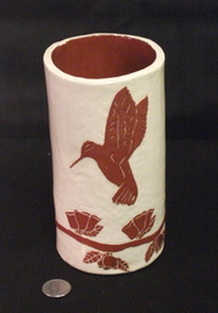
Week 8 & 9 - Sgraffito Mugs/Vases & Paint Pinch Pot Creatures
October 21-25
- AND - Oct 28- Nov 1 Standards: Standard 1: 1,2,3 Standard 2: 1,2,3,4,5 Standard 3: 4,5 Objective: To learn the Sgraffito technique as applied to pottery To strengthen drawing, design and creativity skills Brainstorming: Students will see a Power Point and watch a video on how to create Sgraffito pottery. Handouts will be on the table to aid students with design ideas Students will need to create 2 thumbnail sketches to come up with an idea prior to making the clay work. Teacher Demonstrations: - On how to begin the drawing and work with positive/negative space - How to create the slab vase - How to transfer drawing to clay - How to make home-made sgraffito tools Steps: 1. Start with brainstorming ideas 2. Draw out image well on the paper provided, as this final image will be traced onto the clay. 3. Create a base for your vase or mug and roll out a slab to wrap around it. 4. Create a handle for mug and shape (put on later) 5. Paint the leather hard clay with an underglaze color of choice. 6. Transfer drawing to the clay. 7. Start carving away the drawing. Leave a good balance between the positive and negative space. Painting Pinch Pots Objective:
1. Students will paint their pinch pots with sufficient skill and care so that personal intentions are carried out in their own artwork. 2. Creatures should be very carefully painted. 3. Students should mix/create their own colors where appropriate. Tube colors alone are not always attractive. |

|
Week 7 - Pinch Pot Sculptures & GlazeingOctober 14-18
Standards: Standard 1: 1,2,3,4 Standard 2: 1,2,4,5 Standard 3: 1,2,4 Objective: 1. To learn the Pinch Pot method of handbuilding in clay. 2. To develop student creativity and problem solving skills. 3. To glaze Texture Platter with sufficient skill that personal intentions are carried out in artwork. Task: Students will finish up their pinch pot sculptures on either Monday or Tuesday. Students are pushed to finalize their creatures with as much creativity as possible. When finished, students will begin glazing their texture platters. This will take 2-3 days to finish glazing their work. Students must use at least 2 different colors. Students will also be introduced to the differences between lead and lead free glazes. |
|
Week 6 - Pinch Pot Sculptures & BlogOctober 7-11
Standards: Standard 1: 1,2,3,4 Standard 2: 1,2,4,5 Standard 3: 1,2,4 Standard 4: 3 Objective: To learn the Pinch Pot method of handbuilding in clay. To develop student creativity and problem solving skills. Brainstorming: Students will be shown a Power Point of example work Students will have hand outs placed on tables of creature images for idea development Students will draw out their image before beginning Teacher Demonstrations: * Teacher will give a demonstration on how to two pinch pots and put them together to form the body of a creature. * Teacher will also demonstrate how to add extremities and detail characteristics to make the sculpture more advanced. Steps: 1. Get starting images from computer lab 2. Form 2 pinch pots and attach together using slip/score method 3. Work on making a head for your creature. ALL FEATURES MUST BE ADDED ON AND NOT DRAWN ON. 4. Work on adding arms, legs, clothing. 5. REQUIREMENT: Creatures must be able to stand on their own and have clothing |
|
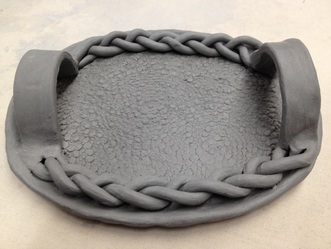
Week 5 - Texture PlattersSeptember 23-27
Standards: Standard 1: 1,2,3 Standard 2: 1,2,3,4,5 Objective: Students will build upon prior knowledge of clay construction to build an attractive serving platter. Students will learn about the Principles of Design and how to apply those principles to their own artwork. Students will learn to add texture to clay. Students will learn the difference between "functional" and "decorative" artwork. Brainstorming: Power Point on the Principles of Design as applied to clay Visual examples of platters Teacher Demonstrations: Group demonstration on how to construct the platter. How to add texture to slab clay. How to add three dimentional elements and how to finish off with good craftsmanship. |

|
Week 4 - Paint Tiles, Glaze Coil Pots, & ZentanglesSeptember 23 - 27
Standards: Standard 1: 1,2,3 Standard 2: 1,2,3,4,6 Objective: Students will understand the difference between paint and glaze. Students will learn the basic properties of glaze, how it is applied, how it looks before and after firing. Students will understand the basic functions of the kiln. Task/Requirements: Painting Tiles: Students will paint tiles showing some form of value from dark to light. Edges of tiles must be painted Craftsmanship is priority (paint all white areas.) Glazing Pots: Must use min of 2 colors glaze Must cover all white areas of pot If you can see the inside of pot you should glaze it. Must apply 3 coats of glaze Craftsmanship should be a priority. Glaze neatly. Zentangles: Students who are finished with their classwork ahead of other studens are working on their Zentangle drawings. This project is a semester long drawing where students used design principles to create an abstract work of art. It reinforced principles learned that apply to all art forms such as: Repetition, Balance, Dominance, Alternation, Contrast and Rhythm. |

|
Week 3 - Clay Coil Pots & Color TheorySept 16-20
Standards: Standard 1: 1,2,34 Standard 2: 1,2,3,4,6 Standard 3: 1,4,5 Objective: Students will learn how to create a decorative pot using ancient coil building techniques. Pot must be no smaller than 7 inches and must include non coil decoration. Brainstorming: * Power Point on history of clay, cultures who have used coil techniques and examples of modern day coil pots * Draw out sketches for their own pots Teacher Demonstrations: * How to start the base of pot * How to roll coils. * How to properly attach coils * How to add decorative elements and attach them together. Steps: * Begin with sketch drawing * Roll out slab for base * Start rolling coils and build higher * add decoration to pot by adding design elements |
|
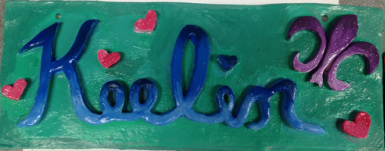
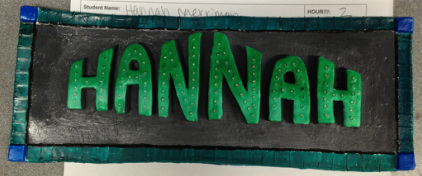
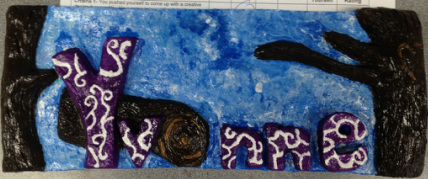
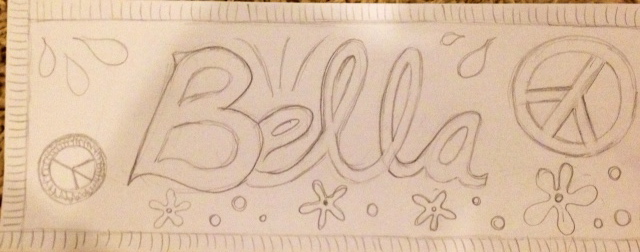
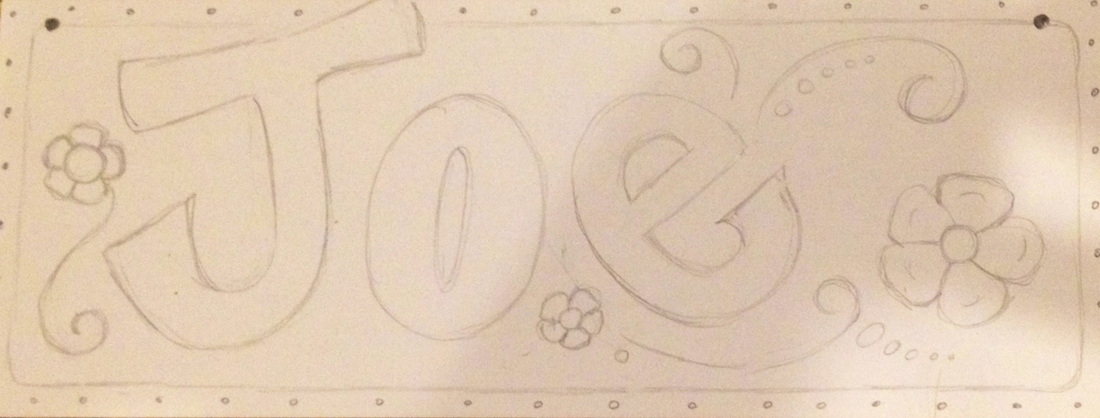
Week 2 - Clay Name TilesStandards:
Standard 1: 1,2,3,4 Standard 2: 1,2,3,4,6 Objective: Students will learn the basic techniques involved in the process of making clay artwork. Students will learn the termonology associated with clay construction. Students will apply this skill and knowledge to make their art tiles. Monday is Demo Day with kids working on: How to wedge, use slip, scratch and score. *Leather hard vs plastic stages of clay. *Discuss what makes clay explode in kiln. *How to store clay overnight. * How to carve once leather hard *Clay tools and their purpose |
|
Week 1 - Intro to the class/Clay Name Tiles (Design)/Clay Stamps(Sept 4-6)
Standards: Standard 1: 1,2,3 Standard 2: 1,2,3,4 Objective: Students will be introduced to the basic design principles while designing a tile with their name on it. Students will learn the steps in developing an idea for clay. Task: Students will design a tile using their name which they will later create out of clay. This first week students will focus on their design skills and learning the basic components to creating a solid design. HOMEWORK: Parent Signature slips due Friday |
|
